Sandy’s Best Leftover-Oatmeal Ham Sandwich

Ham sandwiches don’t usually start with oatmeal. But one thing leads to another around here in ways I can’t always predict. Getting from Point A to Point M is seldom a straight line.

Point A: It’s been unusually cool for May. This time last year we had the kiddie pool out. But sweater-and-sock weather asks for oatmeal.

Point B: I got distracted while measuring out the oatmeal and milk/water, a simple 1:2 ratio so this is a little embarrassing, but somehow I messed it up because it was too liquidy coming out of the microwave. After a brief huh…what-did-I-mess-up-there moment, I solved this problem by taking a handful of oats (with my hand), adding it to the liquidy, almost-ready breakfast, and giving it another 2 minutes. This resulted in no-longer-too-liquidy oatmeal that had somewhat more texture than usual, the late addition not having had as much cook-time as usual. But cooked al dente, like that pasta stage just before it’s really soft, when there is still the tiniest element that’s uncooked, and sweetened not unliberally with brown sugar, it hit the spot.

Point C: My al dente oatmeal, delicious as it was, did not seem worthy of a photo, so there isn’t one (and a photo cannot convey al dente anyway), but adding more oats also resulted in… more oatmeal. Which is to say, leftovers. On my dear German friend Claudia’s first trip to the U.S., she coined the word over-lefts, which she and I still say sometimes 😊 and which is a sub-point of Point C and not Point D, in case you were wondering.

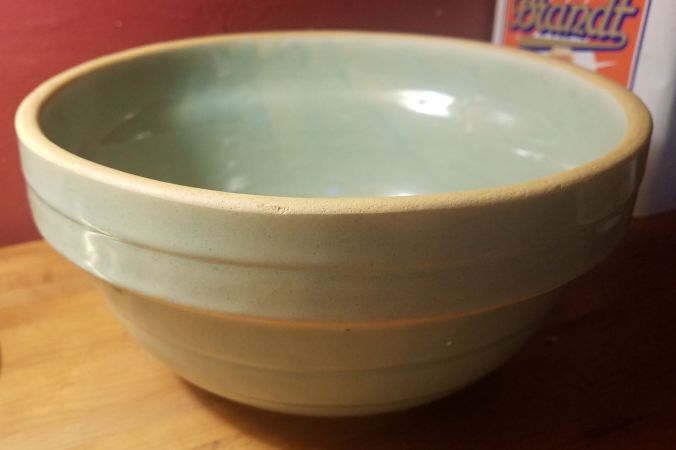
Point D: I stared at the over-lefts and was about to do my usual – look in my non-working dishwasher for the right size plastic container and transfer oatmeal from bowl to chosen container and place in fridge. What might have steered me away from this idea was 1. The bowl I had microwaved the oatmeal in – an old beauty that I got almost thirty years ago from a man who was then in his 80s and had probably had it since he and his wife got married in the 1940s. A spectacular bowl! Same bowl I often use to mix up bread dough (that’s a clue).

green bowl (2)2mp

And 2. (this being a sub-point of Point D) I have been playing around with yeast rolls lately. (Heading toward some kind of bread she is, anyone can see that.)

Point E. I never made rolls starting with leftover oatmeal, never heard of that, but sure, why not? (The following is not a recipe, in case you were wondering and/or looking for specifics. The following is me playing with food.)

I let it cool a bit, added a cup of not-too-hot-not-too-cold water and a tablespoon of yeast (or what looks like a tablespoon in the palm of my hand) and half a cup of flour or so, and stirred this up and walked away. I suspect it helps the end result, this “proofing” of the dough (though I cannot be sure). In any case I get a charge out of the little bubbles that form as the yeast begins its vital and magical work. This was worthy of a photo so here you go. Fifteen minutes (or so) later), bubbles!

bubbles in dough2mp

Point F: Having seen that adding yeast, water and flour to leftover textury oatmeal produces a promising start, I remembered that the raisin rolls I made twice recently came out just fine and I decided to take the leap to Leftover Oatmeal Raisin Rolls. This being an experiment (and not a recipe, as stated above), I added some sugar (guessing 1-2 tablespoons, it’s said to feed the yeast, though I know it’s not essential), some salt (a palm-measured teaspoon, never make bread without salt, whatever you do), some more flour (two cups maybe?) and some chopped up raisins.

I love raisins, but they are a bother when un-chopped-up in dough, always plopping out and being uncooperative, and any of you who have tried to chop raisins with a knife will know that that’s not easy either – they stick to the knife and get all clumpy. I used (and was reminded of the usefulness of) this handy-dandy cutter that I know they still make because you can get it at my favorite grocery store, Yoder’s.

kwik kut cutter2 (2)2mp

I put the raisins in a bowl and let the blades do the cutting work while I do the up and down work. This thing chops nuts too. You gotta love a cutter with the manufacturer’s name stamped into the top like this. There’s not even a zip code. I love it.

kwik kut cutter (2)2mp

Adding the raisins and then seeing the raisins and the bubbles gave my heart a leap. What can I say?

bubbles with raisins2mp

Well then (and you see this is all under Point F, The Making of the Dough), I added more flour till there was just enough so the dough pulled away from the sides of the bowl, turned it out and kneaded it (adding flour as needed) until smooth, then covered it and left it alone to rise, suspecting that the weight of the oats would lengthen the rise-time, which turned out to be correct but I got distracted anyway and a couple hours went by.

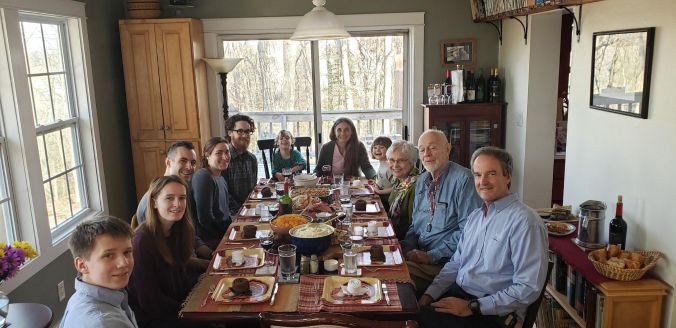
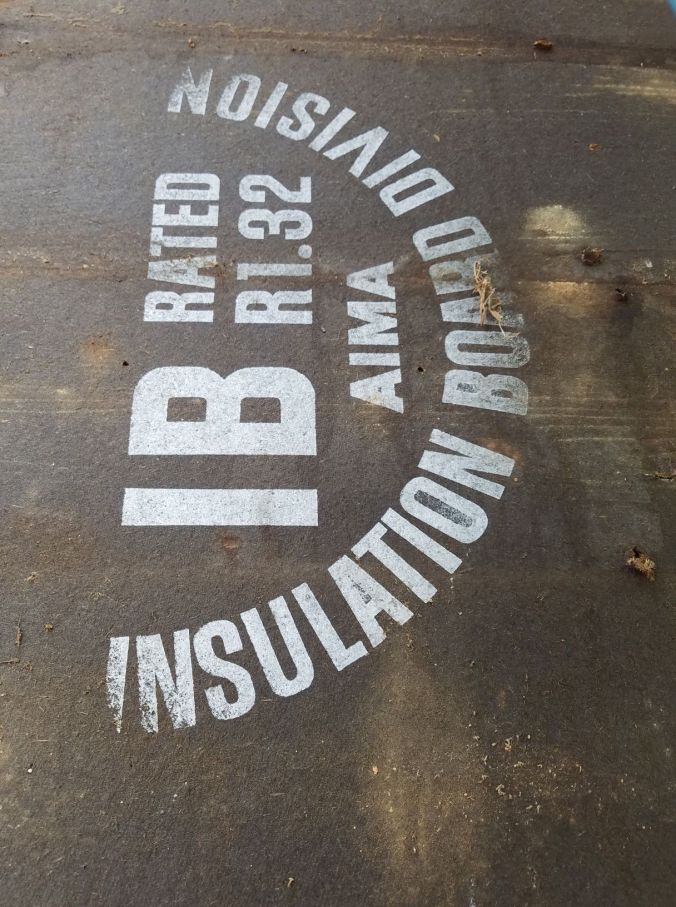
Point G: Thankfully guests are starting to come to the cottage again, so I spent some time over there preparing things. The other thing going on and occupying time during the dough-rising is the siding on the house. It’s all well and good for the front to look nice, but the rest looks pretty crappy, so – one side at a time – this needs to be done too. On the wall that looks out over the mountains we have the obstacle of the electric box that was attached to the house in 1973 on top of the original siding, which was attached to stuff that tries to be plywood but instead (I swear) is packed sawdust. It calls itself “insulation board” and claims a value of some kind that means nothing to me.

insulation board2mp

Look what it does when you pull it off the wall. It’s gross.

insides of insulation board2mp

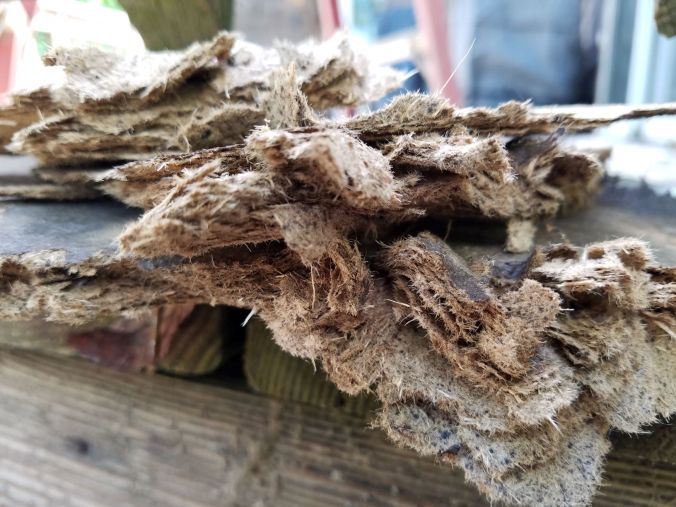
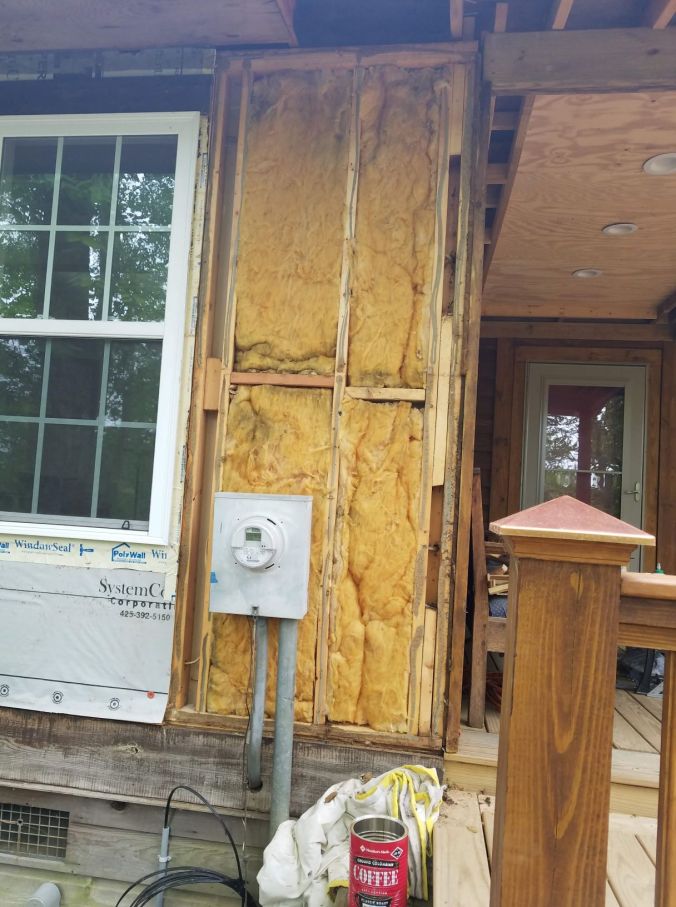
It breaks, crumbles and collapses, which was actually quite handy as we had to get it away from the back of the electric box while said electric box is still attached to a stiff pole. This we accomplished, rendering the box free-standing on its pole, not standing straight in this picture, not attached to the wall at all, but the electric company will help with that part one of these days.

electrical box2mp

Point H: This was a nasty job, fraught with we-are-working-around-an-electric-box worries. You get hungry doing all this stuff (and worrying), so lunch was early and included dividing the dough into 12 pieces and making knots on a baking sheet so they could rise a second time in proper, rolls-in-a-row formation.

unraised rolls2mp

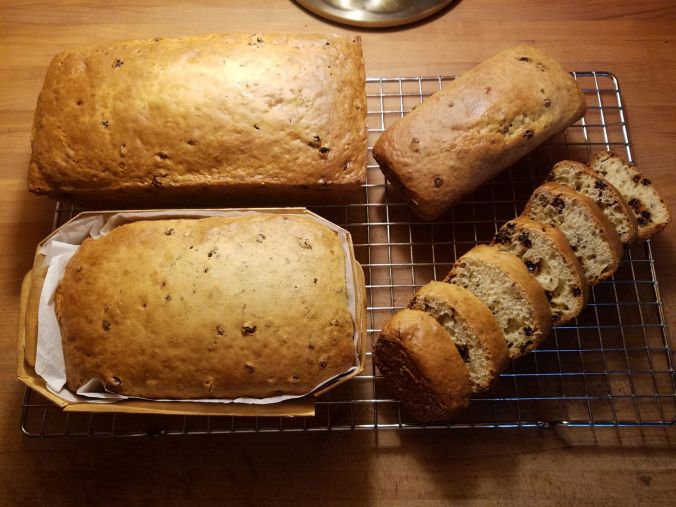
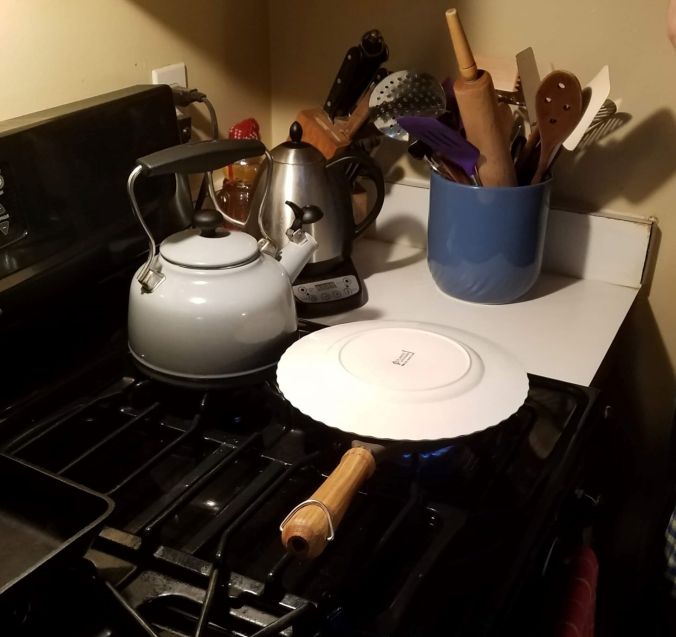
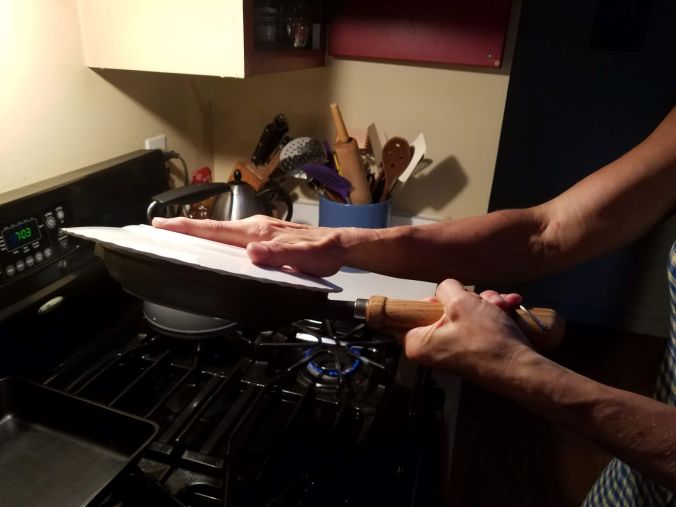
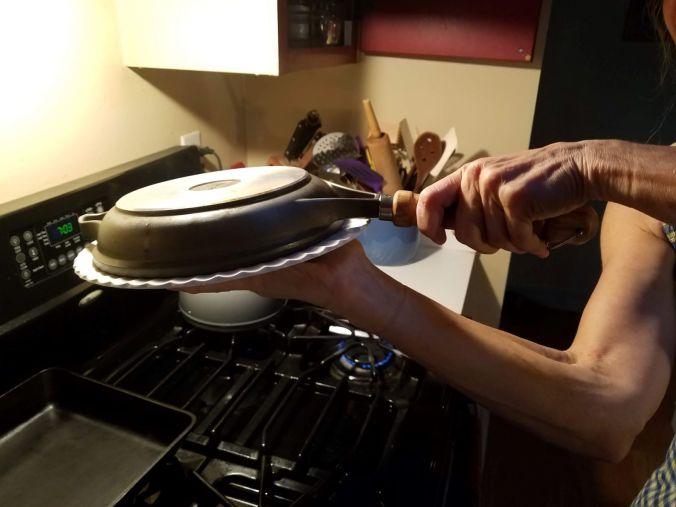
Point I: After lunch we got real plywood up, followed by house wrap. Somewhere in there I peeked into the oven and saw that the rolls had raised well, so I took them out to get a decent picture (plus, you don’t want to see the inside of my oven)…

raised rolls2mp

(Point J): …and put them back in and turned on the oven and set a timer, knowing I would get involved with siding and not be in the house, i.e. not able to depend on my nose to tell me they were ready. Forty minutes later they were a glorious golden brown and the house smelled like a bakery, which all by itself makes this well worth the effort.

baked rolls2mp

I broke one open to see what the texture was like (umm, yes, also had a nibble)… Oh, yum! Well worth the effort.

texture of rolls22mp

Point K: By dinnertime the outside wall was looking like this, with real plywood, house wrap, some siding, and the box ready for the guy from the electric company to come and attach it properly.

electrical box22mp

But by then I was tired and wanted an easy dinner. Earlier I’d picked some lettuce and spinach from the garden, so a good dinner to me sounded like a salad plus some of these raisin rolls plus a slice or two of ham. Raisins go with ham, right? And you know that ham I mean – the kind that comes pre-sliced, maybe ¼” thick (great stuff for adding to scrambled eggs). A little oil or butter in a hot pan gives these slices a beautiful color and adds to their flavor. Super fast, super easy, super yummy. Works for me.

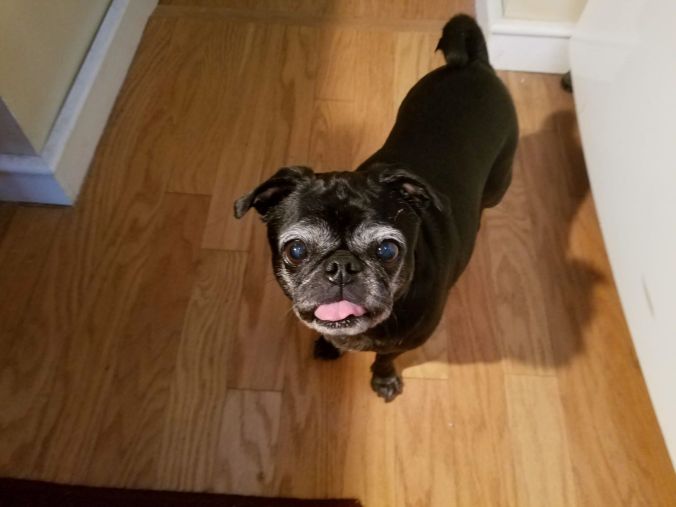
Point L: I gave Sandy his dinner in two plates – salad on one and sautéed ham slices and rolls on the other. I planned to eat my dinner in discrete sections: ham, rolls with butter, salad (in that order). I gave Sandy mustard because normally he puts mustard on ham.

But no. Not this time.

Sandy put the ham slices on the raisin roll and called it the best ham sandwich! Raisins go with ham, right?! It was gone before I had a chance to document this historic event. Day Two for lunch we added thin apple slices (also his idea, bravo Sandy, full of culinary genius lately).

with and without ham and apple2mp (2)


Point M (as in yuMMMMMMM!): With or without the apple, these sandwiches were an unexpected pleasure from leftover oatmeal!


Exotic Irish Soda Bread

I never said my timing was the best, and here’s proof. The slew of (worthy and admirable) bloggers who posted Irish Soda Bread recipes right around St. Patrick’s Day have the pulse on reality. I tend to float on a breeze when it comes to food. To me there’s nothing wrong with pumpkin-anything in the spring or summer, and I love a hot cup of tea no matter what the temperature outside. To this jumble, consider also that in the Age of Covid (which includes, in theory, more time for baking), I sometimes want to take my time with food, relishing the luxury to experiment and play, and I sometimes still (just like in the old days) want E-A-S-Y, as in I-have-other-things-to-do.

In my favor today is the fact that you are probably not presently inundated with Irish Soda Bread recipes, and you might be inclined to want something E-A-S-Y, so maybe you’ll try this delicious flavor blend of exotic + sweet. Are we still allowed to use the word exotic? That’s not one of the off-limits words now, is it?

Caraway seeds add the exotic element that sets this version apart from the rest. Even though these pungent little buggers are often associated with rye bread, I find them equally at home in this soda bread recipe – though how many Irish people would consider them an essential or even authentic ingredient is anyone’s guess. Currents add a bit of sweetness. You can’t go wrong with a bit of sweetness. Feel free to use regular raisins instead, or golden raisins, or the dried fruit of your choice.

My thanks go to Inge White, a lovely lady who lives in Fairfax, Vermont, who passed this recipe to me years ago. I have made it countless times, which puts it on the tried-and-true list among other essential yummies that never go wrong (assuming you are paying attention during the process and don’t forget something important). Thank you, Inge! Another Vermonter gets a shout-out today too. Lyn Boyce, the woman I want to be like when I grow up, subtly suggested on the phone the other day that she would like to see more recipes. I hope you like this, Lyn!

recipe (2)2mp

In case you can’t read my handwriting, that’s

Mix together 3 cups flour, 1 cup sugar, 3 teaspoons baking powder, 3 tablespoons caraway seed, ½ teaspoon salt and ½ box raisins (which is about 1 ½ cups, and this is where I substitute currents or golden raisins). Add 2 cups milk and 2 beaten eggs (I don’t beat them before adding them). Bake in two greased loaf pans at 350 degrees for 1 hour.

How simple is that? Mix dry ingredients together, add milk and eggs, stir and bake.

Speaking of buggers though, one thing you have to get past is that the caraway seeds do look kinda like little bugs in the bowl. (You may recall my aversion to bugs from my Always a Menace post.) If these seeds had legs I would be creeped out, but they don’t, so I can deal.

Instead of two loaf pans, I chose one loaf pan, two mini’s and one oddball thin-wooden loaf form lined with parchment paper. The oddball is going in a birthday package to my son in San Francisco. He is also getting my granola, cranberry brownies (best brownies ever), shortbread cookies (better than any in a tin), chocolate-chip-pecan-espresso biscotti (pecans instead of walnuts this time) and pumpkin-oat-chocolate-chip bread (if you want the recipe for this, ask). In this Age of Covid you somehow can’t get eggs in San Francisco, which means that Drew and Nicole have not been able to bake much. And I’m the mom here, the mom with chickens who give good eggs, so…

baked2mp

One little loaf disappeared before it even cooled down. Try slicing it, toasting it and spreading butter on top. A piece of toast like no other! Enjoy 😊

Leftover Mashed Potato Soup That’s Kinda Sorta Corn Chowder

On Thanksgiving I got a surprise. There’s a lot going on when you have 12 people coming to dinner, and a lot of oh-wow-how-can-I-be-this-tired afterwards. But I like to share the joy so later that evening I sent this photo to my friend Claudia of us all about to partake in the feast.

Thanksgiving2mp.jpg

Do note Mom’s fancy rosette napkins on the paper turkey plates. I am not a paper-plate kind of girl but exceptions are allowed! Our meal included turkey and gravy, spiral cut ham, butternut squash, green bean casserole (the one with the French fried onions on top), creamed onions, stuffing (mine has sausage in it), mashed potatoes, warm pineapple pudding, cranberry sauce from a can (the only thing not homemade), cranberry chutney (because it is one of my favorites), and bread and butter.

Claudia responded to the photo as kindly as usual and ended with: “My soup with the leftover mashed potatoes was very tasty.”

What? Leftover Mashed Potato Soup??

Why did I never think of that?! (And I have leftover mashed potatoes!)

I asked her to tell me more about her soup and got a voice message instead of a text message – how wonderful to hear the voice of a friend who lives so far away! She said:

Well yesterday I sautéed some onions and added some leek and potato – no, not potato – and pieces of squash and carrots. I put some water in it and used the leftover mashed potatoes to just thicken it. I put the potatoes in towards the end. Another option is if you have squash left and mashed potatoes, you just sauté some onions and leek if you have and carrots or other veggies and then you just puree everything and then you have cream of vegetable soup. Something really nice is if you have some bacon cubes – you just fry them in a pan a bit and before serving you put them on top, and maybe some grated parmesan cheese. You have a whole meal if you add some mini-rolls or something like that.

You all will have deduced several things from this, including: 1. Claudia doesn’t measure much. 2. Squash is squash apparently, doesn’t matter what kind. 3. Bacon is available as or able to be cut into cubes in Germany. 4. No one is vegan or vegetarian or against carbs in our world.

In the spirit of Sure-Why-Not, I decided to play around with my own Leftover Mashed Potato Soup on Sunday after everyone had left. It was raining – that raw and cold kind of rain that does not invite outdoor play – so it was a perfect day for creamy, hot, thick soup that would take practically no time to prepare. Plus there’s that emotional hole that a soup like this lives to fill. My description/ instructions/ recipe may be only slightly more helpful than Claudia’s because I didn’t measure anything either, but at least I know about how much. Mine, unlike hers, is Kinda Sorta Corn Chowder.

I had intended to make Kaesespatzin, a cheesy-homemade-spaetzle dish topped with sautéed onions, on Wednesday when Lincoln and Julia and the girls arrived, but I got too tired and we made calzones instead. Having already sautéed the onions however, I put them in a jar figuring they would come in handy another day. For my soup I started with these. I scooped out a couple spoonfuls and warmed it up in a saucepan. I would say the amount I used was the equivalent of about one chopped onion sautéed in 2 tablespoons of butter.

I then took about as much leftover turkey as would fit in my hand (if I were holding it) and chopped it up fine — the pieces were about the size of raisins, maybe a little bigger. I added a cup or so of chicken broth from a $4.99 Sam’s Club rotisserie chicken we had had on Tuesday when I was also too tired to cook (which is what happens when you make three quilts in two weeks) – that carcass in a pot with water covering it and a bit of time over a flame had provided this. Bouillon or a prepared (canned/boxed) stock would work as well, as would leftover turkey gravy mixed 1:1 with water.

I had half a small bag of frozen corn so I added that; it was about 1 cup of corn. Then, following Claudia’s instructions on this point anyway, I added the leftover mashed potatoes (“toward the end”) – it was about two cups. The thickness of this mixture told me to add water so I did. I added water to the consistency of chowder, which is a thick soup anyway, and who doesn’t love a thick, creamy soup on a cold and rainy day? The potatoes were perfect in it!!

A little salt and pepper and that was it!! I was tired. It was simple. Done!

potato soup (2)2mp.jpg

The very idea of mashed potato soup was a surprise for me but now that I think of it, why not? Thank you, Claudia!!

A Whim and a Limb and Then: Bison Meatloaf!

Do you remember when ground beef was under a dollar a pound? I do. These days I feel lucky to find it under five dollars a pound. Which explains, in part, how I came to make bison meatloaf.

I always had the vague idea that bison* are an undomesticated cousin of the herding animal that accounts for the beef we generally find in stores. Yes, my son, said the domesticated steer to the curious calf, In the grand history of the Bovidae family, we have some… let’s call them… “wilder” relatives. Never listen to Aunt Bessie on this point, son – she calls them renegades and I think that’s rather intolerant of the slight differences between us, and I cannot abide intolerance! …sigh… Back in the Pliocene when our family history began and the forests and mountain areas of Eurasia were our home, all of us had horns that pointed forward and all of us had a straight back. All of us, son.

1200px-American_bison_k5680-1-1200x783.jpg

As happens, even in the best of families, some of the more adventurous members struck out on their own. They wandered east and crossed a massive land bridge known to humans as the “Bering.” After years of trekking and searching, they found great plains in North America and loved it there and thrived! They had lots and lots and lots of little ones like you who somehow over time got bigger than you will ever be – count it among the mysteries and wonders of the universe! I’m not sure about why their backs humped up like that, but never mind. Ignore Aunt Bessie, son, when she scoffs and mocks and finds fault. Cousins these hairy beasts are, I tell you, even if you have to go around nine corners to trace the roots of our common heritage.

Human that I am, unapologetic red-meat eater that I am, I ordered bison steak a few years back at a fine restaurant on the recommendation from the server. It was for me both a whim and a limb: a whim because I am not as adventurous with food as some people and a limb because this was bison after all – bison! – though, I told myself, this particular hairy beast is not in another genetic zone like, say, kangaroo, which would somehow give me pause. The steak was so good, I had no qualms henceforth.

Some time later, probably at a rare point when I was feeling less budgetly constrained than usual, I bought a package of ground bison at my grocery store. This time it was more like How about if I make burgers using special, expensive cousin-of-beef instead of the normal stuff? At about double the price, it was a treat. But every now and then, a treat is a good thing.

Samuel never had qualms of any sort about meat of any kind. He added a bit of salt and pepper and finely chopped onion to the meat before forming the patties, then grilled them. If you have never had a bison burger and can manage the scruple, try one sometime. The burgers were amazing – more tender than regular beef, remarkably tender, and had a wonderful flavor, though similar enough to beef for non-adventurous sorts like me. I was sold. A few more times in the last couple years, I spent the extra money for a superior burger.

A couple weeks ago, the whole lot of ground bison at the store was marked down to $4.99/lb. None of it was near the expiration date. I’m guessing someone in the ordering department messed up and ordered two cases instead of one, or 15 pounds instead of five, and the store knows its customers’ buying patterns and knew it would never sell that much at the normal price. My lucky day! I bought ten packages and put them in the freezer.

bison package2mp.jpg

If it had not been so “cheap,” I would not have had it on hand when (fast forward) Samuel arrived home last week from a week away and Mom was just coming home from the hospital. We would all meet for dinner at Mom’s, and meal prep was on me. In a nod to Samuel (happy to have him home and God bless him forever for not moving far, far away), I asked him what he wanted for dinner.

Meatloaf? he replied.

Hmmm. Okay I said. You know how texting goes: Words on a screen that have no intonation, no body language, few clues as to the meaning of said words. Hmmm. Okay really means a pause while I think this through (I was quite certain I did not have on hand the ground beef-pork-veal combo I usually use to make meatloaf, and I also had too much else on the docket that day and knew I did not have time for a trip to the store), followed by the frozen bison coming to mind (that would be new but could work). Hmmm = pause. Okay = could work.

Don’t want meatloaf? he said, having read only Hmmm. Okay and questioning my hesitancy with no way to understand the mental gymnastics behind it.

No, sounds good. I just have to have the meat. Could make it with bison!

That sounds yummy!

Bison it is then.

Wanting to make sure there was enough to leave leftovers with Mom (she was not supposed to lift anything heavier than a coffee cup the first week, let alone cook) and enough to give Samuel some to take back to his place for a meal another day (I repeat, God bless him forever for not moving far, far away), I used two packages.

BISON MEATLOAF

In a large bowl combine 2/3 cup Italian breadcrumbs, 2/3 cup old-fashioned oats, ¼ cup milk, ¼ cup minced onion, 1 cup grated romano cheese**, 2 tsp salt and 2 Tbsp dried parsley***. Add 4 eggs and 2 pounds ground bison. Mix well.

mixed2mp.jpg

Form two loaves. I do mine free form, but you can use loaf pans if you prefer.

uncooked2mp.jpg

**I happened to have this asiago-parmesan-romano blend, which is more shaved than grated, and I thought What the heck?

cheese package (2)2mp.jpg

I chopped it fine

cheese (2)2mp.jpg

and added it instead of the grated romano I would normally use.

The larger pieces of this oddball cheese choice resulted in large blops of melted cheese on the surface of the cooked meatloaf which, depending on your perspective, looks either appealingly creamy and fantastic or weirdly blotchy and unkempt. It was delicious. I baked it for 45 minutes at 400F. The higher temp gets the outside crispy. Oh yum.

cooked2mp.jpg

Alongside baked gold potatoes and acorn squash mixed with butter and a touch of maple syrup, the meatloaf was a hit. Mom and Samuel put ketchup on theirs, I was Plain Jane with mine, and Jerry, hmmm, I don’t remember! We ended the meal with Mom’s Apple Cake and that’s how I say I’m so glad both Mom and Samuel are home! 😊

______________________________

*Thanks for the bison photo to modernfarmer.com.

***Fresh would be better but I didn’t have any and remember, no time to go to the store.

Mom’s Apple Cake

If you have used a recipe countless times, if it’s the one you think of when you need something delicious and reliable, if you have many times called it tried-and-true – yes, keep this recipe and pass it along. Let’s hear it for Mom’s Apple Cake!

32mp.jpg

You know how old this recipe is because it calls for Spry. I venture to say some of you never heard of Spry. Now for our culinary history lesson (thank you, Wikipedia): “Spry was a brand of vegetable shortening produced by Lever Brothers starting in 1936. It was a competitor for Proctor and Gamble’s Crisco….Though the product is discontinued in most countries, there are anecdotal reports of its being used through the 1970s.”

Back in the day (and Spry had its heyday in the 1950s) you were either a Spry cook or a Crisco cook. Mom was devotedly Spry (I mean, who wouldn’t want to be spry?!). I copied her recipes verbatim, even if by the time I had my own kitchen, the thing I bought was not actually Spry, but a store brand of shortening. I called shortening “Spry” for many years because Mom did.  (I am quite certain I never converted to Crisco because it was always more expensive than the store brand and because Mom would never have used Crisco back then – maybe she does now….)

Note the way the recipe changed. First Spry, then shortening, then (when I smartened up and realized how amazing butter is) butter. Note what appears to be an emphatic obliteration of the Spry or shortening. Really, butter is better.

recipe2mp (2).jpg

Note also that this recipe is titled Cup Cakes. Boxed cake mixes were not so much a thing in the 50s. And mixing these ingredients together does not require an electric mixer and takes very little time. I don’t follow it exactly, having found that presifted flour (is there any other kind now?) eliminates the need for to “sift three times” (good heavens!). In my head, and if I ever rewrite it on a new card, the recipe will be simpler (and it will not have all the asterisks below because that info is in my head). And since I use it for apple cake 95% of the time (only occasionally plums), I will call it Apple Cake and just make a note about the plums. And I will write it the way I do it.

Apple Cake

Mix 1/3 cup softened* butter with 1 cup sugar**. Add one egg; mix well. Add 2 1/2 tsp baking powder, 1 tsp vanilla and 1/2 tsp salt; mix well. Alternately add and mix in ¾ cup milk and 2 cups flour***. Divide batter between two layer cake pans that have been buttered and dusted with flour. Spread batter to edges. Peel and thinly slice 3-4 apples. Arrange on top****. Sprinkle with cinnamon-sugar*****. Bake at 425F until nicely browned and a toothpick inserted in the cake part comes out clean, about half an hour. This cake is also delicious made with plums.

*Soften either by letting it sit out for an hour or so or by using the defrost mode of the microwave for 35 seconds.

**Use a wooden spoon. My spoon has a flat end that has a hole in it. Works perfectly. You could also use a whisk.

wooden spoon with hole (3)2mp.jpg

***In other words: Add ¼ cup milk; mix well. Add 1 cup flour; mix well. Add another ¼ cup milk; mix well. Add another cup of flour; mix well. Add a final ¼ cup milk; mix well.

****I go for the bursting star design usually. If you have more time and want to slice the apples thinner, it’s prettier. I was tight on time when I made this yesterday.

12mp.jpg

*****It is assumed that you have a jar in your pantry into which you have put about a cup of sugar and about 2 tablespoons of cinnamon and shaken it like mad (the Cinnamon-Sugar Dance!) until well blended. This jar lives in your pantry for when you need to make cinnamon roll-ups from leftover pie crust or for putting into hot farina (aka cream of wheat) on a cold morning or, of course, for this apple cake. The amount of cinnamon-sugar you put on top is up to you. Mine looked like this just before I popped them into the oven.

22mp.jpg

You could also top with a streusel crumb topping. Robin’s (Haphazard Homemaker) Oatmeal Streusel Crumb Topping is great and would work perfectly!

When you can, time the baking of this cake such that it comes out of the oven just about the time you serve whatever dinner you are serving so that by the time you are done with dinner, the cake is still warm but not too hot. Serve with a dollop of whipped cream if you like.

Mom and Jerry are smiling, but truth be known they are both saying: Hurry up and take the picture so we can eat this delicious cake!

mom and Jerry2mp.jpg

Croquettes with a Twist

Recently I discovered that you can make a thing your whole life and then one day discover a twist on how to make it that in all the years before never occurred to you. Rice and Cheese Croquettes are the thing I speak of today. I wrote a detailed post about this all-time favorite last year, noting them as one of my mom’s great comfort foods. You mix plain white cooked rice into a cheesy sauce that causes the rice to stick together, then you form patties, bread them and pan-fry them – oh yum!

patties wo spinach and ham done22mp.jpg

Sometimes I don’t make my rice plain though. Sometimes plain seems boring and you know how I feel about boring. Sometimes, also, I don’t plan very well. I just look at what’s in the fridge and work with it.

Having decided against plain rice as a side for an earlier meal, I had made rice pilaf instead. All that means is that I started with an onion – you seldom go wrong starting with an onion! – sautéed it in a few tablespoons of butter till it was transparent, then added chicken broth instead of water, waited till it came to a boil (just as I would if it were plain water), then added the rice and a bit of salt. When that began to boil, I turned down the temp, covered it and let it simmer 20 mins (just as I would with plain rice). Ta-da! Rice pilaf!

Remember when making white rice, use two cups of water for every cup of rice. Wild or brown rice is another thing. And also remember your rice will triple in volume: 2/3 cup uncooked rice becomes 2 cups cooked rice.

Problem was I had forgotten the tripling-in-volume part and made too much rice pilaf and there it was in the fridge staring at me as a leftover. A whole big container of it. Four leftover cups of cooked rice pilaf. That’s a fairly major miscalculation, but possibly it wasn’t a miscalculation at all but instead I had made extra thinking it would be good to have leftover. I forget. Anyway, you can heat up leftover-rice-of-any-variety in a pan same as anything, even crisp it up a bit, no argument there, delicious and easy. But croquettes were whispering in my ear as I stared into the fridge that day. Hmmm, croquettes made with rice pilaf?? That’s new.

[pause]

Sure, why not? And while I was at it, why not embellish further? Why not finely dice some ham and chop some spinach and add it to the mix? Because those were whispering too.

ingredients2mp.jpg

Let me give you the ingredients of the original recipe first, then explain how I tweaked it. Remember I was starting with four cups of cooked rice, so I ended up doubling everything.

I tablespoon butter
2 tablespoons flour
½ cup milk
2 eggs, separated
2 cups cooked rice (2/3 cup uncooked)
½ cup grated sharp (Cabot if you can!) cheddar cheese
¼ teaspoon paprika
1 teaspoon salt
1/8 teaspoon pepper (a couple shakes)
1 cup fine bread crumbs mixed with 2 tablespoons flour (for breading)

Same as making any roux, melt the butter in a heavy saucepan over a medium heat, add the flour and whisk it together. It should look like this.

roux2mp.jpg

When you add the milk and whisk (a little more gently than u whisked the flour into the butter, or else you’ll have milk splashing all over your stove, and you don’t want that), it gets creamy.

roux22mp.jpg

Don’t add the milk all at once. Add about a third of it, whisk in, then another third, whisk in, then the last bit. You get no lumps that way. Look at this silky, creamy goodness!

roux32mp.jpg

For rice croquettes (unlike regular white sauce then made into cheese sauce) you also add egg yolks. This has to do with the binding properties of eggs – you want this sauce to make the rice grains stick together to form the patties, plus it makes the whole thing richer. So add the egg yolks. I used three instead of four because two of mine were pretty massive, coming as they were from my Mama Brahma hens, which you probably don’t have. Four regular size egg yolks work fine. Set aside the whites for later.

roux42mp.jpg

Stir this up and admire the gorgeous color it forms.

roux62mp.jpg

Add the paprika and again admire the spectacular color of the red specs splatted against the pale golden cream.

roux72mp.jpg

Once duly admired, stir in the paprika. I then added my diced ham and spinach, which are random-but-seemed-reasonable-to-me amounts, probably about a cupful each.

into roux2mp.jpg

Then I added the cheese, which again is (sorry) a rather unmeasured amount (I cut a hunk off the block and grated it, looked about right). It might be a bit more than the called-for cupful (remember I doubled the recipe) but that, I have found, doesn’t matter.

into roux22mp.jpg

This “sauce” I then transferred to a bowl, added the cold rice pilaf (if it were hot or warm it would be okay too) and mixed it up. If your pot is big enough, you could also mix it up right there in the pot. I don’t know why I didn’t.

mixture2mp.jpg

Now the fun part, the part where your hands get directly involved, the forming-patties part. By the way, you can make these whatever size you like, even some bigger than others or odd shapes (crescent moons perhaps?) because they are your patties and no one else’s and you should have fun with rice patties whatever way you like 😊. I chose (did I really??) boring, burger-size patty shapes. I suppose, in retrospect, adding the ham and spinach was enough outside-the-box for one day. Another shape would have been just too much. We do need to know where to draw the line.

patties2mp.jpg

I don’t fry a lot of foods, but these I have no qualms about. You lightly egg-and-bread them and then let them crisp up in some hot olive oil. This is where you use the egg whites you set aside earlier. In my case, I had so many patties, I needed more egg, so I added another egg to the whites and whisked it in. I also add a little flour to the breadcrumbs because I’ve found this helps it stick to the thing you just egged.

ready to coat2mp.jpg

So first put a patty in the egg, flip it to coat evenly, then transfer it to the crumbs and flip the same way. If you can manage this with two forks, you will keep your hands from getting so gooky. Once they are coated, put them in the hot oil. Flip when browned on the first side.

pan frying22mp.jpg

In the end I was quite pleased with this experiment. What we didn’t eat for dinner I wrapped up tightly and froze. What a good idea — boy, did they come in handy when my sister came to visit!

When you are ready for a quick meal or side dish, thaw and heat in the oven for 20 minutes or so, like your own amazing convenience food. I expect you will enjoy every bite!

done2mp.jpg


Second-Day Pasta

I come from a big family, one of four girls, and for most of my childhood either my grandparents on my father’s side or my grandfather on my mother’s side lived with us.

I am also half Italian, which in our family meant a lot of pasta for dinner. We enjoyed my mom’s great “sauce” on our “macaroni” on Wednesdays and Sundays. Please understand that I mean every Wednesday and every Sunday. There are rules and there are rules. This was a rule.

Not to be confused with the non-meat cheese sauce, onion sauce, ceci bean (chickpea) sauce or marinara sauce we adorned our macaroni with every Friday (good Catholics that we were, in that regard anyway), “sauce” was shorthand for what some people would call red sauce, others would call Bolognese – made with onions, garlic and meat (mostly beef but sometimes pork or lamb) browned up together, with tomatoes, basil, oregano, salt and pepper (and the occasional lamb bone or pork bone) added before a long simmer.

Sauce was noted simply as SAUCE on countless pieces of masking tape over the years, marking countless random re-used freezer containers like this. (This photo, by the way, marks Mom’s first sending of a photo via text – bravo, Mom! and thank you, Lynn, for walking her through the process.)

sauce.jpg

So, Wednesdays, Fridays and Sundays. Practically without fail. That’s a lot of macaroni. You try, of course, to make the right amount so you don’t have a lot of leftovers, but it happens. What do you do with leftover macaroni? You make macaroni pie of course!

You take your cold leftover macaroni/pasta, chop it up, stir in a few eggs and some cheese and salt and pepper, put this mixture in a hot, oiled pan, let it brown, flip it, brown the other side and serve. It’s great hot or cold. It’s great as a main dish or a side dish. And it uses up the leftovers in a very yummy way!

Feel free to embellish however suits your fancy. A few weeks ago I made macaroni pie using leftover pasta made with my own “sauce,” but along with the eggs I added some shredded asiago cheese and left it in the pan a smidgeon longer than usual – to the not-quite-burned-but-almost stage – and Samuel said it ranked among the best ever. This weekend I made it using some leftover spaghetti carbonara, which uses bacon, cream and romano cheese in the sauce. That’s the one I’ll show you.

This is the leftover, which was about 4 cups total, chopped up in a bowl with my three eggs. You can use any sharp knife to cut it up – it cuts easily when cold.

in bowl.jpg

Adding some extra cheese (a handful or so, grated, whatever kind seems to go with whatever kind of pasta you have) and salt and pepper at this point is a good idea because once it has a crust, it’s harder to season.  After you’ve mixed it all up, put about 2 Tbsp oil in a frypan and turn on the flame to get the oil hot. Mine looked like this.

oil in pan.2mp.jpg

Wait about one minute before using a rubber spatula to guide the mixture into the pan . You want to wait that minute because you want the sizzling sound. The sizzling sound of the cold pasta mixture hitting the hot oil is one of those kitchen thrills you cannot explain to the those who have not yet joined the Kitchen Club, made up, of course of those of us who get a thrill from sizzling sounds, gleaming egg whites, bubbling edges (see below) and other such marvels.

Let it cook over a medium heat for 10-15 minutes. You are not only heating the mixture, you are letting the eggs, which bind it all together, cook through. You’ll see a little bit of bubbling around the edges. Zoom in on the edge if you want the thrill.

bubbling mixture.2mp.jpg

The tricky part of this operation is “the flip,” but a plate makes it easier. Use a spatula to peek at the browned bottom of the pie. Decide if your optimal brownness has been reached and make sure the entire bottom of the pie is loose. Run your spatula under it if need be – but if your pan is nonstick and you have used a bit of oil, there shouldn’t be any problem. The pie should be able to move as a single unit in the pan as you move the pan back and forth.

Then plate a plate on the pan like this.

plate on top.2mp.jpg

Take the handle of the pan with your one hand and place your other, open hand on the plate. Lift the pan to about chest height away from the flame.

hold plate.2mp.jpg

First time trying this – not that I expect disaster! – perhaps move over to the sink 😊.

Tilt the pan/plate while holding the plate tightly against the pan…

begin to flip.2mp.jpg

…then quickly flip the whole thing so that your hand holding the plate is now under the plate and the pan is on top.

flipped.2mp.jpg

Remove the pan from the (now) top of the pie and put it back over the flame. Slide the pie off the plate and back into the pan so it can brown on the other side.

slide back in.2mp.jpg

All this time you are of course oblivious of the begging dog (poor Coco!!) hoping something will fall. Nothing did — this time!

begging coco.2mp.jpg

Give the second side about ten minutes to brown up, then slide the whole pie onto a plate. The crispiness on both top and bottom is as good as the moist and tasty pasta inside.

cut to show inside.2mp.jpg

Enjoy!

Not-Kiwi Ice Cream Cake

Today is Eppie’s birthday — the Big Five she is! Before we get to the cake, a word about the present.

Naturally, when there are chickens at Eppie’s house and chickens at Oma’s house and Eppie is celebrating an important birthday, she surely needs another chicken for a present 😊 This one let’s call Silkie Boy – the bad hair day making it a silkie and the red things resembling the wattle that only the (male) roosters have. Seeing as there are no roosters at Oma’s house (none, zero) and the ones at Eppie’s house were recently “processed,” this fellow just might find a special place in her heart. You never know.

Eppie.2mp.jpg

Six days pre-birthday, i.e. this past Saturday, at the War Memorial Park in Martinsburg, West Virginia, I asked her (after she opened the chicken present) what kind of cake she would be having on her special day. She and Rise and Lincoln and Julia would be on their annual family vacation with Julia’s family this week, and I knew that somebody would surely be making her a cake.

Eppie was swinging on the swings as she answered matter-of-factly, “Kiwi.”

“Kiwi?” I was sure I wasn’t hearing her right, what with the squeaking of the swing as it swung back and forth. (I almost wrote swang, so baffled am I even now, even thinking about kiwi and cake as having any connection at all with each other!)

“Kiwi,” she repeated.

“Kiwi,” I repeated. Kiwi cake? Wait, kiwi? First, when I was five, I’m sure I didn’t even know what a kiwi was. Second, how does it come about that a child wants a kiwi cake? But okay, why not. It’s a new world. Onward we go.

Today, on her very special day, she is looking particularly angelic… (Thank you Nancy/Nana for the lovely photo!)

E3.jpeg

And she is getting ready to eat her… (you knew this was for real)… kiwi cake! True confession here: When Eppie said kiwi cake, I imagined a light green batter flecked with small seeds perhaps (kiwi seeds of course). I did not imagine this awesome, surely delicious layer cake Kelley made with sliced kiwis (the fruit) between the layers and a super impressive image on top of a kiwi (the bird) done with frosting. See the additional slices of kiwi for decoration – and is that a chocolate-dipped kiwi slice besides??!! That’s a kiwi cake if ever there was a kiwi cake! (Eppie darling, you are very much loved!)

And sure, I knew kiwis were birds, native of New Zealand they are, smallest of the rattites (whatever that means), coincidentally the size of a chicken…. Sure, uh, everyone knows that…

cake.2mp.jpeg

So I, in my not-functioning-well-in-this-heat-wave brain, somehow had thought that Eppie would be here tonight, which of course she isn’t. But in that delusion I had – not yet having any clue as to the monumentally incredible kiwi cake that was to come, not having any clue what a kiwi cake even is – decided to make for her a simple ice cream cake with two of her favorite flavors. And this, despite the clear inferiority of my offering, I share with you for two reasons.

  1. I meant well.
  2. It’s super easy and anyone can do it (whereas your average Joe might be oh-so-slightly intimidated when it comes to monumentally incredible kiwi cakes, hats off to you, Kelley!).

This is Not a Recipe for Ice Cream Cake. It’s only kind of a recipe. It’s more like assembly instructions.

Start by taking out the ice cream from the freezer. It spreads better if it’s a little soft. This part of the instruction presumes you do not get distracted with an unexpected phone call, a natural disaster, or by reading or having to reread Mona’s hilarious/gross blog post about Cystifus (click at your own risk). Meaning the ice cream should sit out about 15 minutes (give or take, depending on how cool/warm it is in your kitchen at the time).

The crust is made with thin, crispy, dark, crushed-up chocolate wafers. I use Nabisco. I crush the whole package (9oz/255g). You should use the quantity that best suits that size of pan / amount of ice cream you are going to use.

2.jpg

Crush these up fine, either in a food processor or with a rolling pin. If you choose the rolling pin (quieter and less clean up, plus muscle-building) method, put the cookie wafers in a gallon zip-lock bag first. Reserve some of these crumbs for later (¾ cup or so) and put the rest in a bowl with ¼ cup sugar and ¼ cup (½ stick/ 55g) soft butter. Mix crumbs, sugar and butter together and press (with your fingers) into a pan of your choice. This time, I used my wonderful squarish springform pan, which happens to be 9”/23cm across. A pie plate works fine. A 9×13 baking dish works fine – your call. How much ice cream do you have? Use your finely honed spatial reasoning skills to determine pan size.

After you press the buttery/sugary crumbs in the pan, gently put flattish scoops of ice cream in the pan. In this photo you also see my reserved crumbs in the small bowl.

1.2mp.jpg

I used up the whole container of chocolate for the first layer, gently pressing and flattening as I went. The back of a big, flat spoon works well. Eppie told me she “loves” chocolate, so regardless of chocolate being my own personal favorite, it was a safe bet for this cake. I can’t remember how that came up in the conversation about the kiwi cake, but it did, and I am clear on this fact: Eppie “loves” chocolate.

For your ice cream cake, you pick the kinds of ice cream you like best. For some flavors it might even make sense to use graham crackers instead of the chocolate wafers in the crust (everything else would be and be done the same way).

So, yeah, the whole container – which isn’t as much as you think, certainly not as much as it used to be. They used to put ice cream into containers that held half a gallon. I’m not sure when they started making the containers smaller – and charging the same price, but I was onto that scheme and it made me mad. You have to pick your battles though, right?

So the whole not-half-gallon of chocolate ice cream, smoothed out, looks like this. Don’t be anal about how smooth this is.

amooth first layer.2mp.jpg

On top of the first layer, sprinkle your reserved crumbs.

crumbs between.2mp.jpg

Right away (time is of the essence here), add the second layer. While still on the swing, Eppie, thankfully for me, named another flavor she “loves” and I stopped right there, didn’t need to hear more because, well, mint chocolate chip works because 1. It pairs with the plain (rich) chocolate well and 2. Because it is right up there with the not-as-good-as-chocolate-but-in-their-own-ways-amazing other flavors that I happily eat (sometimes). How handy is that! Bless you, dear child, for not naming butter pecan or some similar ugh-worthy flavor…

The second layer goes on quicker because you are able to move faster because the ice cream is softer, having been sitting out longer. This is where my mother would say, “Don’t dilly-dally!”

second layer.2mp.jpg

For those of you who associate mint chocolate chip with an ice cream that is not only minty but also green, rest assured this is minty just the same.

Now for decorations. I added some chocolate chips because, remember, Eppie “loves” chocolate, so why not. And because it’s for her birthday, I also added some happy sprinkles. Do note that these are the multi-colored sprinkles, not the chocolate ones. I want credit for that.

decorated.2mp.jpg

Chips and sprinkles are random on top because by now I am really in a hurry to get this thing popped into the freezer. You don’t want the ice cream get to the point of being cold soup – it just won’t freeze back up right.

To serve, I put this on a pretty plate. When the time comes, after we’ve enjoyed our homemade pizza tomorrow, I will light the five candles and burst into song as I emerge from the kitchen with my simple masterpiece in hand – hardly a kiwi cake, I know! (I am still so in awe of that!) Nonetheless I have not only made something that is 1. surely yummy (chocolate + mint chocolate chip, yeah, yummy) and 2. likely to be enjoyed (we shall see, but I’m pretty sure), I’ve also shown you how easy it is so you can make one too!

Eppie darling, don’t forget how much Oma loves you! Happy Birthday!

on plate.2mp

Assembly Line Rou-LAH-den for Dinner

Judging by the number of views on my recent Umpteen Salad Dressings post, a fair portion of people like vinegar – or at least don’t mind it. If you like vinegar, pickles, pickled anything, vinegar-y salad dressing and you like beef – any sauerbraten fans out there?? – you just might like Rouladen (pronounced roo-LAH-den). It’s a traditional German dish that any “praktisches Kochbuch” (Practical Cookbook) will include. Here’s mine, published in 1974, a gift from my dear friend Claudia a long time ago!

book cover.2mp.jpg

And in case you are interested, this is the recipe from the book.

german recipe.2mp.jpg

But as you might expect, I do it my way – this time combined with Claudia’s way 😊

I think of these as Assembly Line Rouladen because you get all the innards ready, lay out the thin slabs – let’s call them flats – of beef and systematically sprinkle/spread/place your innards – one at a time – on the flats. Once you’ve got each flat loaded up, you roll them tight, secure each one with a toothpick or two, sear in hot oil, add water and cook until done. If you want, you can then thicken the gravy.

One of the most important things to know about (why) this recipe (tastes so good) is that it contains bacon. As you may well agree, it’s hard to go wrong with bacon. I loved it when the servers at the Bluegrass Grill in downtown Charlottesville wore t-shirts that said “DON’T WORRY – WE HAVE BACON.” They even have bacon jam! Also, their corned beef beats all, but I am going onto a track I did not intend – ah, the power of food! Back to the bacon! Oh, right, back to the rouladen!

I generally use a bottom round cut of beef for recipes that involve slow cooking in liquid (a.k.a. braising), but you will find recipes that say to use top round. I have found that the meat department at my grocery store decides – they pick a cut, slice it thin (1/4-inch) and package it as “Beef for Bracciole” (what you could call the Italian version). Depending on where you live, it might even say For Rouladen. When in doubt, ask the butcher.

The prep for rouladen is like the prep for tacos in that you do the chopping/ preparing/ finding of this and that, put each component in a bowl or a jar or on the counter – get everything ready for assembly – then boom, boom, boom, done! (Okay, maybe there are a few more booms, but you get the idea!) Besides the thinly sliced top or bottom round, you will need mustard, bacon, onions, pickles, carrots, salt and pepper.

Mustard: I like spicy brown mustard, some people prefer Dijon – just use the one you like best.

Bacon: The leaner the better, allow one slice of bacon per piece of beef. I cook mine first to get some of the fat away, and crumble it so that as I spread it on the meat, the flavor is more evenly distributed, but you don’t have to. These will come out just fine if you simply lay the slice of raw bacon on the slab of raw meat and assemble and cook it all together.

Onions: Your call whether to lightly sauté your chopped-up onions in a little bit of olive oil before putting them in. I do because it softens them and makes the beef easier to roll. Approximately one tablespoon of chopped onion per piece of beef. I like onion, so I probably use more than that.

Pickles (dill, not sweet): For ease of spreading, you’ll want to finely chop the pickles or just get/use (pre-chopped) pickle relish, the kind you’d put on a hot dog. Allow a teaspoonful per piece of beef. You use the pickles, not the pickle juice, so try to drain the liquid from them.

Carrots: Hardly essential, but an element of color, nutrition and a tad of sweetness to balance out the vinegar. Claudia suggested adding carrot sticks a few years ago and I love it! Allow 2-4 thin sticks about 3-4 inches long for each.

Salt and Pepper: To taste.

Here are my various innards: You can tell I’m making a lot (24 to be exact) and that I like a lot of onions. My bacon and carrot sticks are in bowls and my pickles are chopped up in the jar.

all ingredients.2mp.jpg

Lay out the meat on a clean, wide-open surface and put a squiggle of mustard on each one.

meat plus mustard.2mp.jpg

Then spread the mustard out, sprinkle with salt and pepper and put a spoonful of pickles on each.

meat plus mustard plus sandp and pickles.2mp.jpg

After you spread out the pickles, put a spoonful of onion on each one. Spread out the onion.

meat plus onions.2mp.jpg

Next come the bacon crumbles.

meat plus bacon.2mp.jpg

Then the carrots.

meat plus carrots.2mp.jpg

Start at one end of each piece of meat and roll it up carefully, trying to keep all the innards in! Secure with toothpicks.

rollups24.2mp.jpg

Put a couple tablespoons of olive oil in a good frypan and sear the rollups on a medium-high flame till they are brown most of the way around. Add water to reach about halfway up the sides of the rollups, cover, turn down to a low flame and let cook at a simmer for about an hour.

This slideshow requires JavaScript.

I like to take them out of the pan, set them in serving dishes, then make the gravy and pour it over top.

done in pans.jpg

It’s a good idea to take the toothpicks out (this is easier for you than for the person trying to eat it at the table). To make the gravy, figure out how much liquid you have left in the pans by pouring it into a large measuring cup. Then for each cup of liquid you have, melt a tablespoon of butter in a saucepan, whisk in one tablespoon of flour until this is smooth, then add the liquid, whisking gently until it is mixed in and looks like a thin gravy. (The gravy method is easy to remember if you keep it proportional: 1 TBSP butter plus 1 TBSP flour per 1 cup liquid.) Pour gravy over top, cover with foil and keep warm in the oven until ready to serve. These also freeze well.

Very yummy served with egg noodles or spaetzle!!

*One of my favorite parts of the praktisches Kochbuch from Claudia is the title page. In it she wrote “ – KOCHEN MACHT FREUDE – und dasselbe wünsche ich DIR” – “- Cooking brings joy – and this I wish for you.” I love that it’s in her handwriting because that makes it real and personal. I love that it’s fading because that means the gift came long ago and our friendship has grown and flourished all this time. I love that to this day, one of our favorite topics of conversation is what we made for dinner 😊

book inside.2mp.jpg

Umpteen Salad Dressings

I haven’t bought a jar of salad dressing in years. The reasons for this include 1. Cheap runs deep – I can make my own for so much less cost, 2. Fear of the Unknown – I worry about ingredient lists on labels that are too long, lists that contain words I cannot pronounce (and therefore are mystery ingredients, though I am not a nut about this, see below*) and 3. Culinary Whimsy – I like to play with food, making my own concoctions on a whim.

(BTW, Hats off to Robin at Haphazard Homemaker for her recent Berry Vinaigrette Salad Dressing post and the inspiration she gave me to share my own method.)

Salad dressing for me starts with a jar. Pick a jar, any jar. No, not any jar. Pick a jar that fits nicely in your hand. A pint-size mason jar works well. My jar, as you might guess, is not a jar I purchased as a jar but is a jar that was left over from something else, I forget what. Use a jar that came with pickles or capers or jam (or something like that) after you have finished up the pickles or capers or jam. This is my jar. It lives in a specific corner of my cabinet that is just to the right of the stove, where other, handy, easy-to-access things like salt and pepper and (in the non-blazing-hot months) butter also live.

I will explain the ruler.

jar.2mp.jpg

Not including salt and pepper, a given for me, salad dressing includes four components. I will call them the base, the sour, the sweet and the embellishments. I do not always embellish. Like a balloon ride, if you took one every weekend, what would be the fun after a while? I take that back. It’s true that I do not always embellish, but in fact I almost always embellish, somehow or other. Go ahead – embellish to your heart’s content – life is short!! Also, sweet is optional, but allow me to say again: Life is short!! A little sweet cuts the sour, tempers the sour, makes more palatable the sour – that’s how I see it. (Oh, and I would love to take a balloon ride someday!)

You start with a base, meaning your first decision is whether you want your dressing creamy or not. (Possibilities for each of the components are listed in a chart below.) Creamy bases start with yogurt, sour cream or mayo; non-creamy starts with the best oil you can get (at the hotel we called it EVO or EVOO for Extra Virgin Olive Oil). Before we start combining, a word about measuring. I am not the Queen of Measuring – understatement of the year right there – when it comes to salad dressing (or some other things not presently at hand). I do, however, have eyes that see reasonably well. They, combined with the jar, have proven a perfectly adequate measuring tool for me. Thus the ruler, just to demonstrate.

Imagine there are lines on the jar. Does anyone remember the bottles that people had for Wish-Bone dressings back in the day? I think it was Wish-Bone, but the company history on their web page doesn’t note this development, so I am perhaps wrong. In any case, they had little lines/marks on the side: Pour oil up to this line, then vinegar up to the next line, then pour in the packet of seasonings, put the cap on, shake it up and dress your salad. That’s what I do: I pour in the base, then the sour, then the sweet up to the lines on the jar that I “see” because I have done this often enough. Feel free to mark your jar with colored tape or whatever works for you. You can of course buy a “salad dressing jar” with markings already on it, but maybe their markings don’t represent the proportions you prefer, and proportions are different for different dressings. Your call.

Lest you think I measure minimally or haphazardly (no offense, Robin!), please understand I did not invent the eyeballing of salad dressing ingredients and I don’t hold a candle to Claudia or my mom when it comes to winging it. Claudia puts her various ingredients one at a time into a coffee cup, then stirs it up with a spoon. Mom does not use a cup or a jar (to this day, far as I know). She just puts the lettuce, cukes, whatever into the bowl, opens the bottle of oil and pours some – in a zigzag manner – over the top, the same with the vinegar, and then takes the salt canister (the big one with the spout) and again zigzags over the top of the bowl, shakes some pepper in and tosses it up. She never uses a sweet element but I always love her salads (and Claudia’s too – oh, you want to drink the dressing that’s leftover with hers, that’s how good it always is!). It’s all good.

As with many things that are both spectacular and inexact, when you are tempted to think about the quantities, think instead about proportion. I use about the same amount of base as sour, almost always. And again that much sweet when the sweet is maple syrup (probably because I like/love(!) the flavor it adds). When the sweet is honey, I use less. When it is straight-up sugar, I don’t use much at all, a teaspoon or so. You don’t need much. But to me, a little bit of sweet cuts the sourness/ sharpness of the vinegar just enough to bring the whole salad to another level. Same as a bit of salt can make all the difference.

Some people, some recipes, suggest more base proportional to the sour, some have no sweet at all (love you, Mom!!) or just a touch of sweet, some just a hint of salt or absolutely-must-be freshly ground pepper. The point here is that you will make your own salad dressing, and it will be exactly the way you like, with the components you like, in the proportions you like.

You just have to play around a little to figure out what that is. And then practice. It might be best to consider the chart below, decide what sounds good to you, try it, try it again, try it till you feel comfortable playing with a slightly different combination or proportion. Experiment, play, practice, practice, play, experiment…

For an example (and only an example), I will show a basic dressing, one that I use quite often. Assuming a salad that will serve three or four people, and using olive oil as the base, apple cider vinegar as the sour and maple syrup as the sweet, I start with pouring the oil into my jar up to a level I know to be about right for that amount of salad. Then I add about the same amount of sour, then about the same amount of sweet (a little less, it usually turns out to be, but again, inexact here!). More or less of any ingredient changes the result slightly – play around and figure out what you like.

This slideshow requires JavaScript.

Once I put in the oil, vinegar and syrup in the jar, I add salt and pepper, put the cap on the jar, shake it up, pour it over my salad and toss. Voila! Quick and simple and yummy.

If you use base or sweet components that are non-liquid (like sour cream, yogurt, mayo, sugar or jam), spoon it into the jar. Then add the rest and shake like mad. Note: if/when you use jam, you might want to break it up a little (with a fork or the back of a spoon) before you start shaking so it will end up evenly distributed in the dressing.

All right, I tried making a chart and then converting it to the right format so I could insert it here, plain and simple, but these things are not plain and simple for me so, forgive me if this is less pretty, but here are lists instead.

To dress a basic salad of lettuce, tomato, red onion, cucumber, sweet pepper (and whatever you put in it), consider the following choices:

BASE
(extra virgin) olive oil (EVO)
other oils (grapeseed, canola, etc)
(plain, unsweetened) yogurt
sour cream
mayonnaise

SOUR
vinegar (cider, red, white, balsamic, rice, etc)
lemon juice

SWEET
maple syrup
honey
jam (any berry, fig, etc)
sugar (brown or white)
boiled (reduced) apple cider

EMBELLISHMENTS
pickled cucumbers or pickled anything else (mushrooms, artichokes, okra, beets, asparagus, beans, etc)
capers
dried fruit (raisins, craisins, dried cherries, etc)
herbs (endless possibilities: basil, oregano, thyme, etc)
grapes (cut in half) or other fresh fruit like apples or strawberries
olives
cheese
ham or salami
pepperoncini

Some good combinations (and don’t forget salt and pepper):

  • EVO, cider vinegar, maple syrup (on a leafy green salad)
  • Sour cream/plain yogurt, lemon juice, bit of sugar (on shredded cucumbers)
  • EVO, cider vinegar, oregano (on cooked, peeled and shredded beets)
  • Sour cream/plain yogurt, cider vinegar, sugar or honey, embellished with raisins (on broccoli salad or shredded carrots)
  • EVO, red wine vinegar (on leafy green salad embellished with olives)
  • Mayo, cider vinegar, bit of sugar, embellished with celery seed
  • EVO, balsamic vinegar, embellished with basil
  • EVO, rice vinegar, any herbs you like…

My guess is (my hope is!) that for some of you, making your own salad dressing becomes normal, commonplace, routine. You pick a jar, use the jar, find a special place for the jar. You buy your olive oil and vinegar in large bottles (way cheaper that way), transferring portions at a time to smaller bottles that are easier to pour from. You figure out over time which combination(s) you like best and make a habit of reaching for your jar when the time comes to dress the salad.

Have fun! Good luck! Enjoy every bite!

_______________

*Re: I am not a nut about mystery ingredients: It has always seemed impracticable on my end and surely must irritating on the other end when a “diet” is so restrictive that I/you/anyone can’t even go to a neighborhood barbeque because the food there would no way be within the scope of what’s currently allowable/ fashionable/ desirable. My son Lincoln recently gave his own version of Anthony Bourdain’s enjoy-food-and-don’t-impose-your-inane-restrictions-on-everyone-else: “Nothing wrong with having your own preferences or boundaries, but I follow the 80/20 rule on that. 80% of the time (or more) I can control what I eat but I allow for 20% to be determined by the people I’m with or the social situation.” No one likes a fanatic. So as much as I can, within reason, I eat what I feel good about, what seems reasonable to me, but if I am out and about in a restaurant or someone’s home, and they didn’t make that bread with the best flour or there’s some ingredient I wish weren’t there, it’s probably not going to kill me.