Glorified Onion Soup

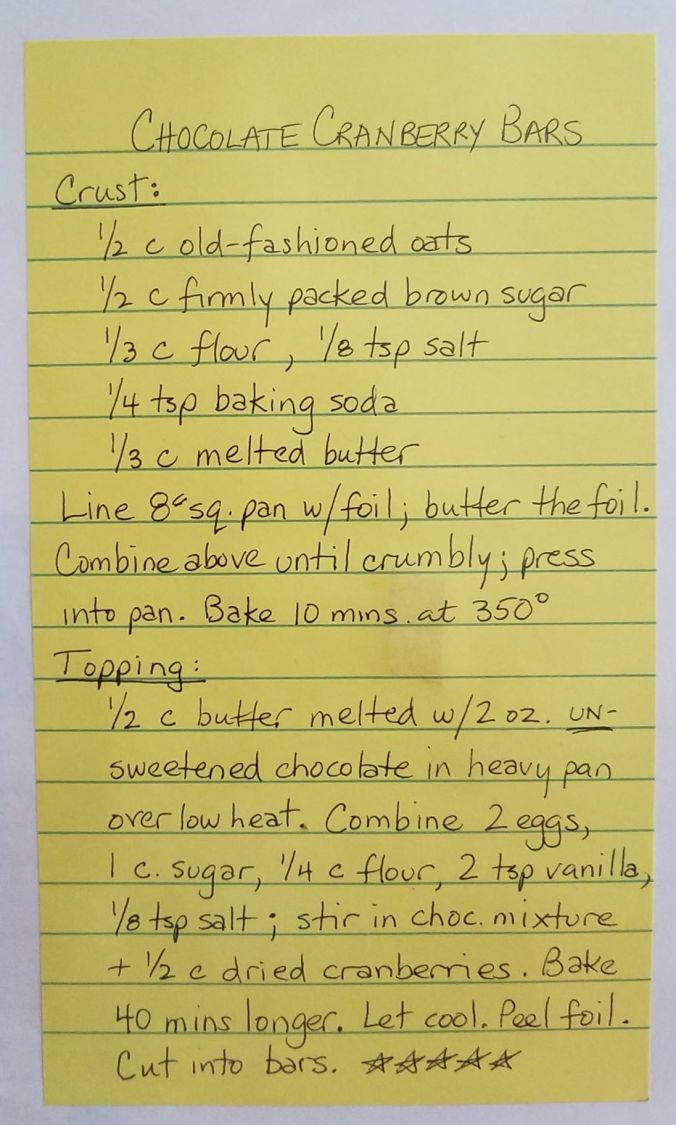
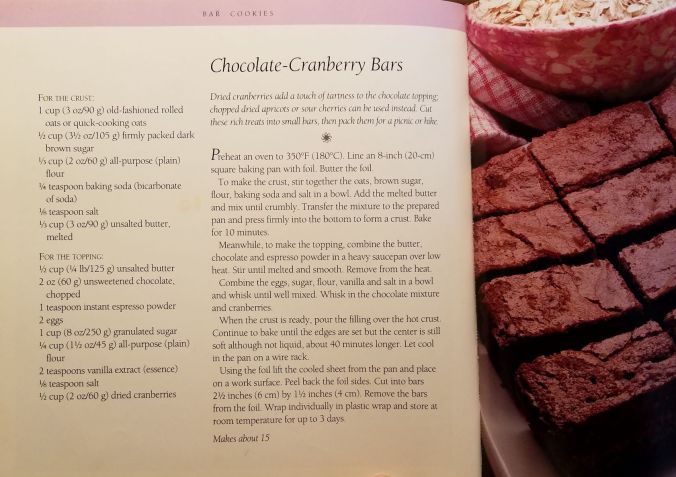
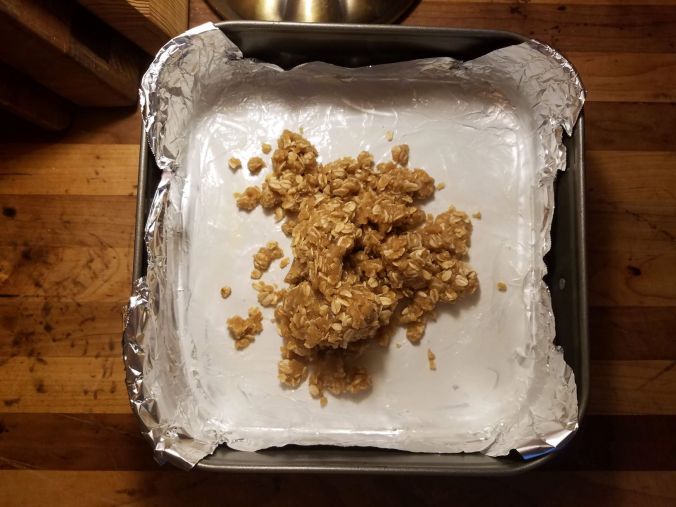
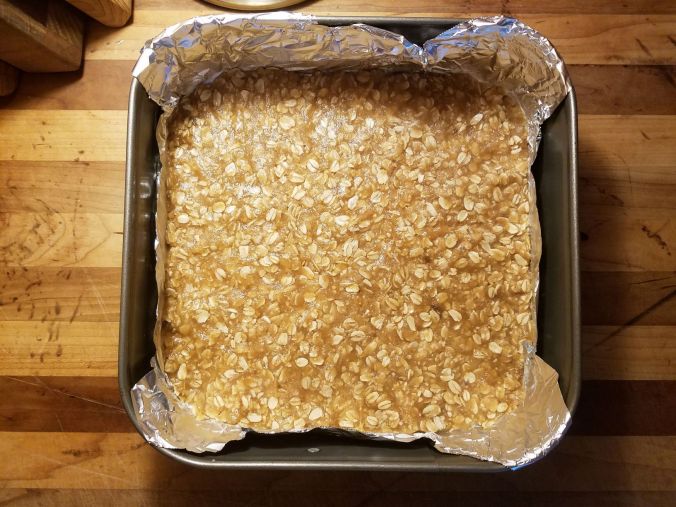
It all started with a pork roast. I had a small one in the freezer last week and needed something easy on a day of porch-building. Pork roast is easy: Thaw, top with chopped fresh garlic and salt and pepper and bake at 400F until just done (between 145F and 160F depending on how done you like it). Bake a few Yukon gold potatoes at the same time, make a simple gravy and serve with a salad. Done!

Except for the four slices leftover.

I put them in a small container along with the leftover gravy. Saturday came along. Mom and Jerry were coming for dinner and I had yummy, somewhat special (on account of being less often served) “rouladen,” which I realize now I intended to post the recipe for – half a year ago in my post about Mom’s bracciole! – but forgot! I promise to show you how to make them soon. The eleven yummy (but little) rouladen I made, even with spaetzle and salad on the side, seemed tight for five people. So what else can I make??

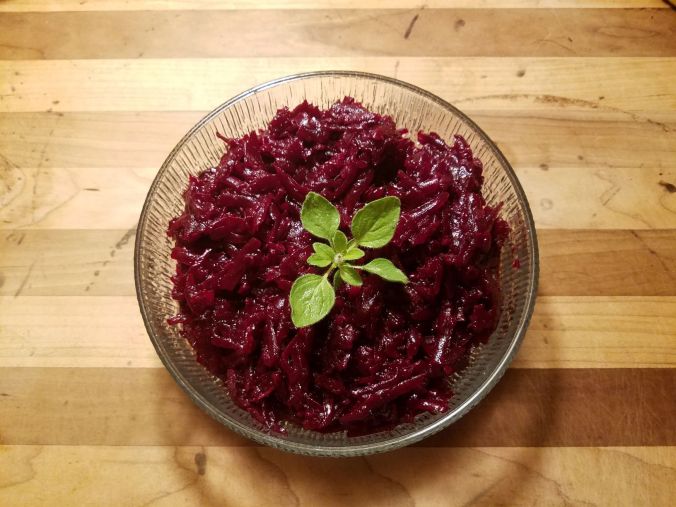
When you have onions like this growing in the garden…

garden onions (2).2mp.jpg

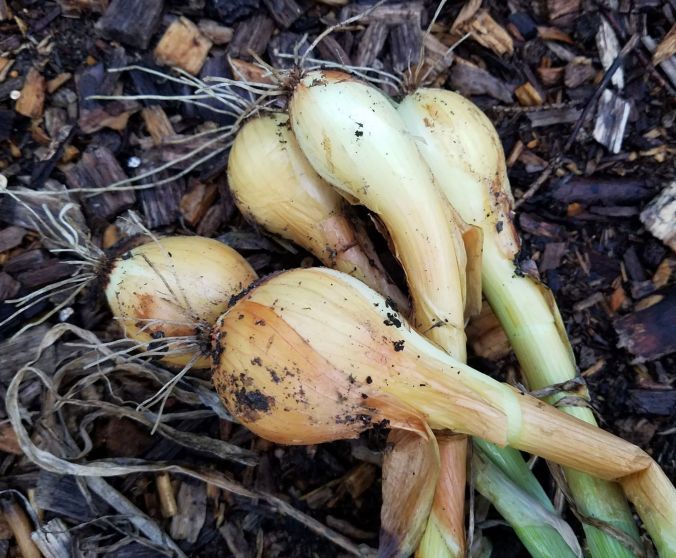
…you should be thinking of onion soup – but I didn’t. I was thinking of the rouladen and that I didn’t have enough. That was the problem!

In such situations I would sometimes just add a baguette or another salad, but somehow soup came to mind. Not onion soup, just soup. Starting a meal with soup is lovely, even in the summer. I took out a marvelous SOUPS & STEWS* cookbook my daughter gave me a few years ago (she particularly likes the Greek Lamb Stew on page 125). I leafed through the book but nothing jumped at me. This is possibly because I was determined to use that bit of leftover pork roast and none of the recipes I saw asked for four slices of leftover pork roast with gravy. Imagine!

soup cookbook (2).2mp.jpg

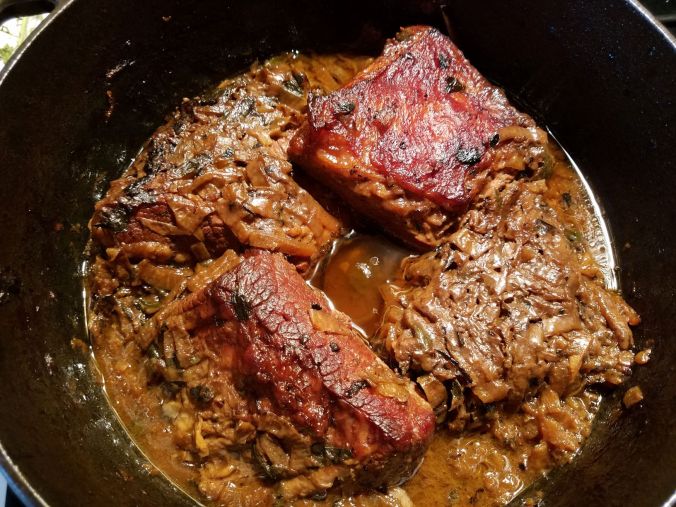
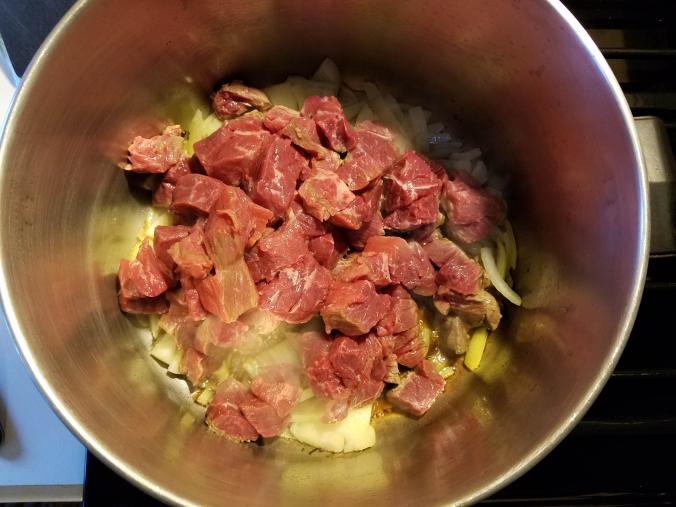
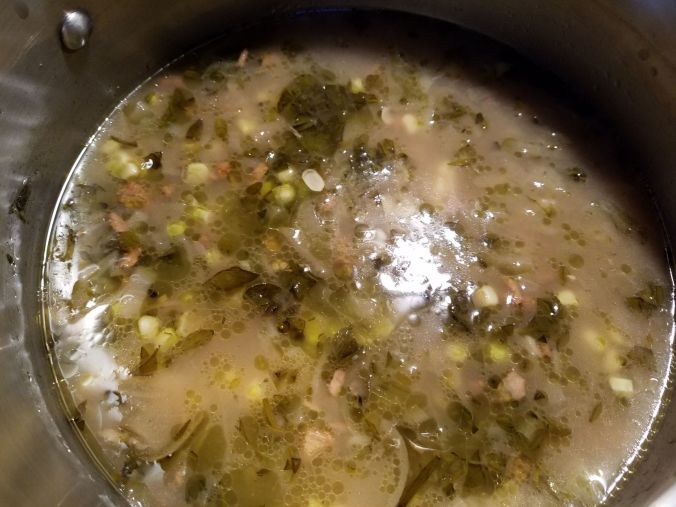
Onions. For me it often comes back to onions and this time was no exception.  Onions you have on hand (or in the garden). Onions are so amazingly delicious in so many ways. Looking through a book of great soups I couldn’t help but remember the onion soup I had at Mt. Vernon at the end of last summer – the day it rained almost the whole day and my feet were wet through and oh, how good that soup tasted! Hey, why not just finely chop the leftover pork roast and add it (along with the gravy) to onion soup? The gravy will act as the bit of thickener that made the Mt. Vernon soup so marvelous.

That’ll work. In the morning I chopped enough onions to make about 1 ½ cups and sautéed it slowly in 6 tablespoons of butter in my Dutch oven pot. When I say slowly I mean this took about an hour, at least an hour, maybe a little more than an hour. S – l – o – w – l – y. Anyway I got busy working on the porch. Shortly after lunchtime, as we were cutting the last of the decking boards – the edge pieces that require the jigsaw and more precision and measuring than the rest – I asked Samuel to finish the rest. I couldn’t switch gears at that point and come in and make food.

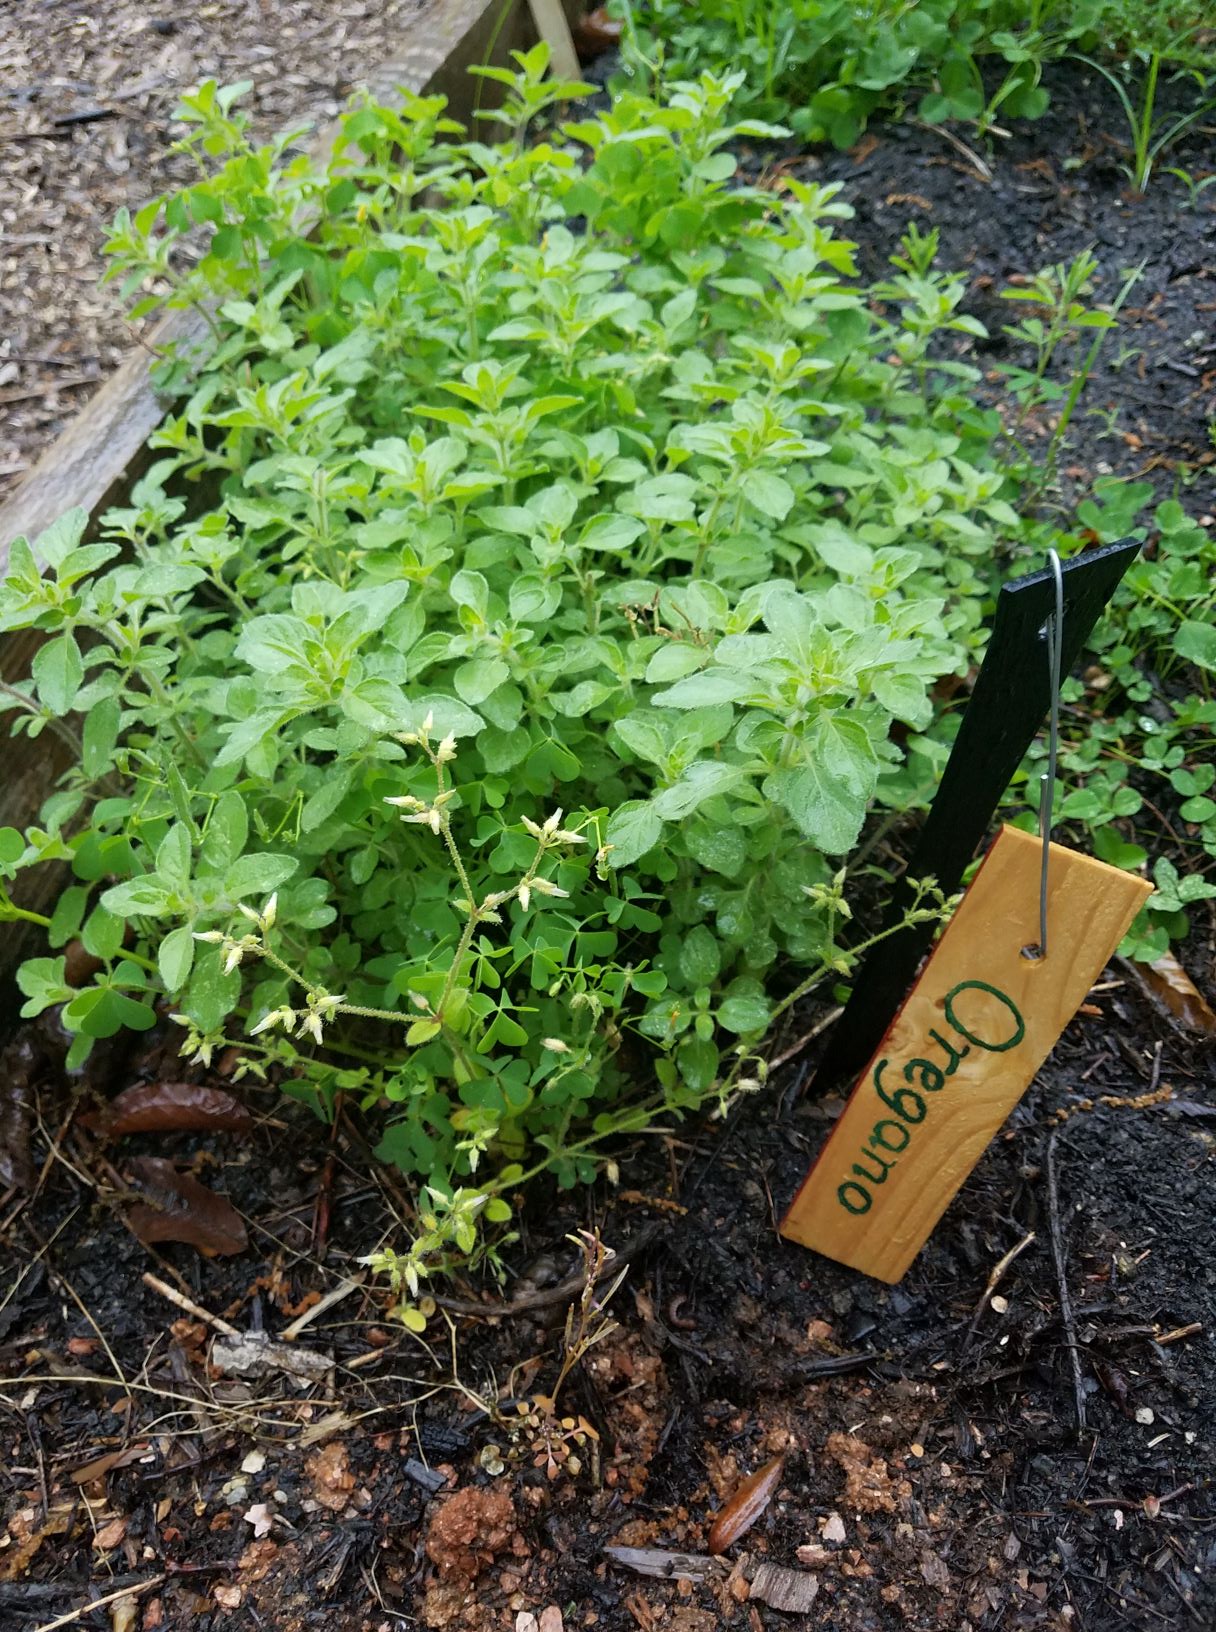
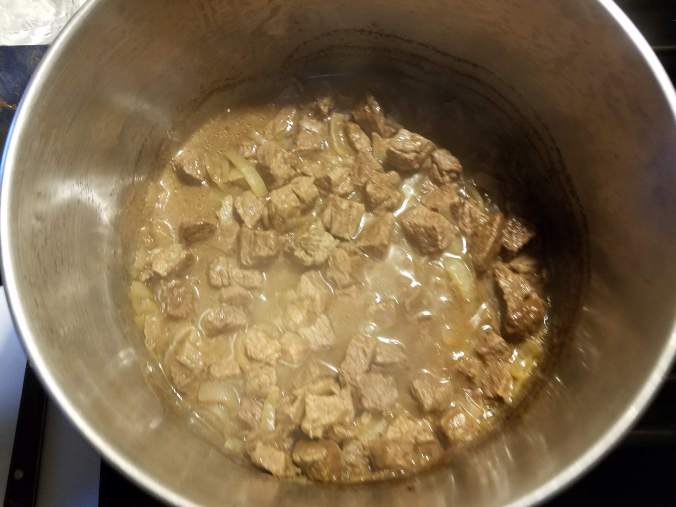
“Add enough water to fill the pot about halfway,” I told him. “Get some rosemary and thyme from the garden. I don’t have any chicken broth in the freezer so just add three each of the chicken bouillon cubes and three of the beef. Oh, and a splash of sherry. And chop up that leftover pork roast real fine and throw that in there too.”

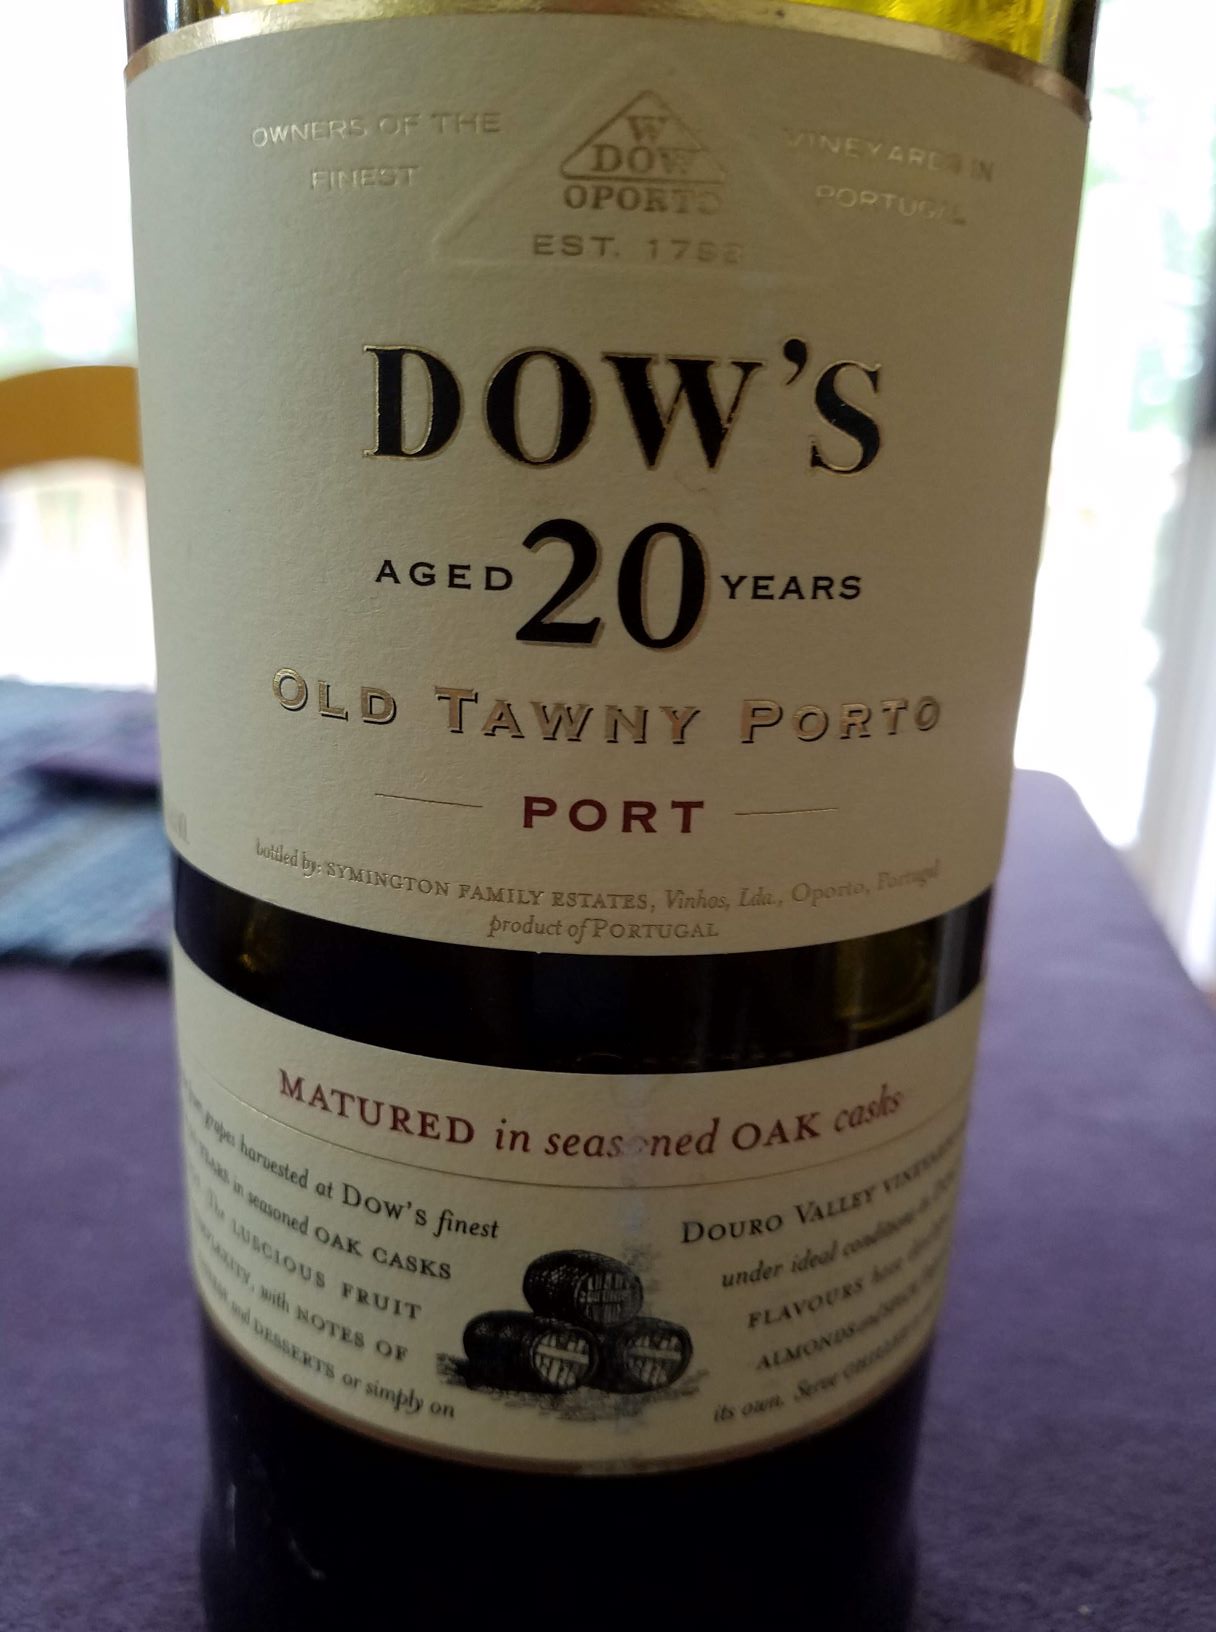
The vagueness of my instructions was not clear to me. Some rosemary and thyme? Let’s see, the leaves from two 6” lengths of rosemary and enough thyme to fill in the balled-up palm of your hand. Chop up the pork real fine? Smaller than bite-size. I suspected it would break up smaller than that as it cooked (it did). A splash of sherry? Say about two tablespoons. Uh, Mom, I don’t see sherry… Right, well you’ll have to use that good port. It had been perfect in the Mt. Vernon soup…

port.2mp.jpg

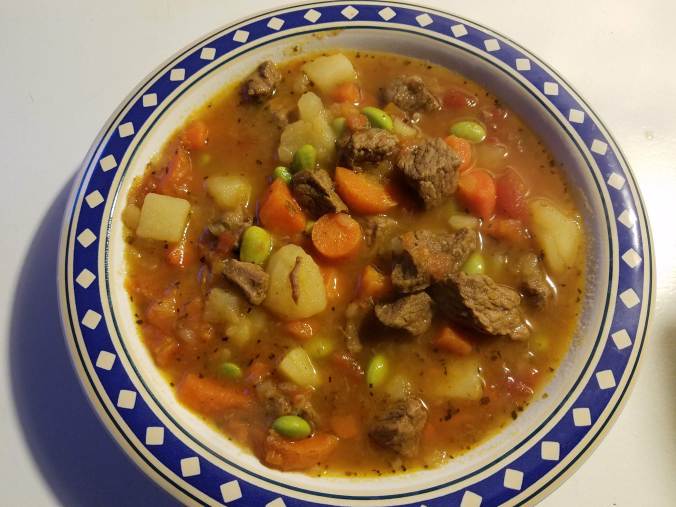
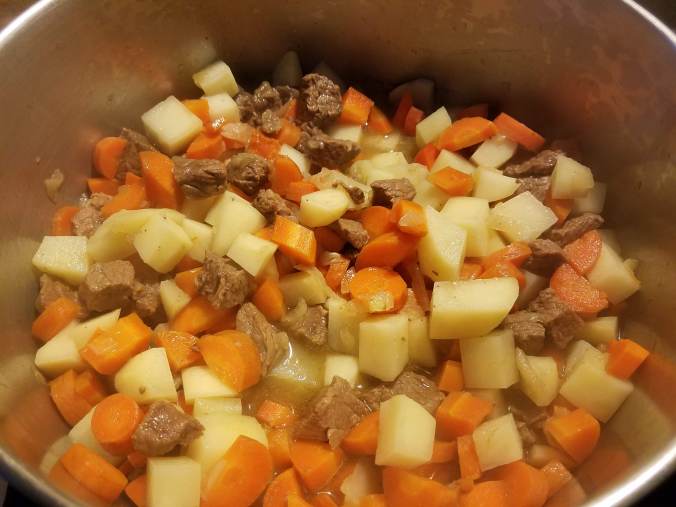
Now don’t forget that the pork had been cooked with fresh garlic, so that flavor was in there too. This concoction simmered away s – l – o – w – l – y all afternoon while I was outside trying not to be afraid of the chop saw. By the time I came in at 4 or so, the soup had reduced some, though I can’t tell you how much. Oh, also, I had had corn on the cob this past week and one ear was leftover. I had sliced off the kernels into a small container. Saw those in the fridge and said Sure, why not? and added them to the soup as well. Salt and pepper to taste of course.

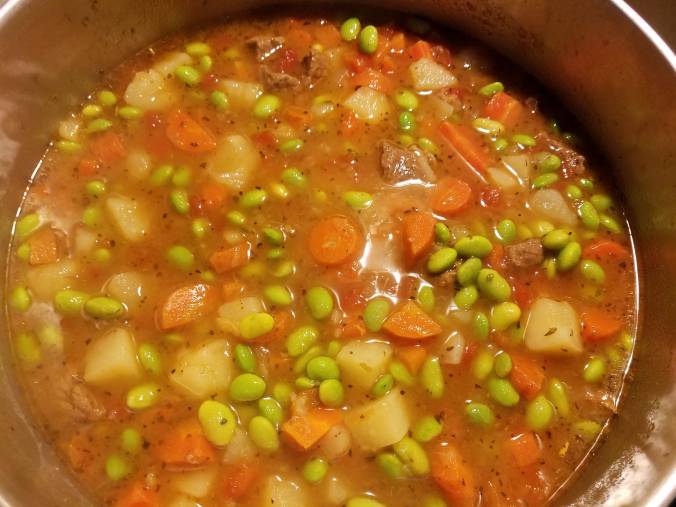
It wasn’t the prettiest soup, but oh, Onion Soup with Pork and Corn (and those spectacular fresh herbs) is soooooo tasty!!

onion soup with pork and corn.2mp.jpg

If I had been smarter, if I had had more time, if I did not still have half of my brain thinking about soffit boxes and decking boards, etc, etc, I might have thought to make some cheesy croutons and sprinkle them on the soup before serving it when Mom and Jerry came to dinner. Oh well!

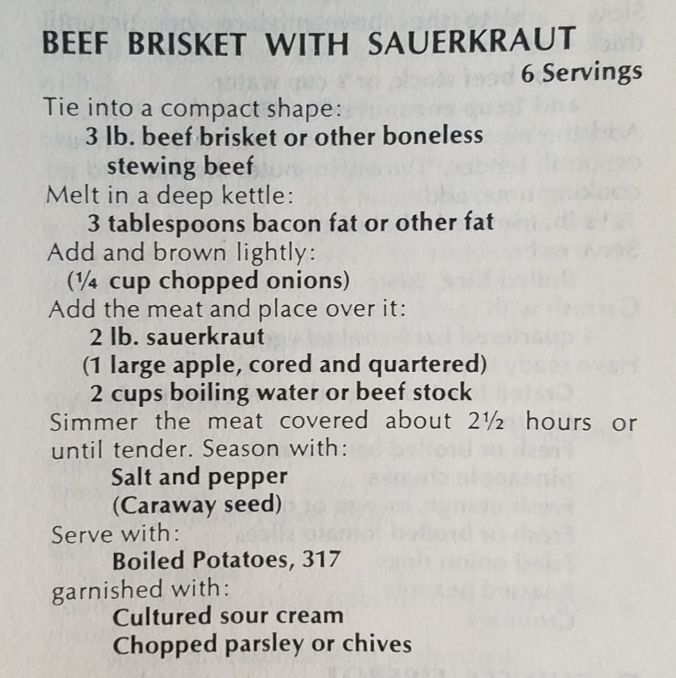
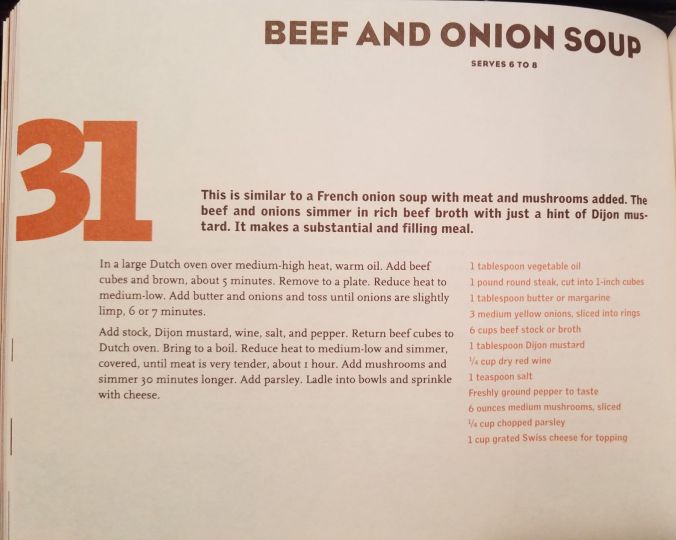
Wouldn’t you know, when I took out the SOUPS & STEWS cookbook to take a picture of it for this post, I said to myself, I bet there’s a recipe in there for onion soup. Sure thing, and not one but four recipes, including one that includes beef! Okay, not leftover pork roast with gravy, but still! You might want to try it.

recipe for beef and onion soup (2).2mp.jpg

Oh and by the way, after the meal with Mom and Jerry, I had leftovers of everything except salad. As my mother would say, at least I knew I had enough food!

_____________________________________

*Big Book of Soups & Stews by Maryana Vollstedt, Chronicle Books, 2001.

Best Brownies Ever

After making such a fuss about chocolate the other day, I thought it only right to post my favorite brownie recipe. To me they are the best brownies ever because they are not straight-up brownies. They combine the best, richest, most-perfect-brownie-texture brownie part with two other elements that set them apart: dried cranberries, with their sweetness/zing and oatmeal cookie, with its delicate crunch and isn’t-it-kind-of-good-for-you draw.

stacked.2mp.jpg

Basically you make what seems like a very small amount of oatmeal cookie dough, press it into the bottom of the pan, bake that for ten minutes while (in the meantime) preparing the chocolate part, to which you add the cranberries, pour it over the now-baked-for-ten-minutes cookie base, and bake for another 40 minutes. Done! Chocolate heaven awaits!

This is now the third blog post that expounds on a recipe found in my Williams Sonoma Cookies & Biscotti cookbook,* clearly a favorite from my library.book (2).2mp.jpg

I am old enough to have actual cookbooks on a shelf, and they are dear to me! I copied the recipe into my loose-leaf recipe binder at some point, possibly afraid I’d loan the cookbook to someone and then – horrors!! – not have the recipe on hand when nothing in the world will due except these brownies.

My version, slightly simplified (i.e. this is the way I do it). Note the five stars at the bottom!

recipe2 (2).2mp.jpg

And the book’s version (with metric equivalents, which I know is much appreciated by some of you and I’m sorry I don’t always convert…):

recipe (2).2mp.jpg

As noted above, the combined oats, brown sugar, flour, baking soda, salt and melted butter doesn’t seem like much, certainly not in the bowl, and even when you transfer it from the bowl to your buttered, foil-lined pan…

oats in pan.2mp.jpg

…but with your fingers you can spread this out to all corners. My pan, by the way, is a wonderful Kaiser springform pan that Claudia gave me years ago and is also perfect for my chocolate cheesecake. But I have not always made this recipe in this pan. An 8” or 9” square pan works just as well. The wonder of the foil lining is that you can just lift the entire thing out when it has finished baking and cooled slightly.

So here is the oat mixture spread out…

oats spread.2mp.jpg

… and here it is after the ten minutes in the oven.

browned oat base.2mp.jpg

During the ten minutes that the base is baking, you wouldn’t want to be idle of course, so that’s when you make the chocolate part. A better idea is to melt the ½ cup (one stick) of butter and the two ounces/half package unsweetened chocolate (I use this Baker’s brand) …

chocolate (3).2mp.jpg

…before you even start with the oatmeal part.

choc in pot2.2mp.jpg

Do get it all the way melted before you let it cool a bit, and then add it to the rest of the other ingredients. BTW I do not use the espresso powder as the original (note not my copied version) suggests, though you are welcome to.

The combined eggs, sugar, flour, vanilla and salt will cream together beautifully with a whisk – is there anything more basic in baking, anything more sublime? (I do this in the same bowl I mixed up the oatmeal cookie dough in. If a stray, left-behind oat happens to mix with the chocolate part, it is not the end of the world.) Then you add the melted-and-slightly-cooled chocolate/butter followed by the cranberries and bake it 40 minutes longer until it looks about like this.

baked.2mp.jpg

After ten minutes or so of cooling, I unhinged/took away the side part of the pan (or you can lift it out holding the foil) and peeled the foil back from the sides like this.

foil pulled down.2mp.jpg

I cut through it right then and there because I wanted you to see the side view.

inside layer.2mp.jpg

And then I cut it into 36 little squares. I am playing with numbers for my own benefit here, you see. If the brownies are smaller, I can have two, but if they are bigger, I will tell myself that one is enough. And you know how it is (or trust me that this is how it will be with these brownies) – you will want more!

cut.2mp.jpg

Voila! I hope you like them. And even if you don’t, for some reason I cannot fathom, your friends and family will! Being as rich and moist as they are, these brownies also travel well – I sent them on a Thursday a few weeks ago to my friend Fred in Kentucky; they arrived on Saturday and he waited till Sunday to eat them – how a person could wait, I have no idea, but that is another conversation.… He ate them with his coffee for breakfast and called them delicious 😊.

______________________________

*Some of you might recall the Lemon-Anise-Almond Biscotti and the Chocolate Chip Walnut Biscotti.

Zucchini Surprise Pie

It’s been busy around here: building an extension to the front porch (and dealing with the accompanying mess), preparing for company (another good reason to deal with the construction mess) and enjoying company (how nice to have cleaned up that mess!). With all of this activity, I go inevitably in and out through the front door a lot, meaning recently that I get to see certain precious images over and over – this is one of the notes of greeting that 6-year-old Rise made last week and taped to my front door. How can you see this and not smile??

Rise door greeting.2mp.jpg

When it’s busy I forget about things, but routine is handy for calling us back. I have a garden. I planted stuff. But it’s been so busy I’ve hardly been out there except for a quick oregano-snipping or weed-lamenting visit.

Anyone who has grown zucchini knows what a zucchini surprise is. For those who are unfamiliar with this fast-growing vegetable, it’s when you are casually checking under the leaves of your various, viney garden plants to see what’s hiding, and come upon – Oh, look at that! – a baseball bat of a zucchini that you didn’t see when you were in said garden two days earlier (!). Such a surprise was mine last week when giving a mini-tour of the garden to some recent Airbnb guests.

Carrots, beets, onions, melons, cabbages and almost all herbs will reach their optimal point of harvesting and nicely wait for you to come along and take them to the kitchen. Not zucchini. It is among the most impatient of vegetables. You don’t care enough to look for me when I am in my tender prime? Fine. I will grow bigger, bigger, bigger, past my prime, and you will have a baseball bat on your hands before long!

So, yeah, past their perfect prime were those first two zucchinis, though you couldn’t call them bats yet. I gave the smaller of the two to my guests and put the other in my fridge, after checking to make sure there were no babies hiding there too, looking to expand into zucchini monsters if I were negligent again. I gave them a few days, did remember to go check, and there found four new ones, only one of which was still prime (i.e. three were already bigger than that!).

Guess it’s time to do something with zucchini! Right about then, Claudia sent me a new zucchini pie recipe called Schafskäse Zucchini Quiche. (It’s the zucchini time of year apparently!) I was intrigued by the parmesan in the crust and the goat cheese and sunflower seeds in the mixture. (Never mind that Schafskäse means sheep’s milk cheese, not goat’s milk cheese – this is unimportant.) I asked Mom if she had sunflower seeds; she didn’t, and I didn’t want to go to the store. So in the end the recipe was simply inspiration and I created my own Zucchini Surprise Pie.

For the crust I cut ½ cup cold butter into 1/3 cup finely grated romano cheese mixed with 1 ½ cups flour and ¼ tsp salt (with my pastry blender). It looked like typical pie crust crumbs, but I knew it would have an extra special taste on account of the cheese in there.

crust crumbs.2mp.jpg

I added ¼ cup of ice cold water (you can make it cold by adding ice cubes to the water, or use water from the fridge, or take your chances that the water coming out of your faucet is cold enough). Mix this quickly (don’t overmix) till it pulls from the sides of the bowl; make a nice ball. Roll this out on a floured surface, big enough to fit your dish – I used an oval dish that’s 12×8 inches. Best way to see if the dough is the right size is by placing your dish on top, as I did (see below). If there is enough to fit in there and come up the sides, you are good to go!

crust laid out with dish on top.2mp.jpg

Fold the dough in half and gently lift it up and into the dish; unfold and drape the edges over the sides. This keeps them out of the way for now. Later, you can be fancy with a scalloped edge or just flop the excess on top.

For the mixture, start by grating your zucchini (not the smallest holes you have on your grater, and not the largest). I used about 2 ½ cups in this recipe, but if you have a little more or a little less, I don’t think it would matter. To this I added 4 eggs, 8 deli slices of genoa salami (cut up), 4 oz crumbled up (by hand) goat cheese…

goat cheese.2mp.jpg

… as well as 1 cup grated Jarlsberg (swiss) cheese, ¼ cup flour, 1 tsp salt, a few shakes of pepper, 3 fresh sage leaves (chopped) and the leaves off 2 stems of fresh thyme (which would amount to 2 teaspoons probably, hard to tell when it’s so fresh and not pressed down – again a little more or less won’t hurt anything). These are the herbs I used because they seemed good to me, and you know that Simon and Garfunkel song:

Are you going to Scarborough fair?
Parsley, sage, rosemary and thyme.
Remember me to one who lives there.
She once was a true love of mine.

What parsley, sage, rosemary and thyme have to do with the fair and the love I haven’t a clue (never did). But because of that song I always thought that any/all of these herbs could be used in a recipe that calls for one or another, that they go well together and that various combinations are acceptable. See what you learn from music?? Anyway, the fresher, the better, and mine came straight from the garden into the bowl and that makes me smile. 😊

ingredients in bowl with herbs.2mp.jpg

Right about at this point I turned on my oven so it would get hot while I finished up. I set it to 375F, then mixed all of this up and poured it into my crust. Normally you put milk or cream in a quiche but the goat cheese is so creamy, you don’t need it.

mixture in.2mp.jpg

I was not in the mood to be fancy with the edges (chomping at the bit, one might say, to go lay more deck boards on the new porch) so I flopped them over and popped it in the oven. Ovens are different and people like different levels of golden-brownness; my pie stayed in my oven about 40 minutes and looked like this.

baked.2mp.jpg

It smelled so good!! My sister was coming and I knew she would love this, but we had decided to go out to dinner – enjoyed Rhett’s River Grill which, it turns out, is relocating by the end of the year and will be waaaay closer to my house!!

So I let the zucchini pie cool, covered it with plastic before refrigerating it, and reheated it the next day at 300F for half an hour. Delish! I love the cheese in the crust too. Taking leftovers as part of a picnic lunch to the Science Museum in Richmond the next day gave us a chance to try it cold – just as good!!

Not bad for an experiment, I’d say. Thank you, Claudia, for the inspiration! Now whoever among you has too many zucchinis…

Blueberry Snacktime!

The Ben & Jerry’s Pfish Food is gone. I enjoy it sooooo much every now and then, counting it as very special, meaning I don’t make a habit of having it around because 1. Too much Ben & Jerry’s would make me a whale and 2. I don’t want to be a whale. I’m not too keen on the lowfat or calorically-modified versions of things though because mystery ingredients make me nervous. Within the range of reason, I like to know what I’m eating.

So where does that leave me when I want something like ice cream – cold, sweet and dairy – but have met my quota of fudgy fish mixed in with the richest chocolate ice cream and luscious marshmallowy goo? (Oh, for a free pass on Pfish Food!)

It leaves me with one of my all-time favorite snacks – simple as can be AND cold, sweet and dairy.

“My blueberries,” I call it. “I’m going to have my blueberries.” By this I mean I walk to my freezer, take out the package of frozen wild Maine blueberries (the tiny ones these are, and this concoction works better with the tiny ones as compared to the giant cultivated berries), pour a little maple syrup or honey over them (say, about a tablespoon), making it look like this…

blueberries2.2mp.jpg

…pour some milk over it, like this…

blueberries3.2mp.jpg

…and wait five minutes or so for the frozen hardness of the berries to seep into the liquid milk, resulting in softer berries and sweet, slushy milk, which you then mix up and eat with a spoon. Oh yum! Not too heavy, just sweet enough, and I forget all about the Pfish Food!

The berries I use are Wyman’s and you can see I got the 3-pound bag of them this last time because they were on sale. Snacks don’t have to be complicated to be very, very good!

blueberries1.2mp.jpg

What Do You Do With a Brisket?

I was in the meat section the other day and saw beef brisket at half price. Half price! I have never cooked a beef brisket before, but for half price, I can learn.

Brisket sounds old school to me, substantial, hearty. But I really wasn’t sure what to do with it. I turned to my trusted sources first: The Fanny Farmer Cookbook (12th edition), Joy of Cooking (22nd printing), and The New James Beard (first printing). You can’t go wrong with trusted sources, right? Can you tell which one I’ve used the most?

cookbooks (2).2mp.jpg

I started with Fanny of course. She will tell me, I was sure. This tried-and-true cookbook falls open to the quick breads section (so often have I made muffins, pancakes, etc!) and has a section about every kind of basic cooking and baking. Surely Fanny will at least get me started.

But no. Nothing on brisket.

James Beard is out there in a weirder realm as far as my tastes are concerned, always has been. I just don’t make roast Cornish hens or pigs’ feet or sautéed brains. But that’s precisely why I had my highest hopes with him – if I don’t make it as a rule, he probably covers it. C’mon, James. Even if you give me a twist on brisket, I can work with that. Again no. Hmmm.

All right. Joy of Cooking is probably the most comprehensive of the three, as well as the easiest to follow. Titles of recipes and “About” sections ARE IN BOLD CAPS, ingredients are in lower case bold, (optional ingredients in parentheses.) Thank you, Joy of Cooking (!) – I did find BEEF BRISKET WITH SAUERKRAUT.

recipe with sauerkraut (2).2mp.jpg

But I was not in the mood for sauerkraut. You can see, though, that Joy of Cooking added “…or other boneless stewing beef” which told me I was working with meat that would need to cook for several hours in liquid. Some meats you cook fast, some you cook slow. Stew beef I understand. Stew beef I can do.

Reminds me of a time I stood in line in the dining hall where mom lives. They had meatloaf that day, and the man in front of me – at least 80 years old I’d say – was waiting for it also. We stood in front of the posted menu that included any number of rather unconventional, one could say faddish, items/ingredients.  While the staff were running to the back to get the next meatloaf coming out of the oven (clearly it was a popular choice that evening), I said to the man, “Nothing like meatloaf.”

Clearly I gave him an opportunity to vent. “They give us all this stuff, weird stuff, food I can’t pronounce. Meatloaf… meatloaf I understand. Why can’t they just give us more meatloaf?”

I learned from Joy of Cooking that brisket was stewing beef. Now we’re getting somewhere. Next I did what any sensible person in my position in 2019 would do (but sometimes avoid because of the inundation factor) – I googled beef brisket. Pick a recipe, any recipe. Ah, here’s one that starts with sautéing onion in oil, searing the meat, adding some herbs, covering it with water and letting it cook in a slow oven for a long time. Sounds simple, but it was actually way more complicated than that, and included some other ingredients I didn’t like.

All right, forget about it. Let’s sauté onion in oil, sear the meat, add some herbs, cover it with water and let it cook in a slow oven until it’s done.

I cleaned and sliced three onions and browned them in about 2 tablespoons olive oil (always use extra virgin). I chose oregano and thyme for my herbs since they are doing well in the garden right now.

herbs in onions cooking2 (2).2mp.jpg

I removed these from the pan when the onions were soft enough to have lost their shape and looked at my piece of beef – too big for the pan as is. So I quartered it.

brisket quartered (2).2mp.jpg

I put another tablespoon or two of oil in the now-hot pan, turned up the heat to almost high, and let each side sizzle in the hot oil for a few minutes until nicely browned. I noticed when I stuck my large cooking fork into each piece (to put it in the pan or pull it from the bottom to turn it to another side) that the fork did not go in easily. Having to jam it in there told me that this meat would require a long cook time to get tender. Stewing beef it is.

brisket seared (2).2mp.jpg

Three choices for the slow cooking part of this experiment stood before me: stovetop, crockpot or oven. It would have been easiest (and less clean-up) to just put the onions/herbs and water right in this pot, cover it and let it cook slowly. But it was a hot day and I didn’t want a flame on for hours. Using my crock pot seemed a good alternative, but it is not very big. But by the time I put the everything in, it was nearly overflowing. Not a good plan.

Oh, this might be a good occasion for the Lodge cast iron Dutch oven! I retrieved it from its home on top of the fridge in the basement, and everything fit nicely. Besides the meat, sautéed onions/herbs and water (enough to just cover the meat), I added salt and pepper of course, a moderate sprinkling (you can always add more later if you want). I covered the pot, put it in the oven, turned the temp to 325F, shut the door and walked away.

The aroma of the slowly cooking beef in the house all afternoon would have been reward enough, but the taste of the broth was heavenly and the fork went into that meat like nothing after four hours (during which time I might have basted the meat or in some other way tended it, but didn’t, must have been busy elsewhere). Success!

brisket cooked.2mp.jpg

Notice the liquid cooked way down, concentrating the flavors and softening the meat. I can (you can!) do something with a brisket. This works – it’s simple and delicious. Your call to decide about adding roasted potatoes or spaetzle or whatever side dish would gladly share the savory juices. I am quite pleased about it. Next time you see a half-price brisket, go for it!

Best Beet Salad

In our family you get to say what you want for your birthday dinner. The process starts about a week before the birthday with me saying, “So, what do you want for your birthday dinner?” A few days later, when I ask again, I get an answer and proceed. This year, along with herbed salmon (a recipe I got twenty years ago and have made countless times since) and mushroom risotto (which I have never made because I am not fond of mushrooms), he asked for beet salad.

My mom made beet salad when I was a kid. In retrospect I see it was one of those salads you can make without having anything fresh in the fridge. If you want, you can open a can of whole beets, drain and grate them, add the dressing (oil, vinegar, salt, pepper and dried oregano, see below) and serve. But if you want it best, use fresh beets and fresh oregano.

finished beet salad.2mp.jpg

The ones I got were about as big as baseballs. I have not found a difference in flavor – big beets vs. small beets – so get what looks fresh. Look at the greens. If the greens look fresh, as in not wilting, the beets (which look the same regardless) are fresh. I cut the greens off (for chickens in my case, though some people would cook them separately) and put them in a pot.

clean in pot.2mp.jpg

Notice how clear the water is. This does not last long. As soon as they start cooking, the water will get pink/red. Turn on the flame, bring to a boil, then turn down and let simmer. Cook the beets until you can put a knife into them easily, which could be 20 minutes and could be 40, depending on the size of the beets. Mine took 40. I was doing other things so just turned the flame off when they were done and walked away. An hour or so later, Samuel said Hey, look at the rings in the water.

rings.2mp.jpg

If anyone knows what that is, I’d be curious. I don’t think it’s bad. We all ate the salad yesterday and live to tell about it.

When you are ready, drain the beets and fill your pot again with cold water. If you have let some time go by, all the better because you handle these with your hands and if they are cooler, you will have an easier time of it. (If you are pressed for time and the beets are hot, you can do the job of getting the skins off while holding the beet under cold running water.)

Your thumbs are the best tool in the kitchen for this job. You can use a knife, but you will forfeit part of the beet. With your thumbs, exert pressure and push, slightly to the side. The skin should pop off. If you dunk the beet in the water now and then to give the sloughed-off skin a place to go (it likes to swim in the red water of the pot), you can see your progress more easily. You will need a knife for stubborn parts and for the end that the greens had been attached to. Beets are generally loath to give up all their skin without some resistance, a good reminder to us all, right? Don’t be a total pushover.

peeling skin.2mp.jpg

Now notice that my hand is clean in the photo above. Duh, you say, of course you would work with clean hands. Yes, I work with clean hands. But this was the first beet. Remember how the water in the pot became red? So will your hands become red, which is actually kind of cool if it doesn’t gross you out.

beet hand.2mp.jpg

Which is to say – and this is a warning – do not wear that new white shirt you have, nor anything you might be sorry you splashed beet juice on. Wearing an apron when working with beets is a good idea. You could stain wood with beet juice.

Now don’t worry. Your hands will wash clean soon afterwards. The white shirt I can’t promise anything about.

When all the beets are skinless, rinse your hands and get out your grater. Here’s mine that I love (and my mother hates for reasons I will never understand). It’s a perfectly fine grater and whatever you grate ends up in the container below.

beets and grater.2mp.jpg

Next, if you are fortunate to have fresh oregano in your garden…

oregano.2mp.jpg

… go get eight to ten stems, take the leaves off and chop it up fine. That’s what I needed for the about 8 cups of beets I had for my salad. Remember it was Samuel’s birthday, meaning there would be extra people for dinner, and beet salad keeps very well in the fridge (wide-mouth mason jars are perfect for storage), so I like making a big bowlful. I had a full quart leftover.

Add the chopped up, fresh oregano to your grated beets as well as a small onion, chopped fine. It doesn’t matter if you use red onion or white onion. You will not be able to find the onion in the salad once the beet juice stains it red anyway. If you are partial to the flavor of onion, you can add more onion. No one will get in your way. In the rare, practically unthinkable instance that you don’t have any onion in the house, carry on without it. The oregano is what makes the difference in this dressing. If you don’t have fresh oregano, use dried. I would use one full teaspoon per four cups of grated beets.

The rest is simple: olive oil (extra virgin is best), apple cider vinegar, salt and pepper.

The basic proportion of oil to vinegar in this salad is almost 1:1 but not quite. Use somewhat more oil than vinegar. Per four cups of grated beets, use 1/3 cup oil and ¼ cup vinegar. Salt and pepper to taste. It’s yummy at room temperature or chilled. It’s yummy as a side dish or a snack. It’s yummy!

Old-Fashioned Beef Stew and Biscuits

Sometimes, when it’s damp or raining or even just overcast and cool — and even April days can be like this — you just want a bowl of something hale and hearty like beef stew. When you complement the rich broth, tender meat and delicious vegetables with flaky biscuits, you have a winner of a meal. And neither one is hard to make!

I would start with the stew because you can make the biscuits later while the stew is stewing. This version has beef, carrots, potatoes and edamame (soy beans that taste kinda like lima beans). I always feel better if a stew has some green in it, and the package of edamame was the first thing I saw when I opened the freezer, so that’s what went in the stew!

in bowl.jpg

Peas would work too, or green beans, or lima beans, or any other green you want.

Or no green. You are free to add no green. That’s what I love about cooking. You make it the way you like it.

Naturally, though, you start with an onion – everything is better started with an onion. Well, maybe not everything. But in this case onion is good, and I added a can of petite diced tomatoes besides. That’s a fairly new ingredient for me, but I keep doing it, so it must be good.

Put a couple tablespoons of olive oil in a Dutch oven over a medium flame and add one chopped onion. It doesn’t matter how big the onion is or how small you chop the pieces, but the bigger the onion, the more onion flavor your stew will have, and the bigger the onion pieces, the more you will see them once it is cooked. Some people don’t want to see their onion; I cannot explain this.

I used about two pounds of  bottom round beef. This is going to cook for several hours, so it does not need to be a prime, expensive cut. You can buy it as a roast and cut it up yourself, or you can buy it already cut up as “stew beef.” Obviously, you decide how much meat you want in proportion to the rest of the ingredients. If you want it mostly meat, then add just a few vegetables. If you want the meat to be a background ingredient, then load on the veggies.

meat in pan.jpg

Let the meat cook on a medium flame until it has browned. It will make some juice of its own, like this…

browned meat.jpg

but you want it to simmer for a while in liquid, so add enough water so that the meat is almost covered. Cook on a low flame, covered, for about an hour and a quarter. An hour and a half won’t hurt anything. Then add your veggies. I peeled and cut up five big carrots and three big potatoes. Let that simmer, covered, again with enough water that the veggies are almost covered (a little more than in the photo below, remembering that if you decide to add tomatoes later, they add liquid too). 

(By the way, this works really well with pearl barley instead of the potatoes, but you will need more liquid.)

carrots and potatoes added and mixed.jpg

I let the carrots and potatoes cook about another 45 minutes. During this time I prepared the biscuits and put them in the oven, then added my frozen green vegetable, the can of diced tomatoes and my flavorings – salt and pepper (to taste) and whatever else appeals to you. This time I used about a tablespoon each of dried basil and parsley and a teaspoon of oregano. The time it takes for the biscuits to bake is about how long the green veggie needs to soften a bit. I never want my green too mushy. If you want yours mushy, add them sooner. Turn up the flame a bit — adding frozen anything to this pot will lower its overall temperature, and you do need the green stuff to cook a few minutes, not just warm through.

You can also add the herbs sooner. A case could be made for that.

with edemame.jpg

The biscuit recipe I use comes out of my old Fannie Farmer cookbook. I do it a little differently though. First of all, I use butter, not vegetable shortening. Goodness! I use six tablespoons of butter. And I use buttermilk (or milk with a teaspoon of vinegar added) instead of the plain milk. (I don’t mean I follow what it says below for “Buttermilk Biscuits” though I expect that would work too. I just mean I use buttermilk instead of the plain milk.) Also I definitely don’t knead it 14 times. I handle it only as much as necessary to make a flattened dough. And I make mine 1″, not 1/2″ high.

I guess I change it more than I realized…

recipe2cr.jpg


The dough is one of those you can’t play with too much or your biscuits will be tough. Mix all the dry ingredients with the butter, get that all looking like “coarse crumbs” before you add the milk.

biscuits pre milk.jpg


Then add the milk and stir just enough to combine.

dough mixed barely.jpg


What’s in the bowl doesn’t look like a ball, but it comes out in one blob, so turn it out onto a floured board, sprinkle a little flour on it and flatten it to about an inch thickness. You can flatten it with your hands or a rolling pin. I like the irregularity of using my hands. I don’t want them perfect. These are not Pillsbury, not manufactured, not factory-made. I love them looking homemade. That’s good.

dough flattened.jpg


To cut them up I use a cutter from a set Kim gave me years ago. I love being able to pick the size that seems best that day. Sometimes you feel like a big biscuit. Sometimes you don’t.

cutters tin.jpg


Thank you, Kim. I chose the fifth from the center this time. It helps if you dip the cutter in your flour canister — just coat the edges with a little flour — so it doesn’t stick to the dough as much when you cut through.

If you don’t have a biscuit cutter, you can use an upside down drinking glass or a jar. Or any cookie cutter with high sides. You can make stars or dog bones or hearts or anything you want.

cutting biscuits.jpg

When I have cut as many as I can, I gently bring together the remaining dough and cut a couple more. Then with the bit leftover I make a ball and stick it on the pan. Waste not. Someone will eat it.

Bake them for 15-20 minutes until they are as brown as you like them. See what I mean about them looking homemade? I think they have character 🙂

baked.jpg

By the way, this stew will taste even better the second day, so it there’s leftovers, all the better.

Maple-Rosemary Pairing

Every now and then I get a hankering for French toast. Visions of warm maple syrup tempt me more than usual right now because I know the sap of maple trees is running well (nights cold enough, days warm enough, correct differential). Plus, I had some bread that was two days old.

In the bakery section of my grocery store (and I don’t mean the bread-in-plastic-bags aisle) they sell a variety of in-store baked bread. I’m not naïve enough to believe that they mix up the dough there, but at least they bake it there, so it’s fresher, sometimes even still warm. You find a decent rye with caraway seeds, a crusty multigrain loaf and a lovely “country” white made with rosemary and olive oil.

Lightly toast a slice or two of that rosemary bread and top it with butter and honey – that’s some good eating! So on Saturday I said to myself: Why not French toast? Fairly thick (just under one inch) slices soaked in the egg-milk mixture, browned in butter and topped with maple syrup – hmmm, using the rosemary bread for this just might work. So I tried it.

rosemary french toast cr.jpg

I love how the pieces puff up as the egg inside them cooks. I love the crispiness formed (especially on the edges) by the hot butter coming in contact with the soaked bread. I love warm, pure syrup dripped over top and then soaking into the soft inners.

Any meal, any occasion, any success, any failure happens because of the confluence of numerous factors, a specific alignment of the figurative stars. This specific breakfast is no different. For it to happen included 1. having this kind of bread on hand, 2. knowing how to turn bread into French toast and 3. being willing to experiment.

Let’s start with the bread. Somewhere along the line it occurred to someone to put jalapenos in pickles, sugar on corn flakes, barbeque flavoring on potato chips. Why not rosemary in bread? Who can doubt that Simon & Garfunkel’s Parsley, Sage, Rosemary & Thyme helped bring all these wonderful herbs into kitchens they had previously not entered, introducing a generation to flavors and aromas that enhance many foods? I’m not sure which is better in bread – kalamata olives or fresh rosemary – but I’ll take either on any day. If there is honey in the cabinet for drizzling on top, I am in heaven.

French toast is such a simple meal to prepare – I should make it more often. For the five pieces you see in the pan above, plus the two in a second pan (no point squishing French toast), I used four large eggs (my good eggs, which undoubtedly contributed to the amazing result) whisked up with half a cup of milk. This was a bit much – three would have done – but I took the extra egg mixture and carefully poured it onto each slice after I put them into the pan but before I flipped them, which maybe added to the puffiness. Oh, and I used about two tablespoons of butter in the large pan and one in the smaller and cooked them over a medium flame. Get the butter hot before you put the soaked bread in the pan.

The being willing to experiment part is, for me, both limited and expanding: Limited because I know what I like and what I don’t like (so I outright refuse to consider certain things like jalapenos, sorry to say), but expanding because 1. My experience over time has accumulated in a mysterious and wonderful way. New combinations occur to me that never would have. A new method I never used pops in my head for something I’ve made many times. It’s super cool! And 2. Let us always, at least in some benign thing, remain unpredictable. Life is just more fun 😊

Some of the world’s best things came about by similar alignment of stars, i.e. having/doing a thing routinely over time and then a need or a change or an idea turns it into a version of the original by way of experimentation. Ice cream cones come to mind. New Yorker Italo Marchiony sold ice cream off a pushcart to Wall Street customers looking for a quick snack. He served it in little (let’s assume fairly inexpensive) glass cups, but too often these either broke from being dropped or were not returned to him. He came up with an edible cup and was awarded the patent in 1903 for his ten-at-a-time cone-making mold. At the 1904 Louisiana Purchase Exposition his cones were so popular he still couldn’t keep up with demand, so he reached out to fellow exhibitor Ernest Hamwi, who was selling a thin, waffle-like Syrian cookie. The cookies, molded while still warm, made great impromptu cones.

Oh, yum! Never mind French toast – who wants an ice cream cone??!!

The Journey Part of Journey Cake

My mom had surgery two days ago, vertebrae-fusing back surgery that went very well (she was walking within four hours!). I wanted to bring her some breakfast yesterday. We all have our go-to recipes, right? Quick, easy, tried and true? One of mine is Johnny Cake, also known as Cornbread, also known historically as Journey Cake. I love my recipe. Last summer I added fresh summer sweet corn sliced right off the cob and made it into “corn muffins at their best.”

This morning I wanted to make it in my cast iron pan instead. The crust comes out so well this way. If you look carefully, you can see the steam rising from this piece I cut for my own breakfast.

johnny cake (2)

Some things you stop seeing after a while, but when I looked at the recipe, I realized anew that it is called Johnny Cake. That’s how I knew it as a child. “Corn Bread” is parenthetical.

recipe cropped_LI

Somewhere along the line, “Journey Cake” morphed into “Johnny Cake.

I’m glad it did. No way could my version rightly be called or even thought of as a cake you could make on a journey. Think covered wagon journey. Think doing-the-best-we-can-with-limited-supplies. On such a journey (at least in my 21st-century imagination) the chances of having flour, cornmeal, baking powder, salt, eggs, milk, butter AND maple syrup at the same time, to say nothing of the proper pans and cooking fire/oven, seem super slim. Maybe they had a cow tied to the wagon (they would need her when they arrived in Oregon); maybe they had some laying hens, though I expect those became dinner when wild game was hard to find. But baking powder, maple syrup, white flour – no way. I expect they felt right grateful to have cornmeal, water (maybe milk), some salt and a little fat for frying the cakes (think cornmeal pancakes).

I for one am very glad to have all the ingredients at my fingertips.

I get to:

1. soften the butter in the microwave to the perfect melted-but-not-hot stage (30 seconds, then work the back of a spoon against any parts remotely still solid);

butter in bowl cr

2. put the pan in the preheating oven with a pat of butter in it, let the butter melt, then tilt the pan this way and that to evenly distribute the hot, melted butter and feel the solidity of the pan, watch the different paths the butter takes, admire the ways the light glistens. (We all have our thrills, okay?)

butter in pan2.jpg

3. look at the eight ingredients in a bowl, as yet unmixed, and anticipate their utter transformation;

ingredients in bowl.jpg

4. blob the batter into the pan and think about what happens to it in the heat, how the batter finds the corners and changes consistency during baking (I do smooth it out a bit before putting it in the oven);

batter in pan

5. enjoy the lovely crust, buttery because of the butter I melted in the pan and as dark as I choose to let it become.

johnny cake in pan

Step by step a thing takes form, simply becomes. It doesn’t matter if it’s the cornbread I’ve made for years or the Ligurian Lemon Cake I found on a found on a fellow blogger’s site recently (doesn’t that look good?!). It doesn’t matter if it’s a friendship or a project. Step by step we walk our unboring paths, touching and serving one another in ways we know and in ways we don’t know.

There were numerous high points with yesterday’s breakfast, including softening the butter, tilting the pan, blobbing the batter. Another was the steaming piece on my plate, fresh out of the oven, drizzled with honey. The best was packing up a basket to take with me to Mom at the hospital. Other people bring flowers – daffodils, begonias and a sweet pink rose adorn her room – but I bring food. How many chances like this do you get? To bring someone a piece of comfort, a taste of home?

I wish the person who wove my pie basket could see how its size and shape were perfect for a large square of my Johnny Cake/Journey Cake/Corn Bread (whatever you want to call it), a wedge of quiche, a couple of real and pretty plates, silverware wrapped in soft napkins, butter in a little dish, jam in a jar and a small cotton towel to serve as a tablecloth. “I feel like I’m in a hotel,” Mom said. My local hospital is great, but they have their limitations 😊.

For me, the journey part of Journey Cake – the journey part of anything – is the fascinating (if at times difficult and maddening) step-by-step that we experience every day.  Any journey has something (or someone) about it that’s wondrous or intriguing or funny or satisfying or lovely. I do not want to overlook that something. The process gets you – if we may borrow images from our pioneer forebears – down the next path, across the next river, over the next mountain. I want to go today where I haven’t been before, do things I couldn’t do yesterday, learn something new, see something in a fresh way. I also want to relish the familiar, embrace those I love, hold onto what matters. Yesterday I got to bake something I’ve baked a thousand times before, enjoy the process, present it in a different setting and watch it work its same old magic – oh, yay and oh, yum!!

Mom is in the hospital after back surgery. She’s not overly comfortable but is facing the mountain in front of her like the champ she is. Each little part of her journey, each big challenge and each little victory, makes her stronger in some way, better equipped for the next step. Whatever I can do, each tiny way I get to serve her – these become steps in my journey, the very journey that I will one day walk through in my memory, like a movie of my life. I want to enjoy the show!

Yummy Yammy Cheesy Galette

When you first come home from having been away for a week, there’s not much in the fridge. But I did not feel like going shopping yesterday or today, and anyway I was playing tennis this morning, then flipping the cottage, then waiting for guests to arrive – honeymooners(!), repeat visitors Sally and Ryan – how wonderful to see them again!! I was wrapped up in Sarah’s book for many hours as well (while waiting for Sally and Ryan), so it was after 6pm by the time I thought about dinner. Earlier I had taken a chicken out of the freezer, thinking to roast it, thinking we haven’t had one with a teriyaki sauce in a while and that might be nice, but it was too late for that. Maybe tomorrow.

Hmmm, very limited choices then. I could always make mac and cheese but didn’t feel like that either. I said to Samuel, “Can you make a dough?” He is good at making dough even if he would rather amuse us by hemming Coco in with pillows and blankets on the couch, from which she did not care to move so we concluded that she liked it.

Coco.jpg

By “dough” he knew I meant a pizza dough. I knew we didn’t have any mozzarella so a conventional pizza was out of the question, but my daughter Marie has a recipe for a savory galette that came into my mind. Only it’s been five months or so since I made it at her house and couldn’t remember it well.

I remembered her recipe started with a pizza-crust-type crust. Thus the dough I asked Samuel to make.

I remembered it had butternut squash, but I didn’t know I had one/forgot I had one/didn’t see the one I had till I was all done. But I knew I had yams. That would work.

I remembered it had fresh sage. I knew I didn’t have that, but I do (always) have dried sage.

I remembered it had fontina cheese. I knew I didn’t have that, but I did (miraculously, considering how nearly-empty my cheese bin is right now) have asiago. That would work.

I knew it didn’t have ricotta cheese on it, but I had some of that, and thought it might be good to include.

It might have been good to look up Marie’s recipe then and there but I didn’t (or I would have added more onions).

Samuel made the dough, a regular pizza dough. He grated a big chunk of asiago. I cut up two big sweet potatoes (a.k.a. yams) into small cubes and put them in my cast iron skillet in butter and a bit of water over a medium flame to roast (forgetting that Marie’s recipe calls for the squash to be oven-roasted), then remembered the half onion sitting in my fridge and something in me said Add the onion to the roasting yams. I sliced it up thinly, added it to the yams in the pan and covered the pan till the yams were soft, stirring them once or twice with a good spatula; they were done in about ten minutes.

Samuel rolled out the dough, I put olive oil on it and spread it all over the surface with my hand (just enough to cover the surface, not enough to pool). He then salted and peppered the surface. I put small dollops of ricotta cheese on next, using teaspoons to push grape-sized blobs onto the dough (you see the white blobs?), reasonably spaced. Cooked yam cubes and onion slices went on next (well distributed of course), then some dried sage, then the asiago.

yammy galette cropped.jpg

Into a hot (450F) oven the two galettes went for a good half hour until the crust was nice and brown. It was totally delicious. The combination of cheeses with yams with the sage and onion – oh, yummy! Did I need two pieces?? I enjoyed two pieces! And the crust this time! The crust was especially good. We think it might be because Sandy bought King Arthur bread flour last time I was out of flour, which has more protein, which is supposed to make a better crust. We agree it is better. If you can, buy this kind of flour for your crust.

cooked yammy galette.jpg

After we chowed down on this delicious stuff while enjoying Iron Man 2, I found Marie’s recipe, which I will happily share because 1. It has actual measurements and 2. It serves as a springboard to my altered version. You will see that the “pastry” for Marie’s Butternut Squash and Carmelized Onion Galette is not a pizza dough. I guess I forgot that too. There are various ways I veered from this recipe. But the basic idea is quite the same.

butternut squash and carmelized onion galette cropped.jpg

It all goes to show that you can look and see what’s in your fridge and maybe not have to go to the store in order to make something yummy for dinner!