Late in the afternoon yesterday I went to visit my friend Hank Browne. First thing (after hello) I said was, “I have a little something for you. These are my homemade cheese crackers,” and I handed him a little baggie full. Never having had these crackers before, he said, “Now why would you make these when you could just buy a box?” I said, “You try them and then talk to me.”
This is the photo of Hank that we used on the end flap of the jacket of his book.* I love the fact that he is actually holding a bagel in this photo but we cropped it out.

Sometime after I left him with my crackers, I texted him and said, “I need to know what you think of my crackers.” He said simply, “You are my cracker maker.” I think he liked them.
Last week my mom called me to ask for “the cracker recipe.” She did not have to tell me which cracker recipe because only one matters in my world at the moment. There’s a reason you stick with a recipe. It works and it’s wonderful! Imagine sharing /savoring/devouring some of your favorite cheese alongside homemade crackers – these homemade crackers.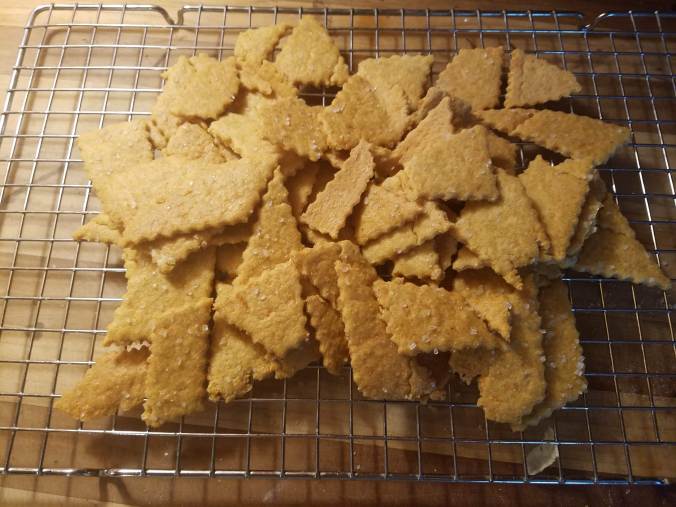
These crackers have texture, flavor and the possibility of crazy shapes if you are so inclined. They can take cheddar (Cabot if you please), parmesan, Monterey Jack or just about any hard or semi-hard cheese. I think asiago would be great. Jarlsberg even.
About two years ago I wrote about these same crackers, but at the time I thought it was enough to present the recipe and show what they looked like finished. See how much I’ve learned in two years? Lots of pictures are good! Here we go. Still, we will start with the recipe. It’s from the King Arthur Flour 200th Anniversary cookbook. Back in the day I thought it was very cool that I got one of their first-run, limited-edition 3-ring binders.
All you need on this page is the list of ingredients, but feel free (later) to compare their instructions with mine. I don’t even look at the instructions any more. Oh, wait. Perhaps I had better check!

That’s right. They wanted you to roll out the dough on a floured surface and then transfer the crackers one by one to the baking pan. I did that for a long time. Terribly time-consuming, and as you might have guessed, I have other things to do. So a few years ago I came up with a waxed paper method I will show you, and just yesterday (lucky you!) I realized an even better way to get the rolled-out dough to the pan. I can’t believe I didn’t think of this before!
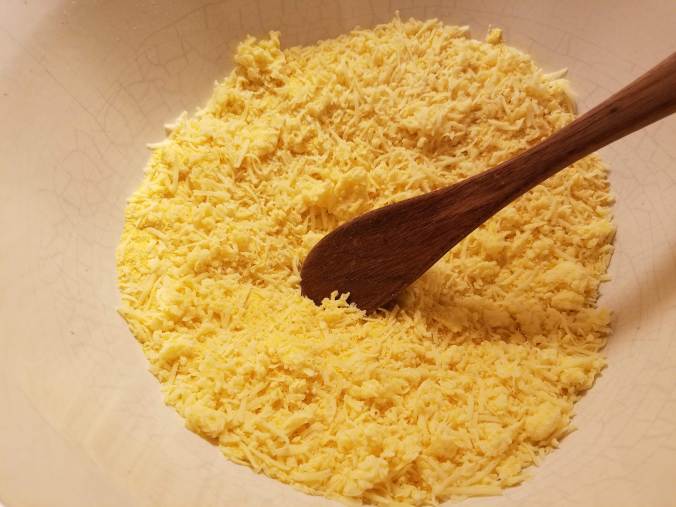
First, grate your cheese. Use the finest hole of the grater you have. This is mine that I got in IKEA years ago. I like it because 1. It has its own bowl that the cheese falls into and 2. it has a second top with bigger holes that I use at other times for other things. My sister Lynn has the same one and she loves hers too. But my mom never liked hers and gave it away. To each her own.

Of course if you are using parmesan or romano cheese and it came already grated, you are good to go on that point. I chose cheddar this time because Cabot was on sale this past week and I bought four of the Seriously Sharp bricks, maybe five.
Also, I tripled the recipe because I know how these disappear. If I am going to go through this process and make something that doesn’t go bad in three days (not that they will last three days even tripled!), I might as well make enough to last a while and be able to give some away. You want to share this kind of love.
Put your cheese in a large bowl and mix in the cornmeal. I happened to have yellow cornmeal but you can get white also. The one I had in the house yesterday is also a somewhat coarser texture than I have had in the past, but it doesn’t matter unless you care about them being a finer texture in the end. They are good either way.
Naturally your cheese is a little moist, so mixing the cornmeal into it first helps keep the cheese from clumping. We don’t want clumps.
Next add the flour. This additionally de-clumps.
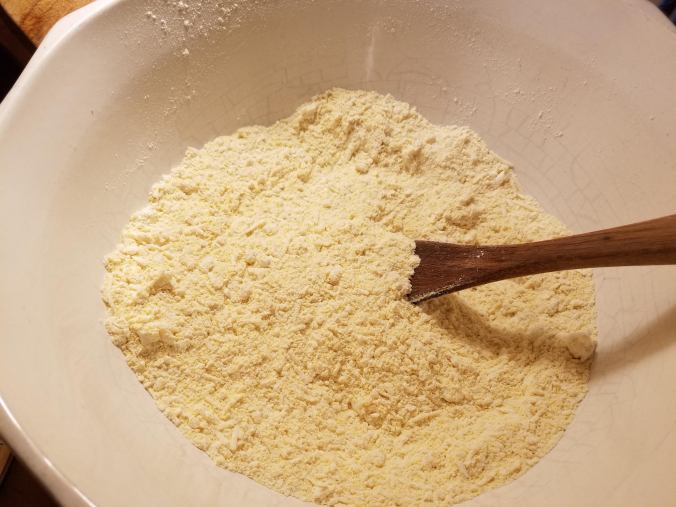
Add the rest of the dry ingredients (i.e. everything else except the eggs, oil and water). Mix in. I did not add the Dijon as suggested in the recipe, but I’m sure it’s good.
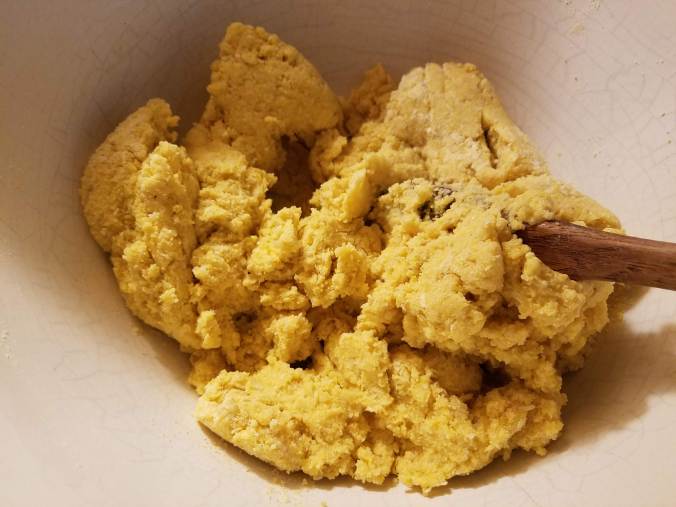
The recipe says to mix the eggs, oil and water together separately and then add it to the dry ingredients. You can do this if you want but it works just as well for me to break the eggs right in the bowl and then pour the oil and water in and stir it all up. Two things: 1. If you are worried about shells getting in your crackers (you don’t want shells), break the eggs in a separate small bowl and pour them in, and if you are going to do that, you might as well beat them up right then with the oil and water before adding to the big bowl. I did not worry about shells because my hens are making good strong shells. Your call. 2. I always use extra virgin olive oil (EVOO, as the pros call it).

This mixture looks so yellow because of the yellow cornmeal as well as the very yellow yolks my hens are making. Yours might not look this yellow.
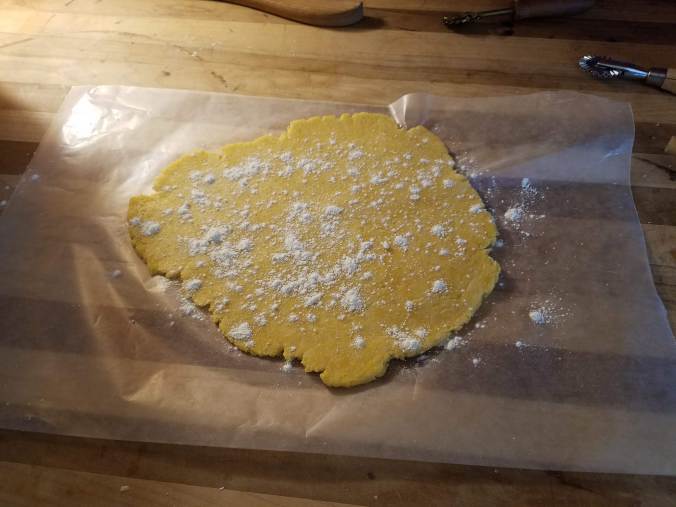
Here is what they dough looks like with all ingredients mixed together. You don’t want it gooky, but it should hold together. If your dough doesn’t hold together nicely or seems too dry, you can add a little water to it. But don’t make it gooky.
Now the fun part.
I did the rolling out part three ways. You can choose which way seems best to you.
- Between two sheets of waxed paper
- On one sheet of waxed paper with flour on top of the dough
- Between a sheet of parchment paper and a piece of waxed paper
All of these methods allow you to transfer a full pan’s worth of crackers to the pan all at once. The two-sheets method is what I discovered a few years ago. It has the advantage of being less messy than the old floured-surface method but the bottom sheet can wrinkle a bit. I’ll show you.
Take about as much dough as comfortably fits in your hands mold it to a flat ball or oval and put it on the paper.
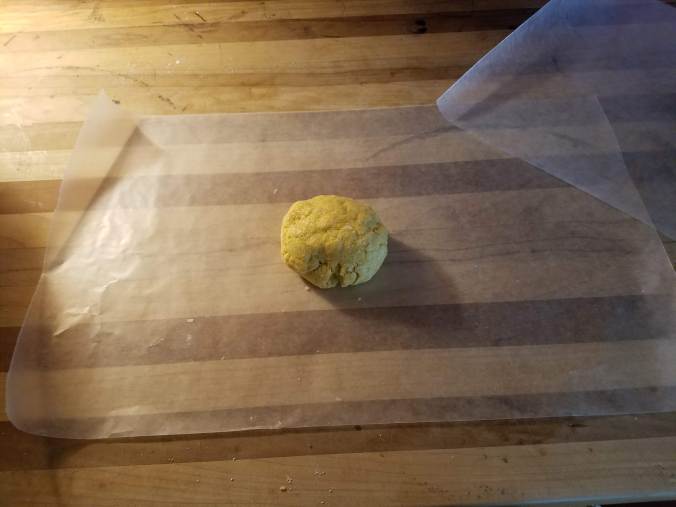
Put the second sheet on top and smoosh it a bit.

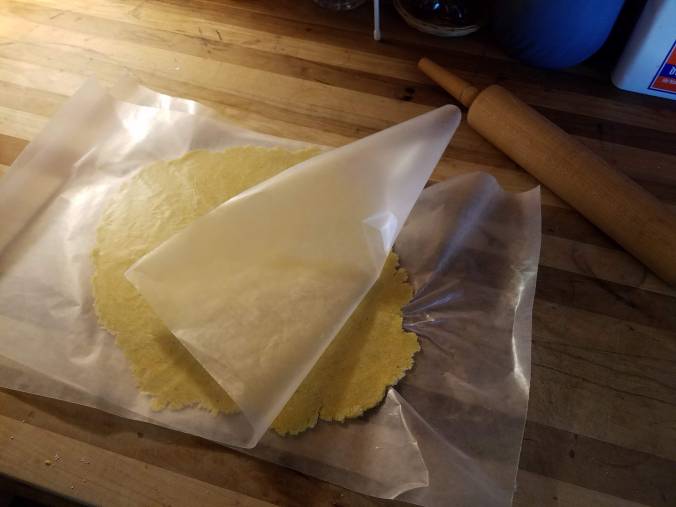
Now use your rolling pin to roll it out. See, no messy floured surface. If you are careful you can re-use the paper for the next ball of dough.

Keep rolling until your dough is about 1/8-inch thick. Remove the top sheet and flip the whole thing onto your silicone-mat-lined baking sheet. If you don’t have a silicone mat, grease the pan.
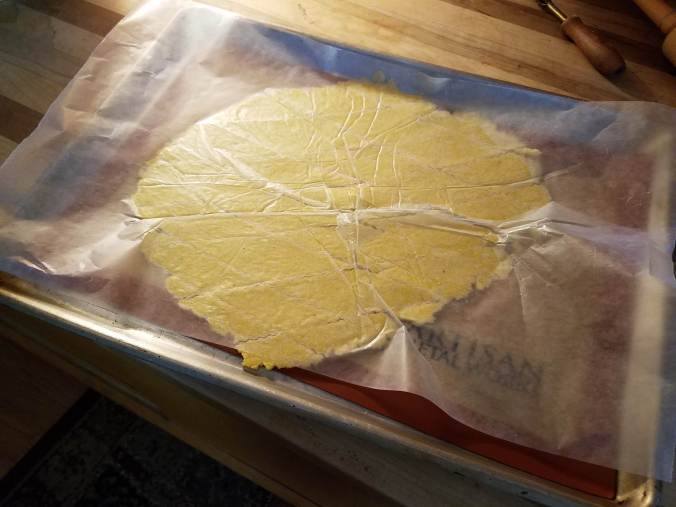
The first time I did this, I cut the cracker shapes first, then flipped it. You should not cut on a silicone mat. In the end I found a better way, but this way first.
I removed the top sheet and cut the shapes I wanted. The tool I have is called a Raedle, which is basically a wheel with a zig-zag edge connected to a handle. The one that says Grand.. on it was my grandma’s. It has been used a lot over the years, thus the chipped off name. The other pictured here I found in an antiques shop near me called A&W and had to decide which of my children to give it to. I settled on Samuel because he made these crackers for me some years ago when I was writing my book. Batch after batch sustained me through that project and I’ll never forget his kind service to me. This one is a beauty. If you find one at an antique shop, buy it. If you don’t have one, a pizza cutter works fine.

The dough sticks to the paper which makes the flip possible, but do you see how the paper can get a bit wrinkly? This happened as I continued to roll out the dough to the thinness I wanted. It does not affect the crackers, but maybe that bothers you.
The bottom sheet may wrinkle less if, on top, you use flour instead of another sheet, but either way the wrinkling is not a big deal. Using waxed paper also means you have to be able to flip the paper on to the pan as I will show you. If you are shy of flipping, use the parchment. You can bake right on it. I’ll show you that later.
For now, this is the flipped waxed paper on the pan.
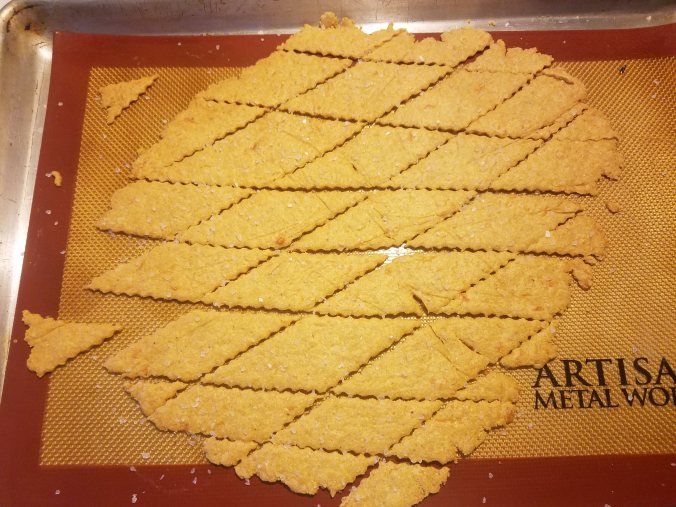
Little by little I carefully peeled what is now the top paper away.
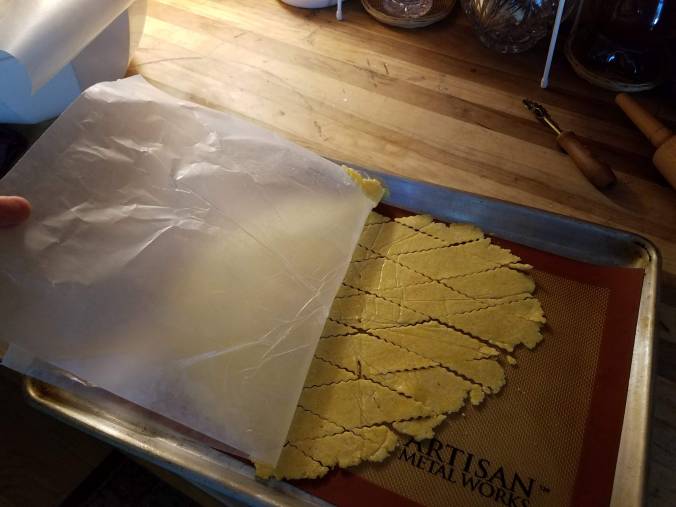
There are always a few stragglers that don’t want to stay with their fellows. See that one at the top? Every crowd has a few renegades. Just put them where you want.

Brush water on the dough before you salt the crackers. I couldn’t find my little brush so I dipped my hands in a little bowl of water and used my fingers to wet the dough – just enough to make the salt stick. Use coarse salt.
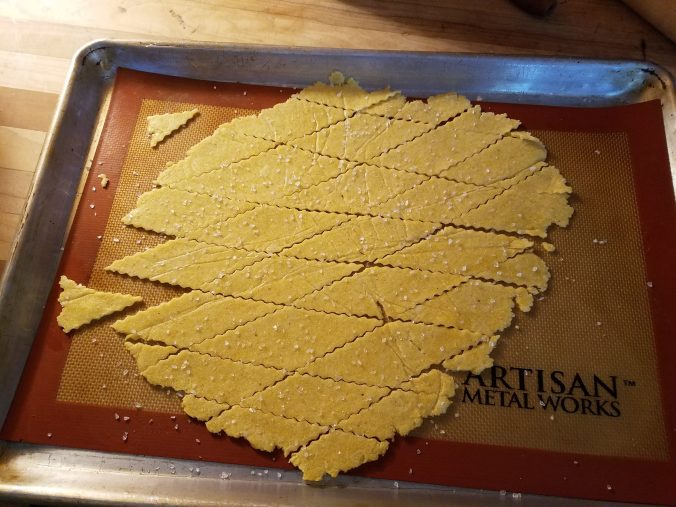
And into a 400-degree oven they go. The original recipe says 375, but 400 works for me. You bake these until they are as dark as you like them. I love them a little darker but was in rather a hurry yesterday so these are not as dark as I would normally make them. Still good though!
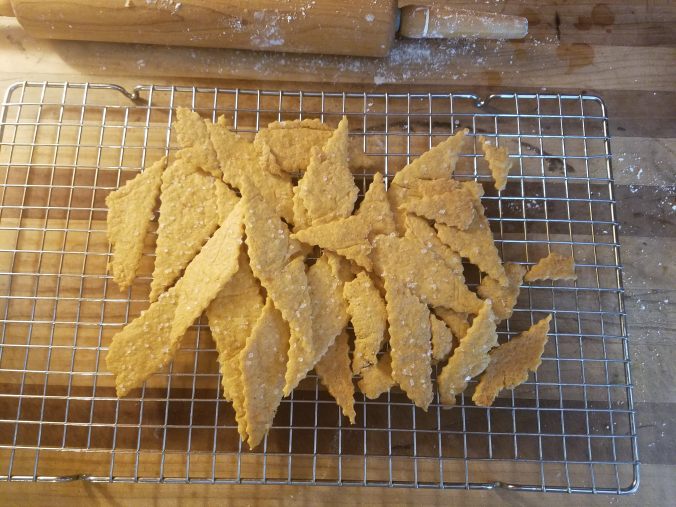
Transfer them to a rack to cool. Try one or two. Stop if you can. Oh yum.
Now back to the other rolling-out methods. First, one sheet of waxed paper only. Put flour on top, rub your fingers over it to smooth out the flour a bit and then roll the dough out.
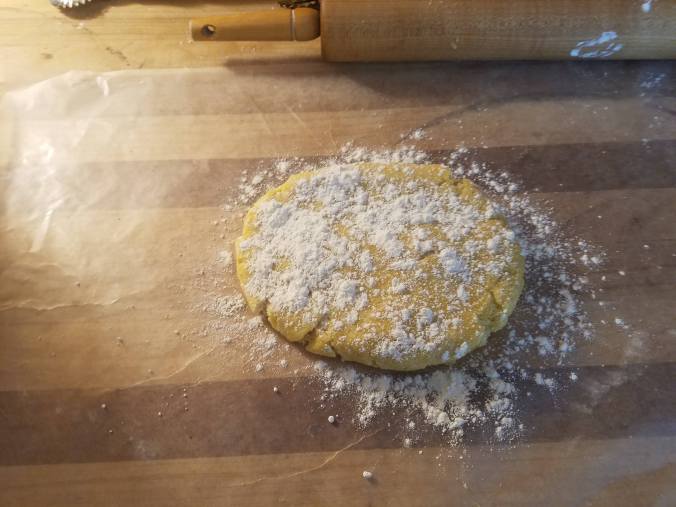
You might need to keep adding a bit of flour until you get to full size and desired thinness.
This method still requires you to flip the paper onto the pan. I found that cutting the cracker shapes before flipping made it trickier, and I know you should not cut on the silicone mat for fear of damaging it but I decided to take the chance. I flipped the uncut dough, removed the paper, then used the Raedle gently. It’s easier and I managed to not damage my mat, but then I remembered parchment paper. That’s the ticket!
Cut a piece of parchment paper that will fit your pan, roll out the dough either with waxed paper on top or with flour on top. This shows waxed paper on top.

Then simply slide this paper onto your pan. No risky flipping. No pre-cutting of shapes. No worry about mat damage.
This is the parchment slid onto my pan, which you can’t see because I cut the paper too big.

So I trimmed the paper.
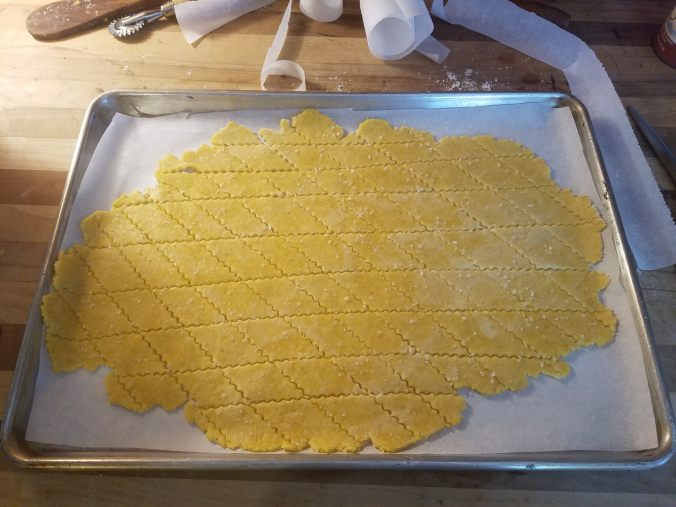
Brilliant. Cut shapes, brush with water, sprinkle salt, and into the oven it goes just like that. Regarding shapes, have at it – standard squares or rectangles, maybe diamonds as you see above, or a little more free form as below. It was fun to make the arc cuts, but in the end the crackers were pretty square anyway. You can use cookie cutters if you want too. Either cut them on your counter and move them (tedious but the most efficient use of the dough) or cut them on the parchment and just leave the in-between parts to eat on the side later.
You don’t have to separate the crackers after cutting but before baking. The baked crackers break apart easily.
I know it’s just as easy to buy a box. But the other night I took the last few of the last batch of these, the ones my mother made last week and gave me, to the airport when I picked up my son Samuel. He polished them off well before we got home, at which time he asked, “Do you have any more crackers?” I knew there were no more of the homemade ones and started showing him his choices, the boxes in the cabinet. He stopped me short. None other would do.
You try them and see if he’s not right.

*Hank’s book is Vanishing History, Ruins in Virginia, published last year by my little publishing company, Paper Shoe Press. You can find it on amazon!