Creamy Rice and Cheese Croquettes

I am on a roll with recipes because my daughter and her husband and their darling little ones are coming to visit for five days. I have more food in the house than we could eat in two weeks, but I’m ready for them! Besides bananas, grapes, a persimmon (thank you, Jerry!), banana muffins, coleslaw in a jar, salad fixings, bracciole, manicotti and numerous other things, I now also have a pile of creamy rice croquettes ready to reheat in the oven one of these evenings.

If you like mac and cheese, if you count it as a comfort food, if you enjoy the creamy cheese sauce complementing the texture of the pasta, get ready for a variation that adds a little crunch and a little spice. These croquettes use rice instead of pasta, and are bound up in a cheddar cheese sauce that’s flavored with paprika, formed into a patty and pan-fried.

patties done2.jpg

The recipe is another one from my mom. Thanks, Mom! I had these as a kid and made them for my own family as well. They are another tried-and-true. Gotta love tried-and-true.

You cook up the rice, set it aside (even overnight), make a regular roux and add extra egg yolks and a bit of paprika, and stir together the rice, the creamy roux and the cheese. Quantities are as follows (I quadrupled this recipe today, so I needed my biggest bowl!)

1 Tablespoon butter

2 Tablespoons flour

½ cup milk

2 eggs, separated

2 cups cooked white rice* (2/3 cup uncooked**)

½ cup grated sharp cheddar cheese (Cabot cheddar from Vermont gets my vote!)

¼ teaspoon paprika

1 teaspoon salt

1/8 teaspoon pepper

1 cup fine bread crumbs

If you have never made a roux before, you’ll be glad to learn the technique. It comes in handy for thickening so many things – not only cheese sauces, but also many gravies and soups. Melt the butter in a saucepan over a medium flame and add the flour.

roux1.jpg

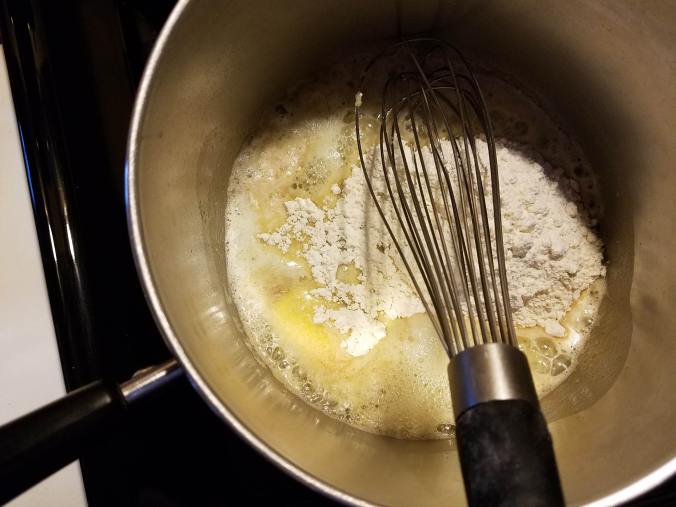
Whisk together until it begins to pull away from the pan. Get all the flour whisked in.

roux2.jpg

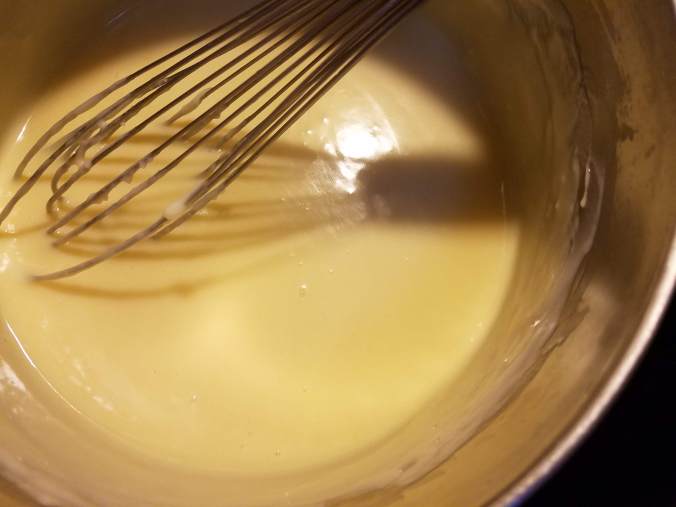
Add the milk in increments, stirring carefully until the milk is thoroughly incorporated and the texture is smooth – each time you add milk, bring it to smoothness again. This is with the milk just added.

roux4.jpg

This is with the first addition of milk incorporated.

roux3

And with about 2/3 of the milk stirred in.

roux6.jpg

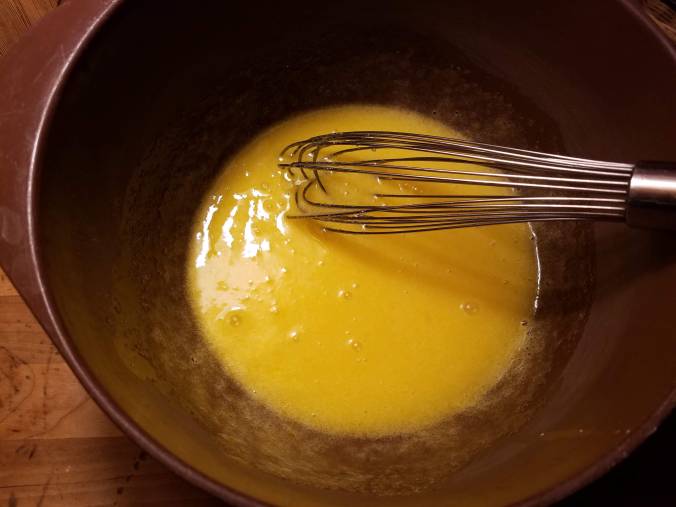
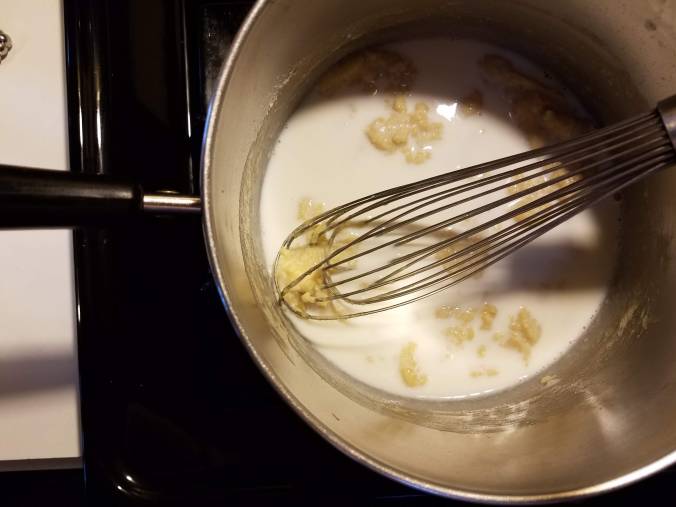
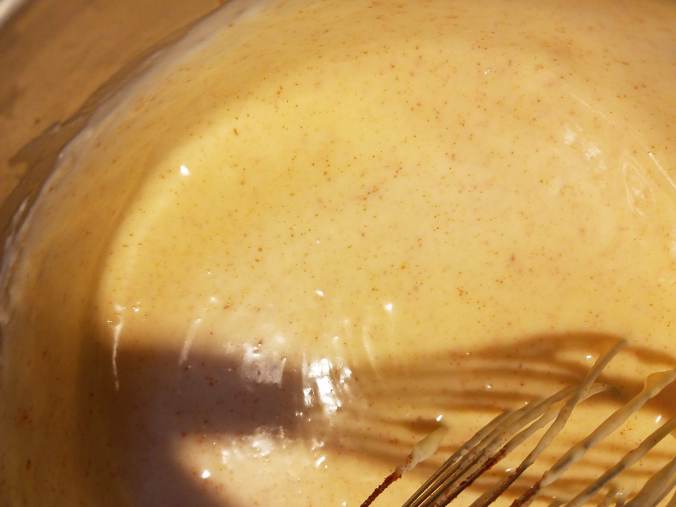
By the time you add all the milk, the roux is a thick, smooth liquid and looks velvety smooth like this.

roux7.jpg

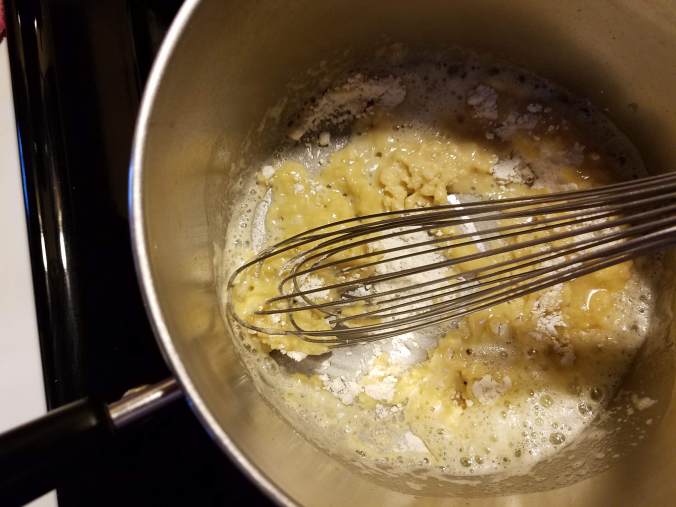
Now is when you add the egg yolks. Whisk them right in. If you forget, you can add them when you are mixing the rice together with the cheese and sauce (not that anybody I know did that… this time…).

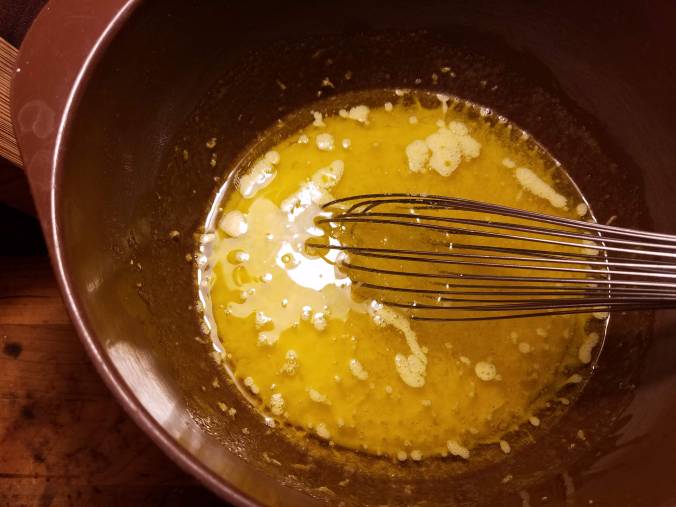
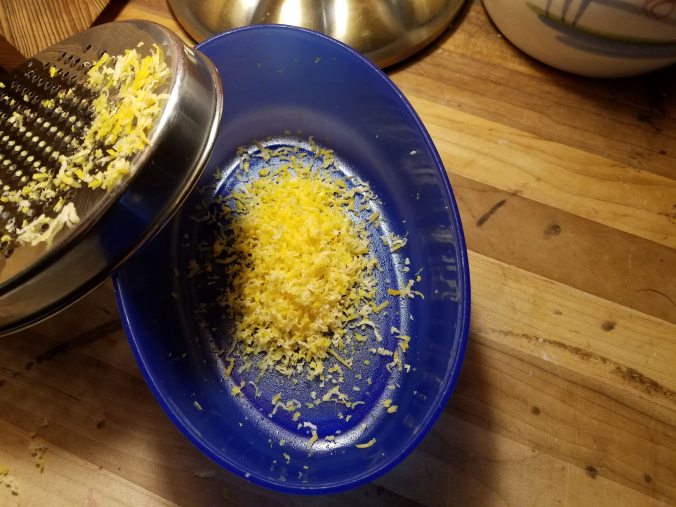
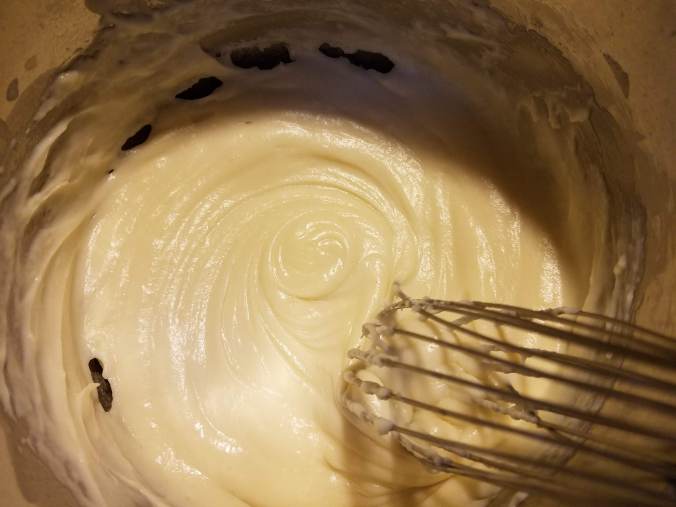
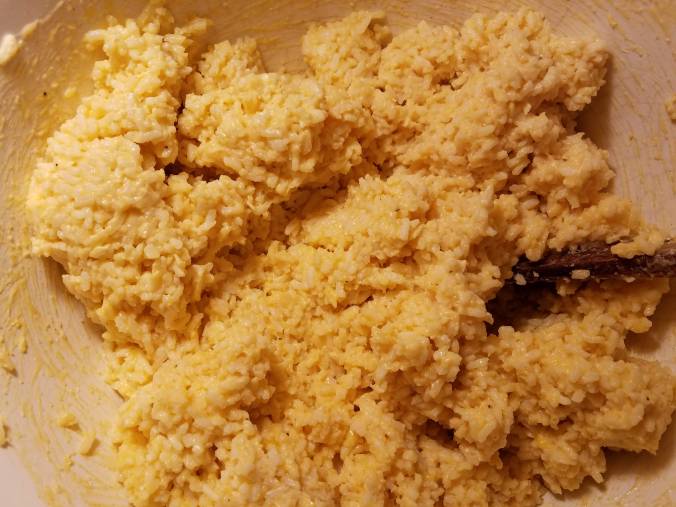
I love adding the paprika because it is such a pop of color.

roux adding paprika.jpg

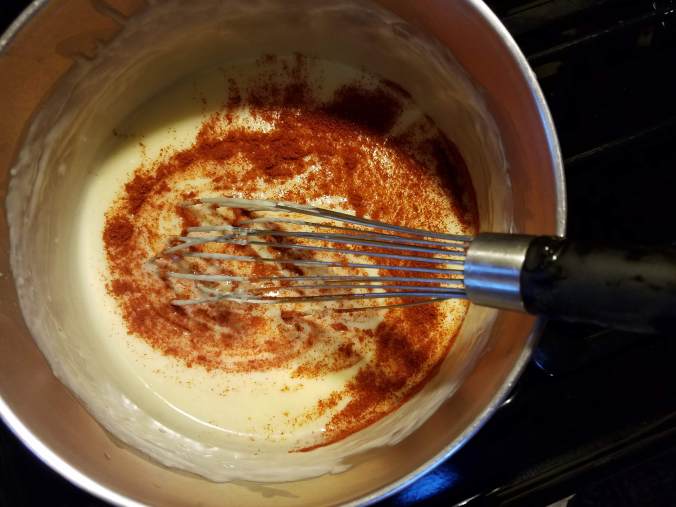
Mixed in, the speckles are still pretty!

roux with paprika.jpg

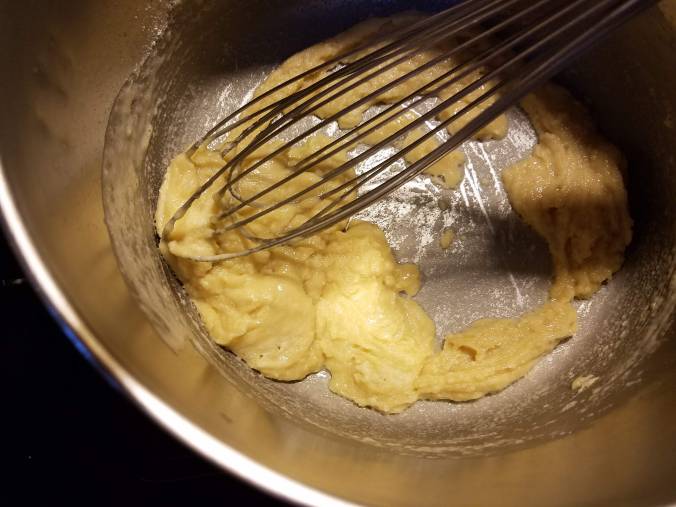
I had made my rice the day before, so it was cold in the bowl. To this I added the grated cheese.
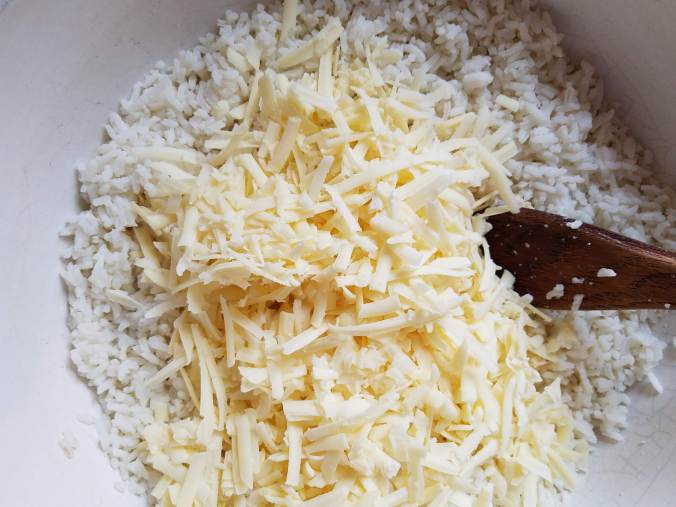
rice and cheese.jpg

And mixed it in.

rice and cheese2

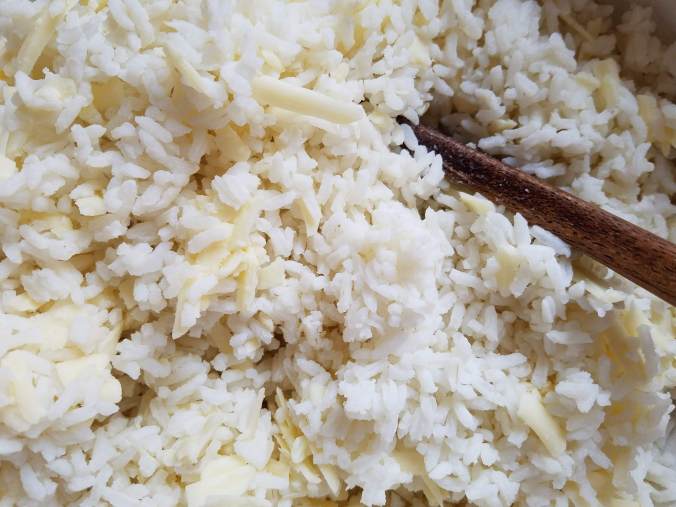
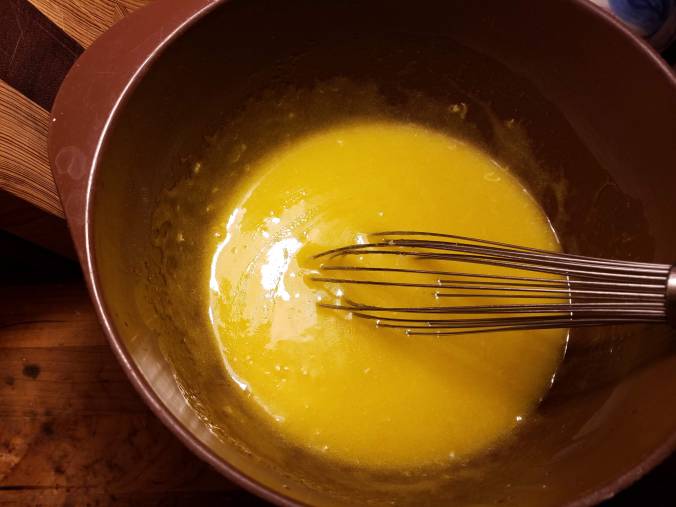
Then I poured the sauce over the top.
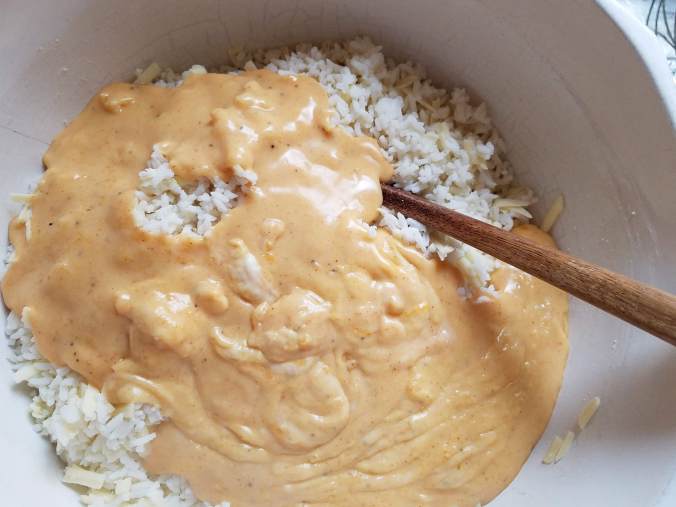
sauce in.jpg

And mixed it in.

sauce mixed in.jpg

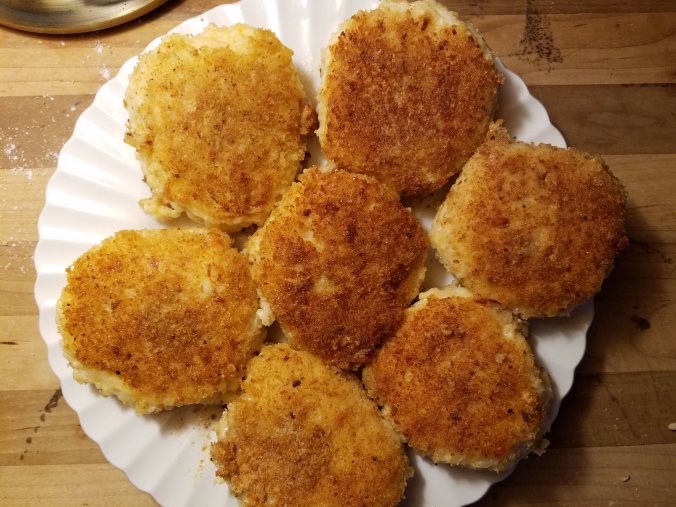
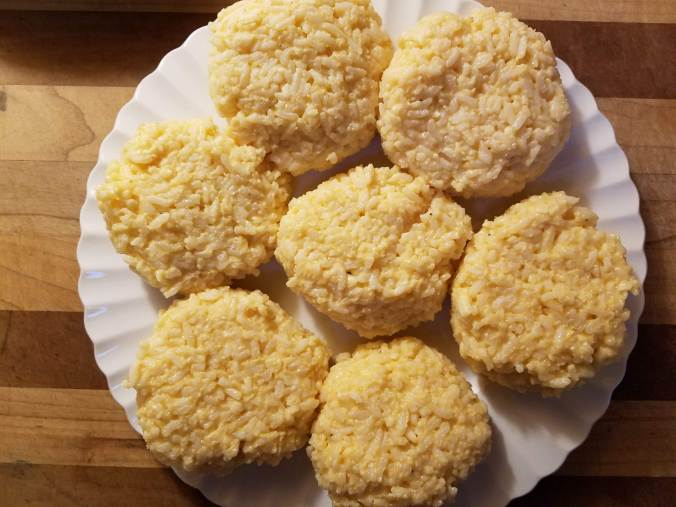
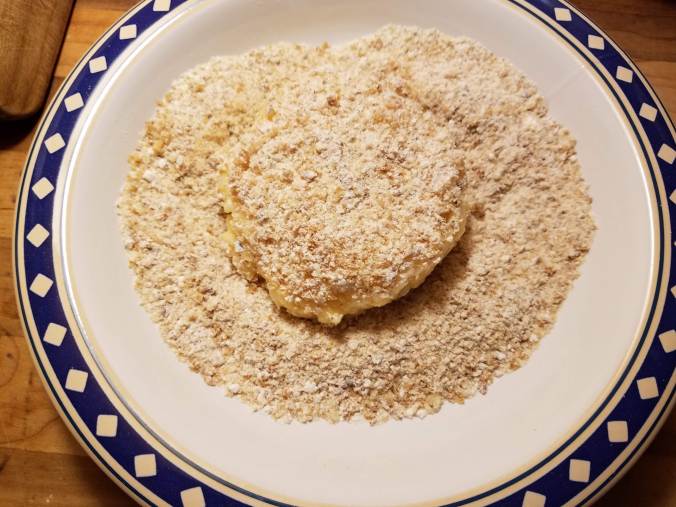
To form the patties that become croquettes, I tried both with and without plastic gloves. The gloves worked better! My croquettes looked like this, but you can make yours any size or thickness that suits you.

patties.jpg

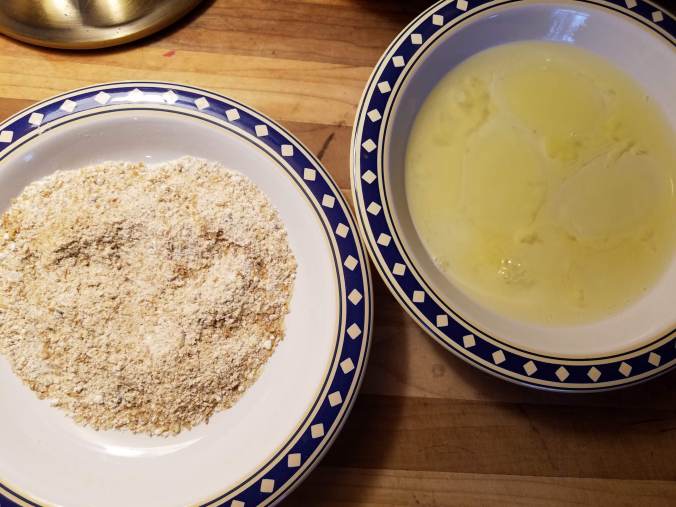
The egg whites are for the breading process. Dredge the croquettes first with egg white, then with crumbs. I like to mix a few tablespoons of flour in with my bread crumbs. I use two forks to move the croquettes from one bowl to the next – carefully. Forks make this part a little less messy than doing it with your hands, but try not to break the croquette! (I broke one today, but someone has to taste-test and that would be me! The broken one serves this purpose very well.)

I use shallow soup bowls for the bread crumbs and egg whites.

egg and bread crumbs.jpg

Once breaded, the croquettes look like this.

patty in crumbs.jpg

Pour a few tablespoons of olive oil in your favorite flat-bottomed frying pan. Turn on the flame and let the oil get hot for about a minute (not so hot that it’s smoking though!).

And into the pan go the patties!

patties in pan.jpg

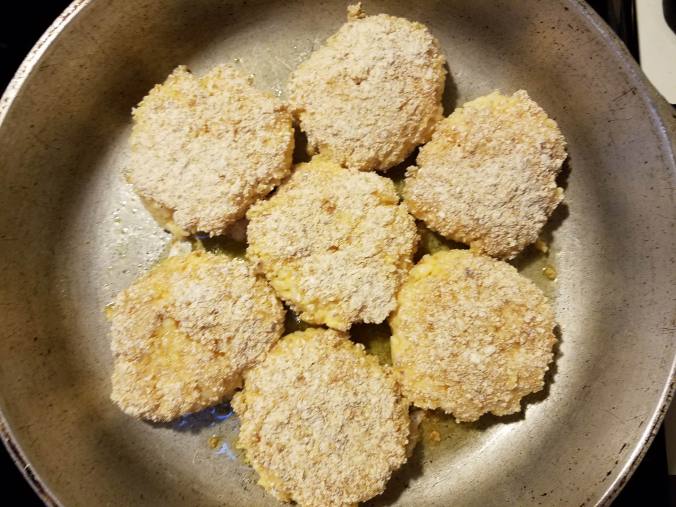
I made so many croquettes today (instead of 2 cups of cooked rice, I started with 8!), I needed two pans. One was my largest copper-bottom Revere Ware that I’ve had for 30+ years. Love that pan. The other (the one you see in these photos) is cast aluminum and has been in my family since 1947. I know this because my grandfather scratched 1947 into the inside of the lid to this pan. Love this pan too.

patties flipped.jpg

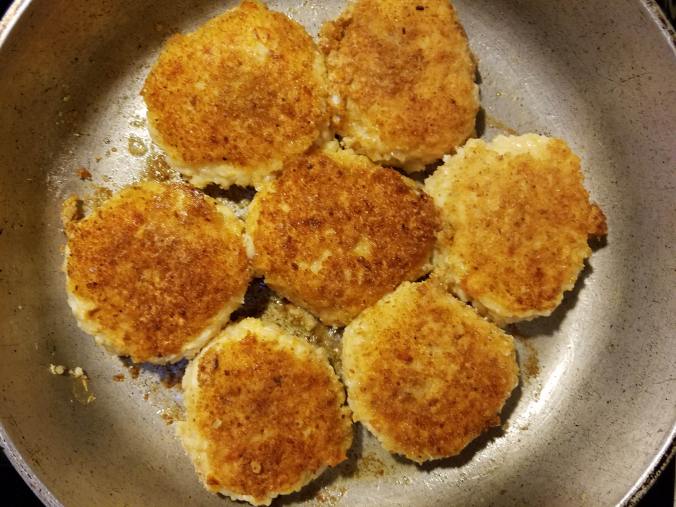
Once you flip the croquettes, you start to want to eat them! This is when I discovered an advantage to making so many! No one will notice one more missing…

Just like mac and cheese, these rice and cheese croquettes are a main dish that’s great with a salad next to it. But unlike mac and cheese, if you make a lot like I did, you can freeze some. When you are ready for them in a few weeks, take them out, let them thaw, and reheat on a baking sheet in a 350F oven for 25 minutes. Simple, done, yummy!!

Notes:

*Of course you can use any rice you like: brown, wild, whatever!

**To cook white rice, bring to a boil double the quantity of water as rice. So for one cup of rice, boil two cups of water. When the water is boiling, slowly pour the rice into the water, add a teaspoon of salt, stir to make sure none of the rice is clumping, cover, turn down to low, and set the timer for 20 minutes.

Mom’s Delicious Bracciole

My daughter and her family are coming to visit and it’s Mom’s birthday on Sunday, so I am making a special dish – manicotti (prepared with homemade crepes) – a meal Mom doesn’t make for herself very often. I planned on having a good baguette, warmed up, and a big green salad on the side, as well as some pan-fried Italian sausage, always a delicious extra protein. But yesterday I happened to see “Beef Top Round Thin Cut” in the meat case and thought Why not make bracciole?  That’s what any person would think if they saw meat like this, right?

meat in package.jpg

When I was a kid, Mom would make bracciole (pronounced brah-zho-lie) every now and then. I’m not sure why it didn’t appear on the table more often, maybe Mom will tell us. Bracciole is thinly sliced beef, rolled up with yummy parmesan or romano cheese and bread crumbs inside (that cheese was affectionately known in my family simply as “grating cheese”), seared in olive oil, then covered with your best red spaghetti sauce (affectionately known in my family simply as “sauce”) and cooked until tender. Oh yum!

finished.jpg

I asked my sister Lynn for her recipe because it’s not in my cookbook and I wanted to be sure I made them just like Mom used to. Perhaps I don’t have the recipe in my book because it’s so simple I thought I didn’t need the recipe? Lay out the meat, put bread crumbs, grating cheese and salt, pepper and seasonings on top, roll, secure, sear, smother in sauce, cook till done.

One step at a time, and with measurements, that process looks like this. My package contained eight slices. Start by carefully separating the slices from each other and laying them on a flat surface.

meat.jpg

One half cup of bread crumbs was just the right amount to sprinkle on these pieces. Lynn’s recipe called for seasoned bread crumbs but I didn’t have those, so I sprinkled Italian seasoning on the crumbs. If you don’t have Italian seasoning as a mix, use basil, oregano and garlic powder. I bet the Italian seasoning had parsley in it too, but I cannot be sure. Go with parsley too. One tablespoon of the mix was enough for these eight. Some people would use chopped fresh parsley, basil and oregano and minced garlic instead of the dried seasoning. I’m sure this is also wonderful. But in my family we kept it simple.

with bread crumbs.jpg

I sprinkled salt and pepper on them too, then ¾ cup of grated parmesan cheese.

ready to roll.jpg

Let the rolling begin!

rolling.jpg

Nice and tight.

Normally I would roll with the fingers of both hands, but it’s mighty challenging to roll with two hands and take a photo with your phone at the same time! I can roll with one hand, but using two goes faster.

rolling3.jpg

My rolls looked like this.

rolled and ready.jpg

Do you see the toothpicks? I used two in each roll, stuck in at angles so they crossed each other in the middle. This holds the roll together during the searing process. You could also use string, the kind that holds pastry boxes together. I couldn’t find any string so I managed with toothpicks. It’s a little harder to get the sides all seared in the pan when you use toothpicks, but somehow I got through that.

Into the pan I put about 3 tablespoons of olive oil, enough to coat the bottom well, and let it heat up for a minute or so on a medium flame. Then into the hot pan went the meat rolls.

in pan.jpg

Give them a few minutes to brown on that bottom side, then turn them to brown them on another side. Turn again when the second side is brown and let a third side brown. Now depending on two things (1. your level of patience and 2. whether you’ve browned them in thirds or fourths), you might need to turn them one more time.

By this point your kitchen smells really good, by the way.

seared.jpg

Once they are seared to your satisfaction, douse with red sauce (meat or marinara, whichever you like best) and turn the heat down to low. Cover and let this cook about an hour.

I let mine cool, removed the toothpicks, put them in a serving dish and covered them tight. I will heat them up again on Sunday (will probably just put my serving dish in the oven for half an hour on 325F) to serve with the manicotti. I have no doubt they will be scrumptious!

Soon I will show you how to use the same thinly sliced meat to make rouladen, the German variation of this dish, also totally delicious, but rouladen would not go with manicotti!

A New Twist on Cole Slaw

You can never be quite sure what’s going to do well in the garden. Last year I had cucumbers galore, this year not so many. Last year the beets were few and far between, this year lots. I planted both red and green cabbage this year. The reds were so pitiful, I didn’t bother even trying to salvage anything from them. But the greens!

6 (9).jpg

It’s hard to tell size from this picture, but that head is almost as big as a volleyball.  They don’t come one at a time. I had six at once in June. What do you do with six large heads of green cabbage?

I shredded one head and sautéed it with sliced onion and a little bacon for flavor. A little salt and pepper and 45 minutes on a low flame (covered) makes a very fine side dish. I wrapped three heads carefully and put them in the fridge downstairs. That left two. Cole slaw is nice, I thought, but I am not as wild about using mayonnaise in dressings, and I don’t buy bottled dressings. Vinegar and oil would work, but I wondered about lemon, so I experimented.

I chopped up two heads very fine, added chopped red onion and shredded carrot and made a lemon dressing. Yum! Two heads of cabbage make a lot of cole slaw, so after the meal I packed the remainder in wide-mouth quart-sized mason jars and refrigerated it. I found that the flavors got even better the next day and the next. I gave one jar to my neighbors Jen and Quin, and one to Lincoln and Julia, and they loved it too.

A few weeks later I made more, using the last of the garden heads, and we enjoyed it just the same. That was in August. Today I got a hankering for Lemon Cole Slaw again.

Get yourself a nice head of green cabbage. (It’s very cheap!) Chop it fine. I use my 10-inch chef’s knife, preferring to do it by hand because 1. I control the size of the chop and 2. I get a bit of a workout which makes me feel better about dessert 😊

Start by quartering the head and cutting out the core. Slice like this first:

chopping.jpg

Then crossways until it looks like this.

chopped fine.jpg

Certainly you may use a food processor or some other chopping device. I like to add red onion and carrot for both color and flavor. To the one head of cabbage I bought and chopped finely today, I added two finely chopped red onions (each onion was the size of a golf ball) and four small carrots from my garden. Use however much of each as seems reasonable to you. Use a big bowl. The biggest one you have is probably best.

For the dressing, I adapted the sweet-sour dressing I use for Carrot-Raisin Salad from a favorite old (1976) cookbook called Bakery Lane Soup Bowl.

bakery lane (2).jpg

For the lemon dressing I used 1/3 cup sugar, ½ cup lemon juice, ¼ cup olive oil and salt and pepper to taste (for me that’s about 1 ½ tsp salt and ¼ tsp pepper). The salad looks pretty once you mix it all up with the dressing and it tastes light and refreshing.

in bowl.jpg

We had some for dinner and I put the leftover in one small jar and one large jar. Pack it in tightly! It keeps well stored in the fridge. I can’t say how long, but am guessing a week or so. Mine doesn’t last that long!

jars2.jpg

The smaller jar here is special to me because Claudia’s dad makes his own honey on their farm in Betzigau in southern Germany and packs it in these jars. I save the jar of course because it reminds me of him and his wonderful gift to me. This jar is from the honey Claudia brought last year. One time when I was returning from a trip there and had forgotten that even creamed honey is considered a liquid and put it in my carry-on so that I could be more careful with the glass jar (do you see where I’m going!?), I had to watch the airline security official throw it in the trash (!!!!) because it was a “liquid.” “It’s honey!” I told the woman, “It’s like gold to me!” She just threw it in the trash… Moral of this story: Put honey in your checked bag!

If you want to make Carrot-Raisin Salad, peel and shred 2 pounds of carrots and mix with this same dressing only using cider vinegar instead of the lemon juice (same quantity). Mix in a cup of raisins (golden or regular) just before serving. Some people don’t like the raisins, so I usually divide it in half and add raisins to only one of the bowls. If you have leftover of the one with the raisins and you store it in the fridge, the raisins will absorb some of the dressing and be soft and all puffed up the next day. I don’t mind this at all, and it doesn’t hurt anything, just know it will happen.

These salads-in-a-jar are so nice to have on hand. No last-minute salad prep when it’s time for dinner. Oh, look, here’s salad!


Building Skills for Building Stuff

For four years now I have been hosting Airbnb guests at the cottage that Bradley and Beth built on my property.

cottage.jpg

As a kid Bradley always loved to build things in the shop – I remember when he was a teenager and I prayed he would be careful with dangerous power equipment. He was, and he taught himself many aspects of carpentry that he later incorporated into the cottage, such as the coffered ceilings, cherry tongue-and-groove floors, all the custom-made windows,

March 2016 (55).JPG

and the beautiful railings in the loft.

March 2016 (9).JPG

During the building process, he and Beth worked tirelessly at full-time jobs and the work on the cottage.

zOct 5 (9).JPG

I worked too, but mainly many hours at my job at the hotel. I paid the bills, made food and talked through material and design decisions with them.

cottage3.jpg

Here and there I contributed actual labor, but as anyone in their 50s knows, there is a big difference energy-wise in what you can do in your 50s compared to what you can do in your 20s. I marveled at their energy! I wanted to help! But plain and simple I was too tired, emotionally and physically, by the end of the day. It was their amazing project.

During a few of the cottage-building years, my son Lincoln and his wife Julia lived nearby. Lincoln worked at a woodworking shop in Richmond, honing the skills he himself had been developing. He and Bradley together built not only the original chicken coop, but also skillfully remade the base of my antique dining room table using solid mahogany – they designed and built graceful, perfect legs and gave new life to a family heirloom.

If I had been more present during those years, how much I could have learned from them both! I remember thinking this, remember admiring them, remember longing to work alongside, remember sitting exhausted in a chair…

Lincoln and Julia moved to Vermont in 2013 and Brad and Beth left for Seattle in August of 2014. The decision to try hosting through Airbnb, to “share” this gem of a cottage with others who might appreciate it, seemed reasonable. It took till early October 2014 to get everything ready, but from the get-go, literally within hours of posting the details of my cottage on their site, I had my first guests, and it has been great guns ever since. For two years I managed both the cottage and my job at the hotel (a bit of a juggling act). Then in a good-sized leap of faith in October 2016, hoping that I could get by with just the cottage, I resigned my position at the hotel.

Now I have time and energy for building things! Or unbuilding things, as the case may be. Sandy handed me the drill and up I went on the roof of the old chicken coop run to unscrew the metal panels in order to clean them and put them back on a rebuilt frame.

34157.jpeg

Filling holes with concrete? I can do this.

20180414_131813_001.jpg

I can also dig out earth to make a level place for a deck to connect the old and new chicken coops.

20180612_194433.jpg

And build the coop deck’s framework with scrap 4x4s and 4x6s in rows to support the decking boards.

20180614_092749.jpg

I worked with my Uncle Ernie to make a bench for that deck, getting a little more comfortable with the chop saw. I still don’t like using the table saw.

20180706_145056

And once that all was finished (and huge thanks to Sandy for doing the lion’s share of the work) — oh, how beautiful it looks to me on this rainy November morning —

Nov 6.jpg

we turned our attention to the house foundation

Oct7 (34).jpg

and front porch project. I’m the grunt labor, I know this. Sandy is the energizer bunny, working for endless hours, bringing skill and ideas, and has way more confidence in my capabilities than I do. And Joe and Samuel have been invaluable in this getting so much of this work done so quickly.

hangers5.jpg

A few years ago, I assure you I did not envision myself nailing in joist hangers!

What happened? Yes, I now have more time, and yes, I am not so sapped of energy as in the past. But there is something else. Actually two somethings.

  1. I have always admired the things people accomplish when using their hands/bodies together with their brains, but in my world it was the men who were building and fixing things. My hat is off to all of them evermore, but while Bradley and Beth still lived here, my friend Peggy one time gave him some of the tools she didn’t need any more that she herself had used for years for woodworking and for fixing things! She is the first woman I knew who was not intimidated by machines or carpentry. I expect she has no idea how I marveled at her, how I admired that aspect of her great character. She also gave Bradley a SHOP sign that he proudly affixed to the shop door. I think of her every time I see it. Thank you, Peggy!

shop door.jpg

2. I was always intrigued by the concept that you are never too old to learn something new. Back in the homeschooling days, I read a lot of John Holt’s work. I paraphrase here a story he told of someone who wanted to learn to play the violin but was 50 years old. “I’ll be 55 by the time I can play it decently,” the person said. “Yes,” he replied, “but in five years you’ll be 55 anyway, so wouldn’t it be better to have learned to play the violin during those years?”

In five years you’ll be 55 anyway.

That phrase stuck with me. I stretched it to not only:

I’m x-years old now. I want to learn [pick a skill]. In five years I’ll be x+5 years old anyway. Wouldn’t it be better to have learned that skill in those five years – even if not to the master level – than to get to x+5 years old and still be wishing I could do that thing?

But also to:

I’m x-years old now. I struggle with [pick a subject]. In five years I’ll be x+5 years old anyway. Wouldn’t it be better to find a way to make some strides in that area in those five years than to get to x+5 years old and still be struggling in the same way with that thing?

So here I am, cutting decking boards on a chop saw, knowing the difference between a rim joist and a sill plate and a ledger board, toenailing deck joists in place to hold them until it’s time to screw in the hangers. In a conversation with my son Lincoln the other day, he said, “It’s very cool to see you learning how accessible and simple all this building stuff is. Not just some magic that you have to ask some pro woodworker to do every time. Measure, mark, cut, secure, repeat!” I told him I have my limitations: I am not very strong and I am scared of some of the equipment. He said, “Well you should be scared of those tools! Every safe woodworker is.”

Today I am grateful for all the people I’ve known who have woodworking skills, all the encouragement I’ve received from people I love (in ways they are probably not aware of) and all the enthusiasm of friends and family who cheer on these projects. All of this has developed in me a greater interest in the craft and a hunger to learn more. One of these days I might do more than the grunt work, but if I don’t, that’s okay. I’m having fun and there’s a wonderful result!

Here we are now, with temporary steps on the side! For the first time in almost a month, we can go in and out through the front door 😊

with temporary steps.jpg

The Batmobile on a Road Trip

I can’t say I ever gave too much thought to ornamenting a tire. Tires have always been purely functional for me. They turn. When they do, the heavy vehicles they carry move from Point A to Point B. You can have the fanciest engine in the world, but without tires, the vehicle’s not going anywhere.

Hubcaps are tire ornaments. They have many different circular designs, like simplified versions of the fantastical views you get inside a kaleidoscope. But the Batmobile doesn’t have a fancy hubcap. It has a tire ornament like no other tire ornament.

batmobile tire (2).jpg

If I was the Batmobile and was moved to a new place of display, I would definitely not say, “Here we go again. A bunch more fools are coming to look at me: ‘Oh, look! The Batmobile!’ they say. ‘I remember the Batmobile!’ Yeah, so what! You think I asked for this look?”

Such disdain is so unbecoming. I imagine the Batmobile instead in a rather humble strut, if this is not too much a contradiction of terms. Its look is super cool. “Oh boy, here they come,” it says gleefully to itself. “More admirers! I love admirers! Look at me, look at my tires, look at my sleekness, my gleam, my cool windshields! I don’t have to try very hard, you know, I just am this beautiful!”

batmobile full.jpg

People like me say “Oh, look! The Batmobile!” because you don’t see the Batmobile every day and because somebody had a lot of fun thinking of how to ornament it!

Samuel and I didn’t plan to see it. We planned to float around downtown Roanoke, Virginia, exploring this small southern city, getting a feel for its character, its energy, its good people working hard to make it a great place to live. We strolled through the city marketplace, got a generously large “small” ice cream cone at Bayou Snowballs, ate a fabulous wagyu burger at Jack Brown’s Beer and Burger Joint (where they do not serve burgers with lettuce and tomato, btw) and watched the proprietor of La De Da make a candy dress (yes, a candy dress – I will come back to this).

But then it started raining and was only 3pm. It was a cold icky rain. The observatory at the top floor of the science museum was closed for a private event, so Samuel suggested we go to the top of the parking garage and look at the city. For this we got the umbrella from the car and went up five levels. Other than struggling with our umbrella hilariously turning inside out more than once on account of the wind (umbrellas really do this!), we got a nice view. St. Andrew’s is an especially handsome church.

St Andrews.jpg

You can see how dreary the weather was, but this church! Captivating. Gorgeous. If you get the chance, go see its glorious vaulted ceilings, perfect hanging light fixtures and polished marble floors, all in pristine condition. We did. See if you don’t think it rivals European churches. We do.

But we still had time and it was still raining. The Virginia Transportation Museum had been suggested to us. Okay, sure, let’s go there. The Transportation Museum has a railyard containing many old but beautiful locomotives. This too is fantastic to see.

selfie at railyard2.jpg

Here we are just in front of the railyard. There are lots of wonderful exhibits in this museum calling attention to not only the engines themselves, but also the workforce that made the railroad industry possible, its marching band, its women’s auxiliary and the way trains changed the lives of people. All good, all very well done.

We wandered in the museum the way people wander. Wandering is good sometimes. It gets you to places you did not expect, like the car exhibit. Samuel loves cars – their design, their speed – he is enthralled, way more enthralled than I am. I have generally looked at cars as a thing that transports you quickly and conveniently. It doesn’t matter much what it looks like as long as it does its job.

Stop cringing, you car lovers! I know! How can I not appreciate the graceful lines of the body, the intricacies of the motor that enhance performance, the purr, the roar? I know. Give me time. I might get there. I might be a little closer after seeing this exhibit. I might have to appreciate cars a little more after seeing the Batmobile in person.

As we entered the car bay and saw the 20 or 30 cars lined up on display, I thought Cars, a means of transportation. Of course the Transportation Museum has a car display. I can look at cars. Note my enthusiasm.

But then a museum staff member did a wise thing. He told us, in words, out loud, that the owner of a number of famous movie cars had lent his collection to the museum for a short while, a month or so, and we might enjoy seeing them. Museums use a lot of signage, and this is good, but I don’t know it we would have ventured to the far side of this huge bay had he not spoken to us directly. It was the end of the day. We had seen the trains, marveled at the trains. Enough, right?

I soon changed my mind.

Who doesn’t love Back to the Future? Here was the DeLorean! The 1981 DeLorean DMC-12! “The way I see it, if you’re going to build a time machine into a car, why not do it with style?”  Only 8987 of these cars were produced.

delorean.jpg

They had the ambulance from Ghostbusters.

ghostbusters ambulance.jpg

They had the 1950 Mercury Monterey driven by Sylvester Stallone in the 1986 movie Cobra, a muscle car if ever there was one.

monterey.jpg

I loved its license plate.

monyerey plate.jpg

We saw “Boss Hogg,” the 1976 Cadillac Eldorado convertible, driven by Burt Reynolds in The Dukes of Hazzard, a 2005 film also starring A.J. Foyt IV, Willie Nelson and Lynda Carter. It is one of the last automobiles driven by Reynolds in a feature film.

dukes2.jpg

Check out the car handle.

dukes2 (2).jpg

And yes, it has the horns up front!

dukes of hazzard cadillac (2).jpg

Who can’t smile looking at the 1974 Ford Gran Torino “Striped Tomato” from the Starsky & Hutch TV show?

striped tomato.jpg

Or stare incredulously at one of the two 1970 Dodge Chargers that survived without damage from Fast and Furious?

fast and furious.jpg

fast and furious text (2).jpg

If I owned the Batmobile, the DeLorean and all these cars, I would send them on a road trip too. A change of scenery does us all good. Their road trip did me good! Beyond making me smile, they reminded me that humans have a creative, fun side, yet are incredibly capable of taking an idea and making it a reality. These are just cars, but what cars! Immortalized cars! (Did I really type that!?)

There’s hope yet, Samuel. Cars are cooler to me than they were two days ago.

Jacking Up the House

My house sits up on a hill. Down below, about a mile away, trains rumble by several times a day. The house rattles a bit every time. It’s not intense. I don’t have to worry about pictures falling off the walls. But the sound and the vibration are enough to remind me of the air spaces between solid objects like dinner plates that seemingly sit squarely one on top of the next. The train moves the earth just enough to upset the plates just a little. If it upsets the plates, you have to think it upsets other things.

Over time, train after train after train, the nails that were pounded into wood 45 years ago during the construction of the house might loosen up just a little, then maybe just a little bit more. Tiny cracks form. Over time, storm after storm after storm, some rain seeps through the cracks but not very much air, so the wood can’t dry out once it gets wet. Insects look for hiding places and nesting places and make a meal of the yummy, wet, softening wood. Over time, bite after bite after bite, the now-rotten wood is not so strong.

That’s about the time when, in the proper order of things, we humans come along and fix it. After we get over our initial disgust at finding spongy wood hidden under the front porch under the front door, we make a plan: Jack up the house, cut out the bad boards, replace them with good, new boards and give it another 45 years.

I’m not saying we liked the plan or felt comfortable with the plan. Jacking up a house is not fun, let us be clear. This is my house we’re talking about and what if something slips and we are under it (worst case scenario) or what if we make the problem worse (second worst case)?! But you can’t get around it. You can’t get the old boards out unless you give yourself a little bit of space to get a saw in there and cut through the nails that hold them in.

A quarter of an inch. Six or seven millimeters. That’s all the space we need. Okay, let’s lift the house a quarter of an inch, sure. How do you do this? How much does this corner of the house weigh?

Wouldn’t you know it – someone thought of this before us and came up with floor-to-ceiling jacks that hold 38,000 lbs (minimum extension) or 20,000 lbs (maximum extension). You can buy these. And Sandy did because, you know, we might need them again someday. Would the information on this box be reassuring to you?

jacks3.jpg

I notice it says, “Supports the weight of heavy furniture, appliances, or remodels.” It does not say, “Supports the weight of a house.”  Or even, “Supports the weight of a corner of a house.” Perhaps that is implied by “Supports the weight of … remodels.” That seems vague to me, but with two of them we should be fine, right?

Some things you just have to do. You can hem and haw all day but that doesn’t get the thing done. Breathe deep and put the jacks in place.

The daylight you see in the photo below is not the quarter of an inch we raised the house.

jacks1.jpg

It’s the (partially covered by insulation) hole in the house that we were able to make because of, and only because of, the quarter of an inch gap. From the outside, before we got the board off, you can see the gap. It’s not much, but it’s enough.

hole1_LI.jpg

Once the gap happened, once the jacks did (thank heavens!) what they so boldly lay claim to do, the work on the outside started. First, Sandy got a reciprocating saw into that gap on the outside and cut the nails that held the boards together. He also made a vertical plunge cut in the board so we could remove it in two pieces. Then Joe beat at the longer portion with a sledge hammer from the inside. I’m not sure what was worse: the sawing or the beating. This board was integral to the structure of the house, and we were taking it out. Violently. Ruthlessly. In general I am not comfortable with violence and ruthlessness!

When we started to see movement, it was both reassuring and terrifying.

hole3.jpg

The board would come out, yes, Would the jacks continue to do their job? Would the vibration caused by the beating upset them or change anything?

hole5.jpg

Once the board was out far enough that the hammer could hardly reach it any more, the beast of a crowbar came into play. In this game, we ultimately win. The board loses. C’mon. Out you come.

hole6.jpg

It might have been better for me not to be a bystander during this time, but I don’t have the physical strength to do what Sandy and Joe were doing, so all I could do was watch, hope, pray…

hole7.jpg

There we go. The house is still standing. Now the other piece.

hole9.jpg

Great. Now we have a hole in the house. Between the floor joists and the top plate had been a 2×2 sill plate, which Joe and Sandy found laughable. You can see it where we found it in this photo

hole10 (2)_LI.jpg

and in this photo where it was still attached to the old (longer) board that we took out.

board with 2x2 (2).jpg

They made a new sill plate with a 2×6 ripped to a width that fit perfectly, which was about 2×3½. Then we connected the upright, reinforced, three-boards-wide 2×6 studs through the top plate into the sill plate with 8-inch GRK “rugged structural” a.k.a. ÜberGrade screws.

screw.jpg

Then we could put in the new rim joist using the same screws but in 3-inch size. This I can do.

installing ledger board.jpg

Once the new rim joist is in, securely in, you can breathe. You can take down the floor-to-ceiling jacks and breathe. You can add the ledger boards and begin to visualize the porch that will be here soon.

I want to think the worst of this project is over. We had to remove the old front porch, excavate along the entire front perimeter to basement-floor level, shore up the foundation on the outside with liquid asphalt and 6ml plastic, add perforated drain pipe and drainage gravel, add backfill, dig post holes, fill post holes with concrete reinforced with steel cages, build a retaining wall, shore up the foundation on the inside, fix some electrical issues, remove and replace a rotted rim joist and add ledger boards. We have needed an excavator twice (once a big machine and once a mini), a bottle jack, two floor-to-ceiling jacks, a chop saw, table saw, reciprocating saw, plunge cutter, drills, all manner of hammers, screws, wrenches, levels, squares, hoes, rakes, shovels, 21 bags of concrete mix and lots of muscle.

We did all of this in the past 27 days. In between, when the rain made it too wet to dig, we finished siding the coop with the oak clapboards. I feel sooooo proud of this team, of the energy, skills, humor and experience that Sandy and Joe bring with them every time they come and of Samuel adding strength and assistance (to say nothing of Coco, Queen of the Dirt Mound) at just the right times.

Coco.jpg

I’m so grateful to them all for keeping a good spirit despite the rain delays, for tolerating my ignorance and many questions, for dealing with mucky mud, icky rot and various other unpleasantries. They are all so amazing.

A new front porch is coming – one step at a time.

What’s Under Your House?

Funny how we can avoid some things for a long time. I can’t see the serious rot in this picture (hiding under the porch as it was) so everything must be fine, right? On October 7, the front porch looked like this.

Oct7 front porch.jpg

The steps are fairly new but the rest of the porch doesn’t look great, I’ll grant. It shows signs of age. It’s not going to win any prizes. But for seven years we could walk on it and use it as people use a porch, as the transition in and out of the house, from earth to indoor space and out again. And for 38 years before that, the previous owners did the same.

Wanting a new thing comes in handy sometimes. I wanted a new front porch. That’s what drives this whole project. I wanted a new one in part, I admit, because the old one looked shabby, but mostly because I knew it was in the way of addressing why we sometimes had water coming into the basement. Water coming into the basement made me nervous. It didn’t happen often, but it happened.

Something was wrong, but what? When you know your foundation is wood, and you’ve got leakage, you suspect the wood has something to do with it. But you can’t get to the problem unless you remove the porch. And once you remove the old porch, you have to build a new porch. See? Wanting a new thing comes in handy sometimes. In the end, I get a new porch!

Reality was unavoidable as deconstruction began.

Oct7 deconstruction2.jpg

The joists that held up the decking boards don’t look terrible from afar. But closer up, their condition is clear.

Oct7 joists.jpg

Ah, well, those are going away anyway, you say. Nothing even salvageable here. And once the porch was off the house completely, it still didn’t look too terrible.

Oct7 porch off.jpg

Until you got up close.

bad old close.jpg

There are actually two boards here, one on top of the other, one exterior and one interior. I’ll draw a red line so it’s easier to see what was left of the exterior board after we – easily! – removed the soft, spongy fibers of what used to be solid wood.

bad old close_LI.jpg

Rot is not as icky as some icky things, but it is nonetheless firmly in that category for me. Rotten wood is soft and dry-spongy and comes apart in shreds and flakes as you scrape at it. When you see rot, you think of the insects and the moisture have been working steadily along for decades (that’s what makes it icky for me), turning a hard, dense, supportive substance into a weak filler. When that weak filler is holding up a portion of your house, you had better do something about it.

It’s not always a pretty world. This rot was under my porch all along. How did it get this way? Time, certainly, will cause wood to rot, but the bigger factor is water.

When you look out of my living room windows, you are facing the Southwest Mountains, foothills of the Blue Ridge, a mountain range that starts in Georgia and ends in Pennsylvania. I love the view but I have to be careful of those windows. When it rains, the rain wants to come in on that side of the house. If I have left windows open in warm seasons and I wake up to the sound of rain in the night, those are the first windows I go check. Guess what else faces those mountains: my front door.

When we first moved into this house, rain came in under the front door so bad that it damaged the oak flooring that the previous owners had installed just before selling the house to me. Bradley had taken up the damaged part. When we saw what was underneath, I remember shuddering and thinking yeah, that’s going to need to be addressed sooner or later. He replaced the damaged boards with new boards, Sandy installed gutters that presumably arrested the further development of the rot under the door and we were able to forget about it for a while. All right, for seven years.

inside front door.jpg

The day after Sandy took the front porch off, Joe dug out the dirt. Then it looked like this.

Oct7 wall under front door.jpg

All that weight of all that wet earth for all those years in this part of the foundation made the wall weak. Removing the dirt relieved the pressure, but the blade of the excavator nicked the sheet of plywood in the middle and it was enough to push the soft, compromised wood in just a bit. From the inside it looked like this. You can see that plywood, pushed in, as well as the 2×6 next to it with a large crack.

area in basement (2)_LI.jpg

We put new plywood over the old on the outside, but had to mend the inside of course. We started with a horizontal bottle jack that forced the upright (cracked) stud to a reasonable vertical again, then added a 2×6 to either side of it (and to the upright to the right) for additional support. We also removed those wires and redid the electrical in that area.

interior fix.jpg

Upright supports were strong again, so then we could address the horizontal rim joist in such bad shape under the door. That involved jacking up the house, the nerve wracking part of this project that no one wanted to do, but there was no avoiding it. More on that soon.

Unbeatable Biscotti

“You could sell these.”

“You should sell these!”

“If you’ll make me more of these, I’ll pay you.”

“These are better than any you can buy.”

plated.jpg

If just one person had said such things about my lemon-anise-almond biscotti, I would have thanked her (or him) and carried on. But these make a great gift – they mail well and keep well – so I have made a gift of them many times. And I have heard similar versions of “these are great!” over and over again throughout the years since I discovered and tried this recipe in the Williams-Sonoma “Cookies & Biscotti” baking book.  I don’t even eat them myself (can’t abide the almonds) so I can’t chime in. Sometimes you have to just take people at their word.

This is the book.

book.jpg

This is the recipe from the book.

recipe.jpg

You can see that the page is wrinkled and has spots of something that spattered on it where it says “Makes about 3 dozen.”

recipe (2).jpg

This is what happens when a book is open near your work area. The marks of use are like a letter of reference or a proof that the book has been opened to this page near splashing ingredients numerous times. You don’t use a recipe over and over that you don’t have success with. The marks on this page are the same as a tattered quilt to me — used, loved, used again.

Not only are these a wonderful gift, but they are a joy to make – even for someone who can’t abide nuts! Start with the mixing of the eggs and sugar. I know I’m partial to my own chickens’ eggs. Yesterday, when I needed one and simply walked out to the coop to get one (and the door was stuck on account of being swollen from the rain and I couldn’t get it open and had to ask Samuel for help!), I thought How many people can just walk out to their coop and get a fresh egg when they need one?

I know my eggs are super fresh, but I think yours would look just as beautiful as this whisked up in a bowl with the sugar.

eggs and sugar.jpg

When you add the oil (olive oil for mine, I always use olive oil) and it sits on the top looking so separate,

oil in.jpg

you might be tempted to wonder how it will incorporate. But a little wrist action brings those pure ingredients together into a smooth, glistening mixture that has its own beauty. I love the gleam.

oil mixed in.jpg

I don’t measure the lemon zest. The peel of one lemon, grated fine, has always been perfect not only in amount but also in how it adds to the pleasure of making these biscotti. On and in my grater, the little pieces of peel not only look beautiful, but the lemon oil that gets released fills the air with a freshness like no other. And however much it makes, it makes. I put it all in.

lemon rind4.jpg

Next comes the anise, another sensual wonder. You can buy ground or crushed anise, but to crush it yourself in an old-fashioned mortar and pestle, to smell the rich aroma of the anise oils breaking forth from the seeds – well, I’m in heaven.

anise4.jpg

Once the grated lemon peel and crushed anise seed have been mixed in, it looks like this. Your nose will tell you you’re on the right track.

anise mixed.jpg

It’s time for the rest: baking powder, vanilla, salt, flour, almonds. The recipe says to use whole almonds and chop them coarsely. If I liked almonds and wanted the joy of that experience (no doubt for almond-lovers it’s right up there with mixing the olive oil in, grating a fresh lemon and crushing anise seed), I would do that. But I simply tolerate the almonds for the sake of those who like/love them, so I cheat here and add the very thinly sliced almonds you can buy. In this case it was raining the other day when I might have gone to the store and Mom had some in her freezer – thanks, Mom!

Notice I moved to a strong wooden spoon instead of the whisk for this part.

almonds flour etc.jpg

The dough is quite stiff by the time you mix everything in. The strong spoon is better.

stiff dough.jpg

The recipe says to turn this out on a floured board and knead until smooth, about 10 times. I don’t know if I was distracted (that never happens around here!) or if I thought the dough looked smooth enough. Anyway I forgot this part and jumped to the pans. Again not sure what moved me to use parchment paper this time (for the first time ever) but I did, and it was great. I lined the pans. Notice I am not overly generous with the paper. Cheap runs deep!

pans ready.jpg

And put the stiff dough in.

pre oven.jpg

Turns out that not kneading the dough did not change the outcome. My loaves baked for the 30 minutes the recipe calls for, and they didn’t look very brown, but I took them out, waited a few and sliced them. It was just right.

Use a good serrated bread knife. You have to get through the almonds, and whether they are finely chopped or thinly sliced, they are an obstacle. Slice carefully.

post oven sliced.jpg

Now put those slices, cut-side down, on a baking sheet and right back in the oven.

post oven on pan.jpg

After 20 minutes in the oven for this part of the process, I didn’t think these looked quite browned enough, so I left them in another 8 minutes, and I liked that color, so I took them out, let them cool and boxed them up for my sister Joanne and her husband Fred, who were in town for a visit.

boxed.jpg

I found just the right box in my handy-dandy empty box collection. Look at that, two layers fit perfectly. My children always laughed at me for saving empty boxes of various sizes, but as any empty box collector knows, all boxes are not the same and there’s something to be said for having a good selection for times such as these, which I did (on account of careful saving), and which came in handy (again). I say, if a thing – say for example my empty box collection – doesn’t harm anyone, shall we perhaps kindly overlook the quirk and allow the collector to indulge? But I digress.

Enjoy your biscotti and prepare yourself for rave reviews!

A Silkie Walks the Plank

Finish the coop, for crying out loud! Then we’ll go in!

This, possibly, is what half of my chickens were thinking for the past four months. I know it’s unlikely. The MO of chickens in general does not include much thinking. But I stand firm with the Queen in Alice in Wonderland, firm in believing impossible things, especially before breakfast.

           “Alice laughed: “There’s no use trying,” she said; “one can’t believe impossible things.”

            “I daresay you haven’t had much practice,” said the Queen. “When I was younger, I always did it for half an hour a day. Why, sometimes I’ve believed as many as six impossible things before breakfast.”

In any case, they finally – most of them, most of the time – go into the finished coop at night.  Yes, it’s finished. We put the chop saw away.

Possibly now that it’s colder the birds are further incentivized – it was 39F when I went out before breakfast this morning. The half of my chickens that I refer to is my Bridge Club — the silkies, d’uccle and black copper marans. (The Sewing Circle – the old auracana, Rhode Island reds, cinnamon queens and brahmas – have gone into their own coop at night from the start, though possibly the old girl led them.)

What’s funny is watching the Bridge Club come out in the morning. As I approach the coop area, I see them through the large window on the side. Do you? That’s Miss D’uccle standing front and center.

1.jpg

As I get closer, I see her competing for the window space with a black copper maran in front of her and a silkie behind her.

2.jpg

To let them out, I lift the door that slides up and down behind the egg door by way of a string attached to an eye hook inside.

3.jpg

They’ve seen me. They hear me. They are waiting with bated breath.

4.jpg

C’mon! Hurry up!

5.jpg

Out! Freedom!

They can hardly get out fast enough. In a matter of seconds they are out the door and on the ground. They don’t go down the ramp. They jump off the platform with wings out. They land. They keep going. Move, sister!

8.jpg

Hey, I was first!

9.jpg

We’re coming too!

11.jpg

All except for one.

One white silkie is not so sure. She does this every day. Hey, where’d y’all go?! It’s really quite cozy in here. Can’t we stay in a while longer?

14 (2).jpg

Again today, she stayed and thought about it. She shuffled. She hemmed. She hawed.

15 (2).jpg

Finally she ventured. Sort of.

18.jpg

The others were by now busy fanning forth, finding food, feeling fine, facing fate, flaunting feathers, fluttering fancifully, forgiving faults, fostering friendships and formulating fragments of fowl facts for future fame.

16.jpg

Not Whitey. She’s still fearing, fussing, fretting, frowning. Fully two minutes after the others impatiently poured out, she finally stuck her head out. The following photos show the next two more solid minutes that it took her to get to the bottom.

20.jpg

But it’s cold out here!

22.jpg

Fine. All right. If I have to.

23.jpg

But I’m telling you, I don’t want to. Why can’t we just stay inside?? Oh, seriously, now you want me to walk this plank!

24.jpg

Are you kidding? I’m going to break my neck!

26.jpg

Okay, I’m coming. See, I’m two steps down already. Don’t rush me!

28.jpg

I told you, I’m coming. Hold your horses. Save me some food. I’m coming…

30.jpg

This is the bottom. Almost. Now I suppose I have to keep going. Bother this daytime routine. Hmmm. Anything interesting happening over there? Yeah, don’t worry, I can see it from here just fine.

Oh, wait. Do you think I’m sexy? What about if I stretch out my neck like this?

34.jpg

No, no, I’m not posing. I’m not in any way enjoying the attention I’m getting from the human who keeps clicking something. I’m just thinking about my next move. I’m just showing my sisters how it’s done, how you make a grand entrance, how you show the world you’re worth waiting for.

36.jpg

What are you looking at?

It’s not so easy, you know, being me.

35.jpg

I could step onto that straw right now if I wanted to. I just don’t want to. Not yet. What’s the big deal about straw?

38.jpg

Why am I a chicken? How did I draw the straw to become a chicken? I should be a princess. Then they would listen to me. This chicken business is not really fun. Bugs again we get for food. Corn. Leftovers here and there. Okay, the cantaloupe yesterday was nice, I admit. More fresh fruit would be good. More lobster! Where’s the lobster??

39.jpg

You have yourself a nice day! I’m going to go get my breakfast now.

Randos and Meatloaf

If you typed the sentence below into a blank page in Word document on your laptop, one word would come up with a red line under it, telling you to check your spelling because it’s unknown to the internal Word dictionary. If you tried to play that same word in Wordfeud or any of the online scrabble-type games, it would reject that word as “not a word.” Here’s the sentence:

Last night my son Samuel came home from a tech meetup and told me there had been some randos there.

Did you guess which word I mean?

“Some randos?” I said to him. From the context I guessed: “You mean random people?” He smiled. “Randos?” I repeated.

“Yeah,” he said, still smiling. Clearly I am so out of it that my ignorance is amusing. “Random people who show up who don’t necessarily belong.” To prove his point, he said, “I’ll show you in the slang dictionary.” He put rando in a google search. “Oh!” he said, “not the slang dictionary. Merriam-Webster!”

Indeed, rando is a word, randos being the plural. From the Merriam-Webster page https://www.merriam-webster.com/dictionary/rando:

Screenshot (39) rando.png

Who knew? Obviously I didn’t. According to M-W, “The first known use of rando was in 2003.” Ah, a millennial word. To further his amusement and my education, he then pulled up a song on youtube that humorously includes much of the millennial lingo. To further yours, I humbly suggest checking out Millennial Love https://www.youtube.com/watch?v=MUendT_dGks&start_radio=1&list=RDMUendT_dGks

New words enter the lexicon all the time. Notice “meetup” in the original sentence about randos. Why can’t young people say they are going to a meeting? Because when young people want to gather in a group, they don’t meet. They don’t meet together. They meet up. The verb in “Let’s meet up” turned into the noun in “I’ll see you at the meetup.” I myself would be tempted to add a hyphen for the noun, as in “I’ll see you at the meet-up.” But no. Why would a millennial bother with hyphens?

Now that I am clear and settled on this new word (which somehow I missed for the last 15 years) I can reflect on the endless supply of almost everything in this world. Recipes, for instance. Just last night I was making meatloaf. I put the ingredients in a bowl. In this case, ground beef, bread softened in milk, eggs, minced red onion, parmesan cheese, fresh chopped parsley, salt and pepper.

in bowl.jpg

I mixed it all together and found that it was a little too wet. I added a handful of (dry) old-fashioned oats. It was still too wet so I added another handful. This made it just right. A long time ago I had a recipe book that used oats to “stretch” the meat the way my mom had always used leftover bread. I always thought oats were a good idea, as in more “pure” (one ingredient instead of everything that’s in the bread), more natural, more fiber. But while going through my pantry yesterday I had found some dried old bread and thought to use it up with the ground meat I had thawed the day before. But when I had added milk to soften it, I’d added too much, thus the need for more stretch ingredients, i.e. the oats.

I shaped two thin loaves (so it would bake faster, I was hungry) and baked it in a very hot oven (450, I was hungry) which also gave it some crispiness. The meatloaf came out great, even if meatloaf never really looks that great.

cooked.jpg

I thought about sharing my meatloaf recipe and was constructing the ingredient list and preparation steps in my mind when I realized that, well, normally I don’t put minced red onion in. I just happened to have one already peeled in my fridge and it stared at me when I went in for the eggs.

Also I would normally use oats, not bread, for reasons above. But I used the bread yesterday because there it was. A lot of people, including my mom whose meatloaf is fabulous every time, use bread and that’s okay. She squeezes hers to get the excess moisture out, and I think uses water instead of milk to soak it in.

If you don’t have fresh parsley, dried will serve.

How many eggs? Two or three per pound of meat? That depends on 1. how moist you like your meatloaf and 2. how big your eggs are. Mine from the silkies and d’uccle are very small, so I would have used three if I had not poured too much milk on the bread.

I like to use the “meatloaf mix” you can get in the meat case at the store, where they grind up beef, veal and pork together and package it specifically for meatloaf, but that’s not what I had taken out of my freezer, so yesterday’s was just beef.

My sister Lynn makes a stiffer mixture, flattens it out, puts stuff inside (I can’t remember: salami? cheese? cut up veggies?) and rolls it up before baking the loaf. This is always delicious.

Some people bake their meatloaf in a loaf pan. I prefer a freeform elongated football. A very skinny football if I’m very hungry.

My point is: There are endless ways to make meatloaf just as there are endless new words and new expressions in our lexicon.

Go to the greeting card section of any store that sells them. There are endless ways to say Happy Birthday or I’m so sorry for your loss.

Decide to build a porch on your house. There are endless ways to design it (not all of them sensible, feasible or economical, I grant).

Watch the political campaigns happening around you. There are endless ways to say Here’s why you want to vote for me.

Check out Blue Planet II on amazon. There are endless kinds of sea creatures with endlessly different shapes, colors, habits, habitats, diets, methods of survival, ways of caring for their young, levels of ugliness or cuteness. There’s fire spouting from mountains under the sea. Sperm whales rest vertically!

It would be easy to be overwhelmed by the endless newness and the endless variety, and maybe sometimes we are. But mostly I hope we marvel at the richness of the world and count our blessings that there is always something new to learn. We are never done learning. We never should be.

Who knows? The next meatloaf might be even better than this one was!